
Custom Embroidered Bucket Hats: A Complete Guide
You've got a logo that looks perfect on a six-panel cap. Then the bucket-hat sample arrives, and the same artwork feels cramped, soft, or strangely low on the crown. That isn't a production accident. A bucket hat doesn't give you the tall, rigid front panel that cap embroidery depends on, so the logo, fabric, needle, and placement all need a different approach.
Custom embroidered bucket hats work especially well for streetwear releases, festival merchandise, team gear, retail collections, and branded giveaways because embroidery adds texture without turning the hat into a flat advertising surface. The category has also grown beyond a niche accessory. One industry report valued the worldwide bucket hats market at USD 400 million in 2025 and projected USD 660 million by 2034, with Asia Pacific holding 34.54% of market share in 2025 (MarketIntelo embroidered apparel market report).
The ordering mistakes are predictable. Buyers oversize the logo, choose a soft synthetic fabric for a dense design, approve a flat digital mock-up instead of a sew-out, or discover that the supplier's minimum doesn't match the campaign budget. This guide takes the wholesale view, including the decoration zone, stitch-density limits, fabric tradeoffs, proofing checkpoints, and the decisions that keep a first run from becoming expensive inventory you don't want to sell.
The Bucket Hat Moment and Why Embroidery Fits
A buyer sends the same logo approved for a six-panel cap and asks for a centered bucket-hat version. The cap sample looks clean. The bucket-hat sample arrives with cramped lettering, a soft outline, or a mark sitting too low on the crown. The problem is the decoration zone. A bucket hat has a shorter, rounded crown, an earlier brim transition, and less support beneath the needle than a structured cap.
Treat the bucket hat as its own embroidery project. Its relaxed silhouette limits how large the design can be, while the curved crown makes alignment less forgiving. Oversized fills can pull lightweight fabric. Fine lettering can close up or disappear. Artwork placed too near the lower opening may look uneven because the crown begins to turn away from the machine.
Why the category has staying power
Bucket hats continue to appear in streetwear, sportswear, festival fashion, and promotional merchandise. That repeated use makes the shape familiar, so a logo or symbol can look intentional rather than like novelty branding. The market is also expanding across major regions, with Asia Pacific bucket-hat revenue rising from USD 124.22 million in 2023 to USD 130.28 million in 2024 (MarketIntelo market data).
Embroidery suits the format when the buyer wants a compact mark with visible texture and a retail-style finish. Thread gives the design physical depth and can withstand the ordinary wear, sunlight, sweat, and washing that promotional headwear faces. Printing remains the better choice for full-color artwork, all-over graphics, and very soft fashion treatments. For a small logo on a durable blank, embroidery usually gives the stronger finish.
Wholesale rule: Build the artwork for the bucket hat, not for the cap you originally had in mind.
What this guide helps you avoid
Before production, set the decoration zone, choose the stitch treatment, and confirm that the blank supports the artwork. A small flat logo may suit a soft cotton crown, while a bold puff treatment needs enough stable material and clear spacing. Ask the supplier whether the requested blank is available in the required quantity and color, especially if the order has a firm launch date.
A digital proof cannot show how dense stitching will compress a slouchy crown or how the brim will affect visual balance. Request a sew-out, and order a physical sample for retail products or high-visibility campaigns. The most reliable starting combination is a compact logo, a stable fabric, and spacing that respects the crown's curve. That preparation costs attention before production, but it prevents a technically accurate decoration from looking wrong on the finished hat.
What a Custom Embroidered Bucket Hat Actually Is
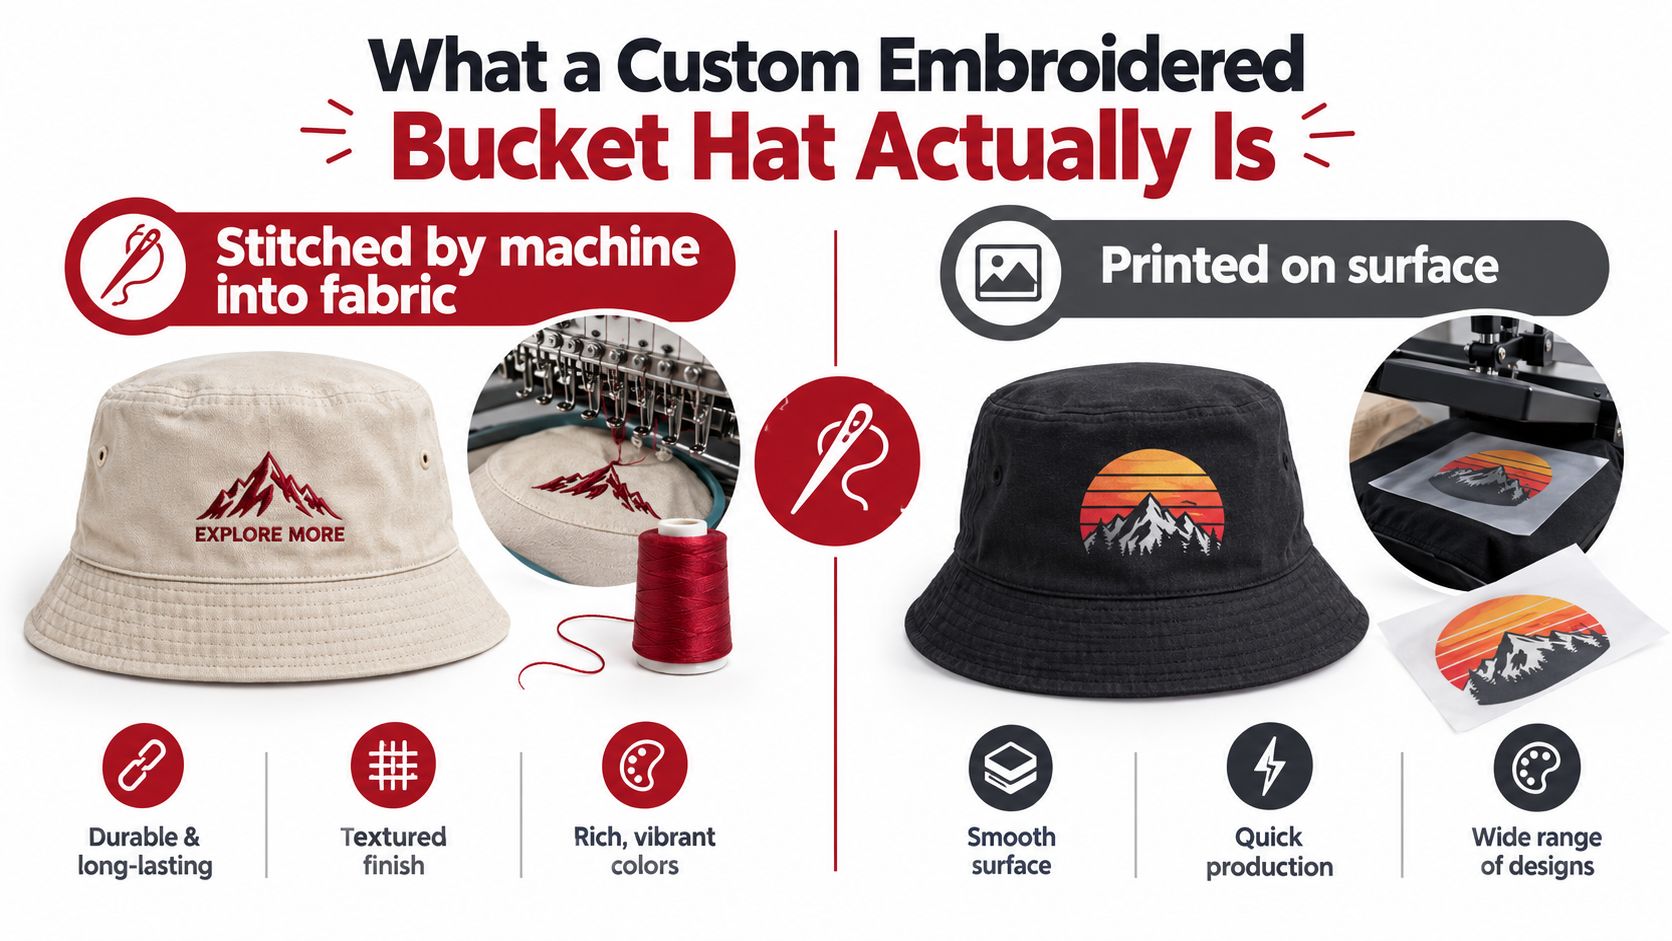
A custom embroidered bucket hat is a blank cotton, canvas, polyester, nylon, or blended hat decorated with thread sewn directly into its crown. The decorator converts the buyer's artwork into a machine-readable file, then runs it on a commercial embroidery machine. That construction separates embroidery from a printed graphic, heat transfer, or patch applied to the surface.
The embroidery file defines stitch direction, underlay, density, trims, thread changes, and sewing order. The machine follows those instructions to build outlines, fills, borders, and lettering. Flat embroidery stays close to the fabric. Puff embroidery places foam under selected areas, giving bold shapes a raised finish.
How the production sequence works
The blank is selected. The supplier checks crown construction, fabric weight, seam placement, brim shape, and available colors. A hat that looks good in a product photo may still be a poor embroidery surface if its crown is loose or its decoration zone is narrow.
The artwork is digitized. Uploading a PNG does not prepare production artwork. The operator sets stitch direction, underlay, density, trims, thread changes, and sewing sequence. These decisions control how the design handles fabric movement and whether small shapes stay readable.
The machine stitches the crown. A bucket hat has less support than a structured cap. Backing and machine tension therefore have greater influence on the result. Stitches can sink into soft material, while dense fills may pull the crown out of shape or disturb the brim seam.
The finished hat is inspected. The operator checks registration, thread coverage, loose ends, puckering, placement, and alignment. A digital proof confirms the intended position, but a sew-out or physical sample reveals how the thread behaves on the selected blank.
Embroidery versus other decoration
Direct embroidery puts thread into the hat itself and gives a compact mark visible texture. A patch uses a separate decorated piece, which can accommodate complex artwork but changes the product's look and hand. Screen printing and heat-transfer vinyl sit on the surface, making them practical for graphic treatments and color-heavy designs without the same stitched texture.
The decorated apparel market includes embroidery as an established commercial decoration method. MaggieFrame's analysis reports that embroidery represented over 40% of global revenues in 2023 (MaggieFrame's decorated apparel market analysis). For buyers, the practical point is straightforward: select embroidery for a durable, tactile mark, then size the artwork and stitch density around the bucket hat's softer, more restricted crown.
Placement, Thread Types, and 3D Puff vs Fine Detail
Placement controls whether the design looks intentional or squeezed onto the hat. The front is the obvious location, but it's also the most constrained because the crown curves toward the brim. Side panels can carry a small icon or initials, while the back generally works better for a discreet secondary mark than a full message.
Independent guidance places the most workable front logo range around 2 to 3.5 inches wide, with embroidery-specific advice narrowing the sweet spot to 2 to 2.5 inches (General Wear embroidery placement guidance). The same guidance identifies a front-panel maximum of about 5 inches wide by 2.25 inches high, while recommending that the embroidery remain at least 1.8 cm from the lower opening to reduce distortion. Use those figures as a starting point, then confirm the exact blank with the decorator.
Match the stitch style to the artwork
Flat embroidery is the safer choice for compact lettering, linework, and logos that need to retain small internal details. It lies close to the fabric, so it doesn't exaggerate the softness of an unstructured crown. Fine detail still has limits, especially when the design contains tiny text or thin lines that can merge after stitching.
3D puff is closer to a stamped wax seal. Foam sits beneath the thread and gives bold letters or simple icons a raised, chunky profile. It creates impact, but it needs enough line width and separation to finish cleanly. On a soft bucket crown, puff can look excellent for a short wordmark, but it's a poor fit for intricate artwork, fine script, or tightly packed symbols.
For a deeper breakdown of the available embroidery constructions, review these embroidery stitch types before you approve the art file.
| Placement | Typical Max Size | Best Stitch Style | Notes |
|---|---|---|---|
| Center front | About 2 to 3.5 inches wide, depending on the blank | Flat embroidery, selective puff | Keep the lower edge above the opening and avoid oversized fills |
| Left or right side | Small icon or initials | Flat embroidery | Side panels are narrow and can distort wide artwork |
| Back near sweatband | Compact mark or short text | Flat embroidery | Check seam access and interior construction |
| Brim or edge | Usually a narrow accent | Flat embroidery or patch | Placement varies sharply by construction and may affect drape |
Choose thread for the surface
Standard polyester thread is the practical default for durability and consistent color. Rayon creates a smoother sheen and can make a clean logo look more polished, but it's better suited to designs where visual gloss matters more than rugged utility. Metallic and specialty threads work as accents, not as a reason to make the whole design dense. Metallic thread needs adequate lettering size and spacing because tight, small runs can shred or lose clarity.
Fabrics, Crowns, and Style Choices That Affect Stitching
Fabric sets the ceiling for embroidery quality. Cotton twill and washed canvas are usually the most forgiving because their woven surfaces give stitches something stable to grip. Washed cotton brings a broken-in appearance, but its softer hand can soften very fine lettering, so the artwork should be simplified before digitizing.
Cotton also makes sense when the product needs a familiar, breathable feel for everyday wear. Canvas gives more body and a slightly more substantial appearance, which helps a logo keep its edges. The decorator still needs to control density, because even a stable woven fabric can pucker when the design contains too many concentrated stitches.
Synthetic fabrics need a different brief
Nylon and performance blends are lightweight, packable, and useful for outdoor programs. Their slick fibers can make stitches sit on top of the surface rather than anchor firmly into it, so dense satin columns may look raised in an uncontrolled way. Recycled polyester blends can behave similarly to other synthetics and may require different underlay or tension settings.
Material also affects sun performance. Technical bucket-hat specifications commonly pair 100% polyester shells with UPF 50+ ratings, which block about 98% of UV radiation (Bon Clic Bon Genre technical hat specifications). That doesn't mean every polyester bucket hat offers the same protection, so request the supplier's actual fabric and testing information when outdoor exposure matters.
A fabric can be excellent for wearing and still be difficult to embroider. Pick the blank for the use case, then design within its stitch limits.
Crown height changes the usable area as much as fabric does. A shallow crown leaves less vertical room before the brim curve, so a tall logo gets crowded even when its width appears acceptable. Unstructured, crushable crowns are comfortable and easy to pack, but they demand restrained decoration. Flat brims, flipped edges, contrast seams, and reversible construction can also limit machine access or alter where the logo sits.
| Fabric | Stitch Hold | Look & Feel | Embroidery Note |
|---|---|---|---|
| Cotton twill | Strong and consistent | Breathable, familiar, clean | Reliable choice for flat logos and compact lettering |
| Washed canvas | Strong with more body | Broken-in, substantial | Good for retail-style marks, but soften tiny details |
| Nylon | Moderate, surface-dependent | Lightweight and technical | Reduce heavy fills and test tension before production |
| Polyester performance fabric | Moderate to strong | Smooth, outdoor-oriented | Useful for sun-focused products, confirm the exact specification |
| Recycled polyester blend | Variable | Sustainable, often slicker | Ask for a sew-out because underlay may need adjustment |
For a broader material comparison before choosing the blank, use this guide to hat fabric materials.
Minimums, Proofs, and Turnaround in the Ordering Process
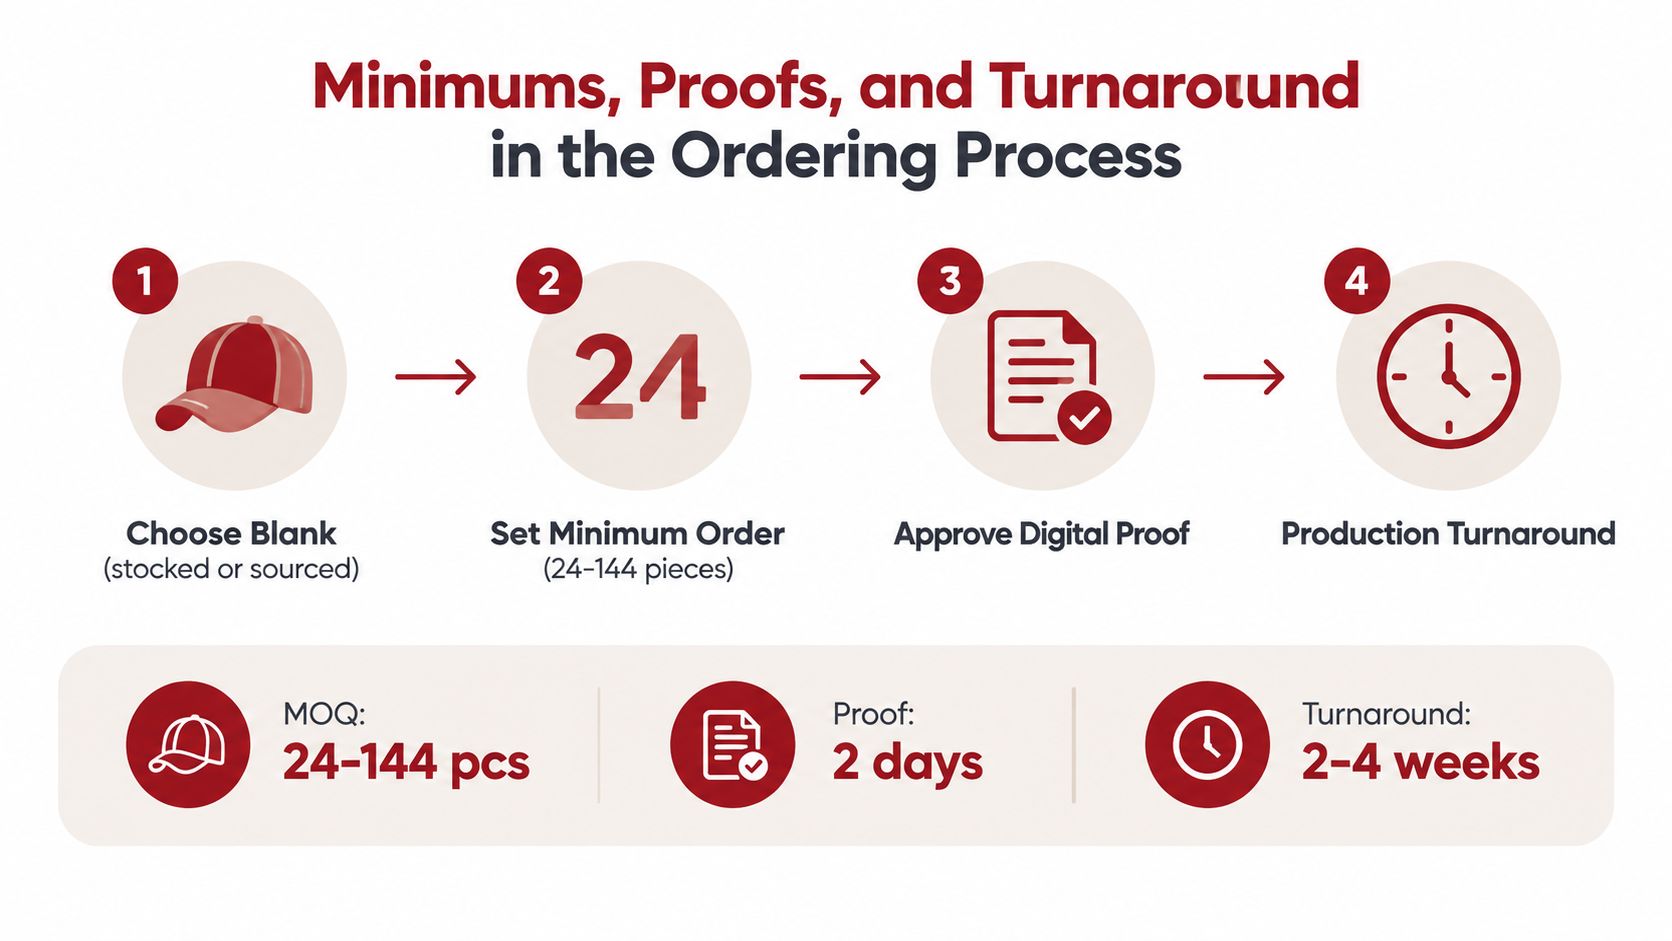
A buyer who approves the logo before confirming the blank is creating avoidable risk. Wholesale minimums depend on whether the supplier has the hat in stock, must source it, or needs a special color or construction. For custom embroidered bucket hats, common minimums range from 24 to 144 pieces, depending on those conditions (CrownsForge bulk bucket-hat manufacturing guidance).
Stocked blanks usually make the first order simpler. Sourced blanks may offer a better fabric or color, but sourcing and handling charges can make a small run less efficient. Confirm whether the minimum applies per logo, per color, or across the complete order before comparing quotes.
Four checkpoints before production
Choose the blank. Confirm the exact crown, fabric, color, seam construction, and inventory. Bucket hats do not provide the same flat, predictable decoration area as caps, so do not approve embroidery against a generic product image.
Set the quantity. Match the order to the supplier's minimum, then ask what changes at higher quantities. A smaller approved run can test a retail design before you commit to a large quantity of an unproven style.
Approve the digitized proof. The proof should show finished dimensions, thread colors, placement, and stitch treatment. It cannot fully show how a soft or curved crown will pucker, compress, or drape. Request a physical sample when the logo, fabric, or placement is visually sensitive.
Release production. Production commonly takes 10 to 21 business days after proof approval, with shipping added afterward. A requested sample round can add 3 to 5 days for that stage.
Treat the proof as a production decision, not paperwork. Check the logo's distance from the brim, its relationship to side seams, thread color against the actual blank, and whether small letterforms remain open at the finished size. Bucket-hat embroidery needs controlled stitch density because limited crown space and softer fabrics expose overcrowding quickly. Reversible, waterproof, or unusually soft construction can also affect hooping and machine access, making a physical sample more useful.
A short production video can help new buyers understand the handoff from artwork to finished goods:
Pricing Factors and Where the Money Goes
A bucket-hat quote usually has four cost centers: the blank, digitizing and setup, embroidery labor, and order quantity. The blank often drives the base price because structured crowns, washed finishes, technical fabrics, and unusual colors cost more before decoration starts.
Setup covers converting artwork into a stitch file and preparing the machine. Several thread colors increase handling through additional color changes. Stitch count controls machine time, too. A clean wordmark costs less to run than a dense crest, even when both designs occupy similar space.
For flat logos on cotton twill or washed canvas, production teams commonly keep embroidery around 6,000 to 12,000 stitches. 75/11 or 80/12 needles with 40-weight thread can help reduce puckering on softer crown fabrics. These are working guidelines, not guarantees. The final count depends on the artwork, finished dimensions, fabric, and digitizer.
| Cost Lever | Impact Level | What Changes the Number |
|---|---|---|
| Blank hat | High | Fabric, finish, crown structure, color, and availability |
| Stitch count | High | Machine time, density, underlay, and logo complexity |
| Thread colors | Moderate | Color changes, specialty thread handling, and matching requirements |
| Quantity | High | Setup and decoration costs spread across more pieces |
| Extra services | Moderate | Samples, rush handling, bagging, labels, and split shipments |
Quantity changes the economics quickly because setup and decoration charges spread across more hats. A small run may carry a higher per-piece cost, while a larger order can justify digitizing and sampling. Ask whether the quoted minimum applies to one design, one colorway, or the entire order.
Cut cost through cleaner artwork before choosing a weaker blank. Reduce stitch density, use standard thread instead of a specialty accent, or select a stocked fabric that suits the use case. If merchandise planning sits alongside software or operational expenses, Vanta Sports pricing plans offer a separate reference point. They do not replace a decoration quote.
Request a line-item quote covering the blank, digitizing, embroidery, additional locations, sampling, packaging, and freight. That format shows whether the expensive part is the hat, the artwork, or the service level. For a closer breakdown of decoration charges, review this guide to machine embroidery pricing. A clear cost sheet also makes supplier comparisons fair, especially when one vendor includes setup or freight and another bills them separately.
Use Cases for Businesses, Teams, and Events
A boutique coffee roaster in Portland might choose washed canvas with a 2-inch center-front logo for staff wear and retail gifting. The compact mark suits the limited crown, while the softened canvas supports the brand's relaxed visual identity. The quantity needs to match the supplier's actual minimum, so the buyer should confirm stock before promising a launch date.
A softball organization has a different problem. Its players need a lightweight hat that can handle outdoor use, but the design may only require initials or a small emblem. Nylon or performance fabric can work, provided the decorator tests the surface and keeps the side-panel mark simple. Polyester thread is the sensible starting point when the team values a clean, practical finish over shine.
Match the hat to the moment
A wedding planner may choose lightweight cotton twill in complementary event colors and use flat stitching for names or a short script. Fine detail makes more sense than puff when guests need to read several characters, and a restrained placement feels like a favor rather than a uniform.
A Brooklyn apparel reseller may begin with a small test order, photograph the hats in lifestyle settings, and reorder only after the product proves it can carry the intended retail price. That buyer should prioritize blank consistency, repeatable thread colors, and a digitized file that can be reused without changing proportions on every run.
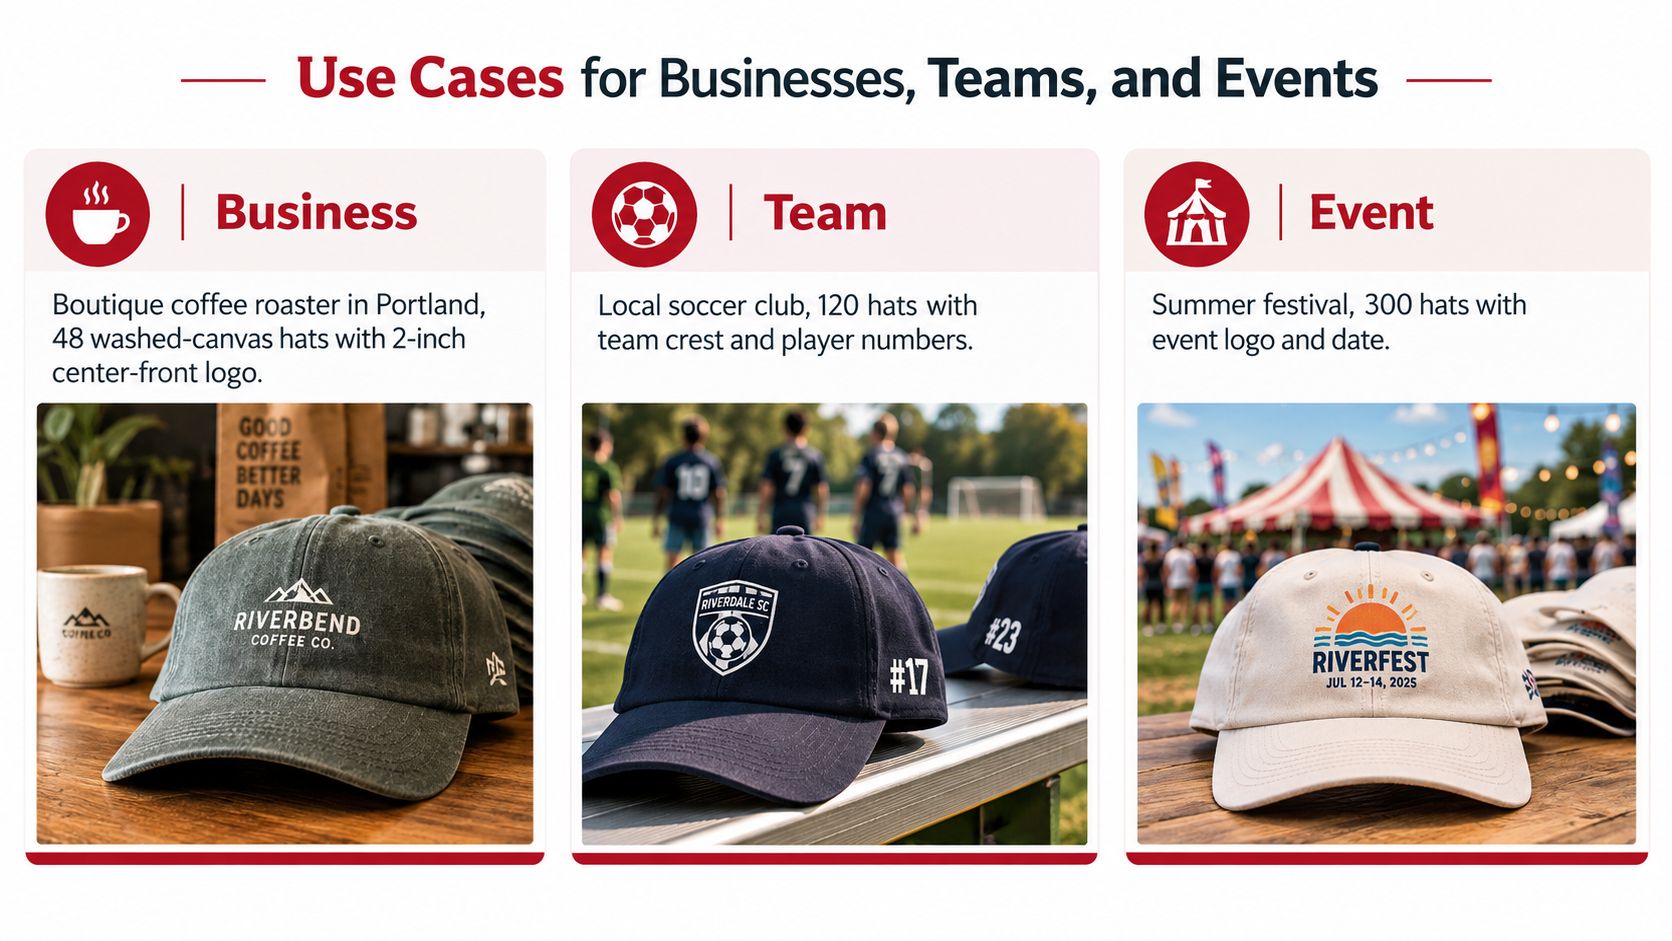
A summer festival can justify a bolder logo, but the buyer still needs to respect the crown's curve. If the artwork includes a date, sponsor names, or several colors, direct embroidery may not be the cleanest answer. A print or patch can preserve detail when the fabric, weather exposure, and budget support it.
Teams comparing headwear with other coordinated apparel may also find SoccerWares custom hoodies useful for planning a broader merchandise package. The same principle applies across the order: choose decoration based on the garment or hat surface, not because one method worked on a previous product.
Your Pre-Order Checklist and Next Steps
Before sending the purchase order, confirm the details that control the finished result:
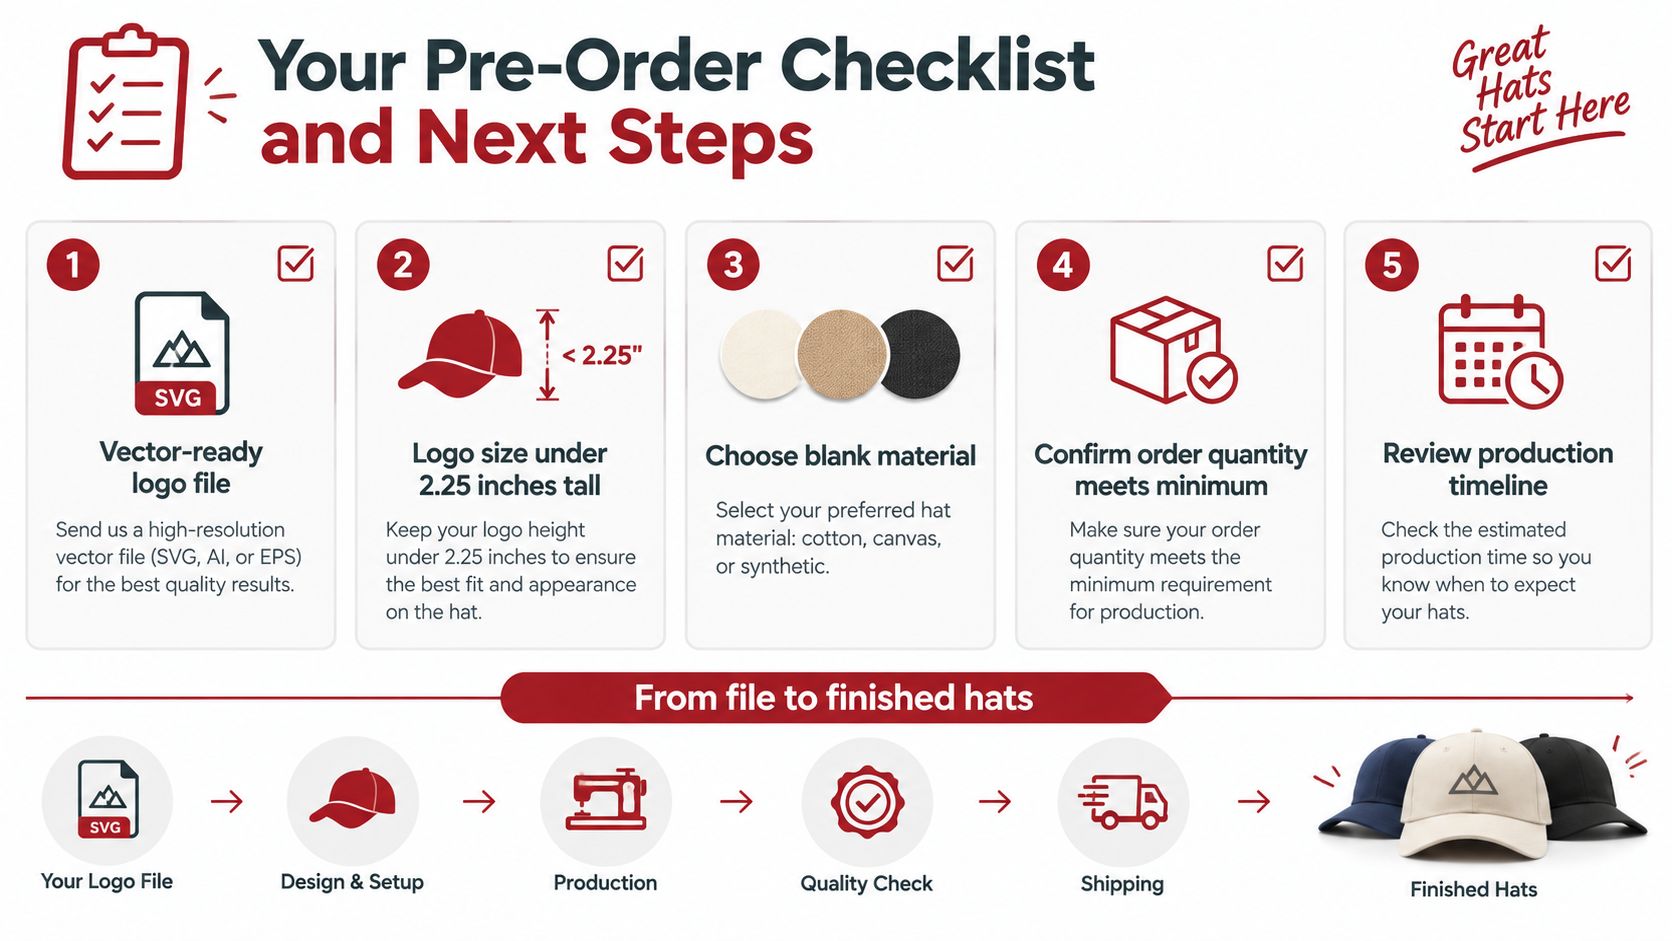
- Prepare the artwork: Send a vector-ready logo whenever possible, and keep the front design under 2.25 inches tall unless the decorator approves a different size for the specific blank.
- Choose placement: Mark front, side, back, or stacked placement on the proof, not just in an email.
- Select the blank: Pick cotton, canvas, or synthetic fabric from current stock, then confirm crown height and seam construction.
- Set the stitch plan: Approve flat or puff embroidery, thread type, thread colors, and any specialty accents.
- Confirm quantity: Make sure the order meets the supplier's minimum and ask for the price at the next practical quantity level.
- Approve the sew-out: Review the digitized proof and request a physical sample when fabric softness, reversible construction, or fine detail creates risk.
- Lock delivery: Confirm production timing, shipping method, carton destination, and any split shipments before release.
Dirt Cheap Headwear supplies blank bucket hats and custom embroidery, with low minimums starting at six pieces per logo and options including 3D puff and fine-detail stitching. Visit Dirt Cheap Headwear with your artwork, target quantity, preferred fabric, and deadline ready, and ask for a bucket-hat-specific proof before production begins.