You’re probably in one of two spots right now. Either you need merch fast and you don’t want to get stuck with boxes of hats nobody wears, or you’ve got a logo ready and you’re trying to figure out whether a small custom run can still look legit.
That’s where snapback caps plain usually enter the conversation. They’re one of the few headwear options that can work for a startup drop, a team order, a staff uniform, a fundraiser, or a local event without forcing you into a giant inventory gamble. A plain snapback gives you a clean starting point, and if you choose the blank and decoration method carefully, the finished hat can look retail-ready even on a small run.
The biggest mistake new buyers make is treating all blank snapbacks like they’re the same. They aren’t. Shape, fabric, structure, closure quality, and embroidery setup all matter. If you understand those trade-offs before you place the order, you save money and avoid the painful version of custom headwear, the kind that looked good on screen but feels cheap in hand.
Why Plain Snapback Caps Are Your Brand's Secret Weapon
A lot of first-time buyers start with shirts because shirts feel safe. Then sizing turns into a mess. You need multiple SKUs, people ask for exchanges, and leftover stock piles up in the least popular sizes.
A plain snapback solves a lot of that immediately. The style has an adjustable snap closure and a format buyers already understand, so it’s easier to order for a mixed group without overthinking size allocation. More important, people wear them outside the event or launch where they got them.
They carry brand identity without looking like promo throwaways
Snapbacks have been around much longer than people usually think, and they didn’t stay relevant by accident. They’ve moved through streetwear, sports culture, and high fashion, which is a big reason they still work as branded product instead of disposable swag, as noted in this history of snapback culture.
That matters if you’re a small brand. You don’t need your logo on an item people politely accept once and never touch again. You need something that fits into an actual wardrobe.
A plain snapback does that well because it sits in a sweet spot:
- Simple enough for daily wear so the branding doesn’t feel forced
- Recognizable enough to feel intentional and current
- Neutral enough to work for staff, customers, creators, and supporters
Small batches make them even more useful
For a startup, school club, local league, or niche merch brand, a snapback isn’t just apparel. It’s a low-risk way to test a concept in a practical setting.
You can put a simple front logo on a clean blank and learn fast:
- Does your audience prefer bold branding or subtle branding?
- Do they respond better to black, navy, cream, or two-tone colorways?
- Is this a one-time event item, or something people ask to reorder?
Practical rule: If you’re unsure whether your design has staying power, start with a plain snapback before you commit to a larger apparel program.
The blank does more work than most people realize
The reason snapbacks are so dependable for custom work comes down to construction. Their shape reads clean, the front profile gives your design presence, and the finished piece can feel polished without requiring a complicated art treatment.
That’s why I often point new buyers toward plain snapbacks first. Not because they’re flashy. Because they’re efficient. A good blank plus a smart logo setup can make a small order look far more established than the order size suggests.
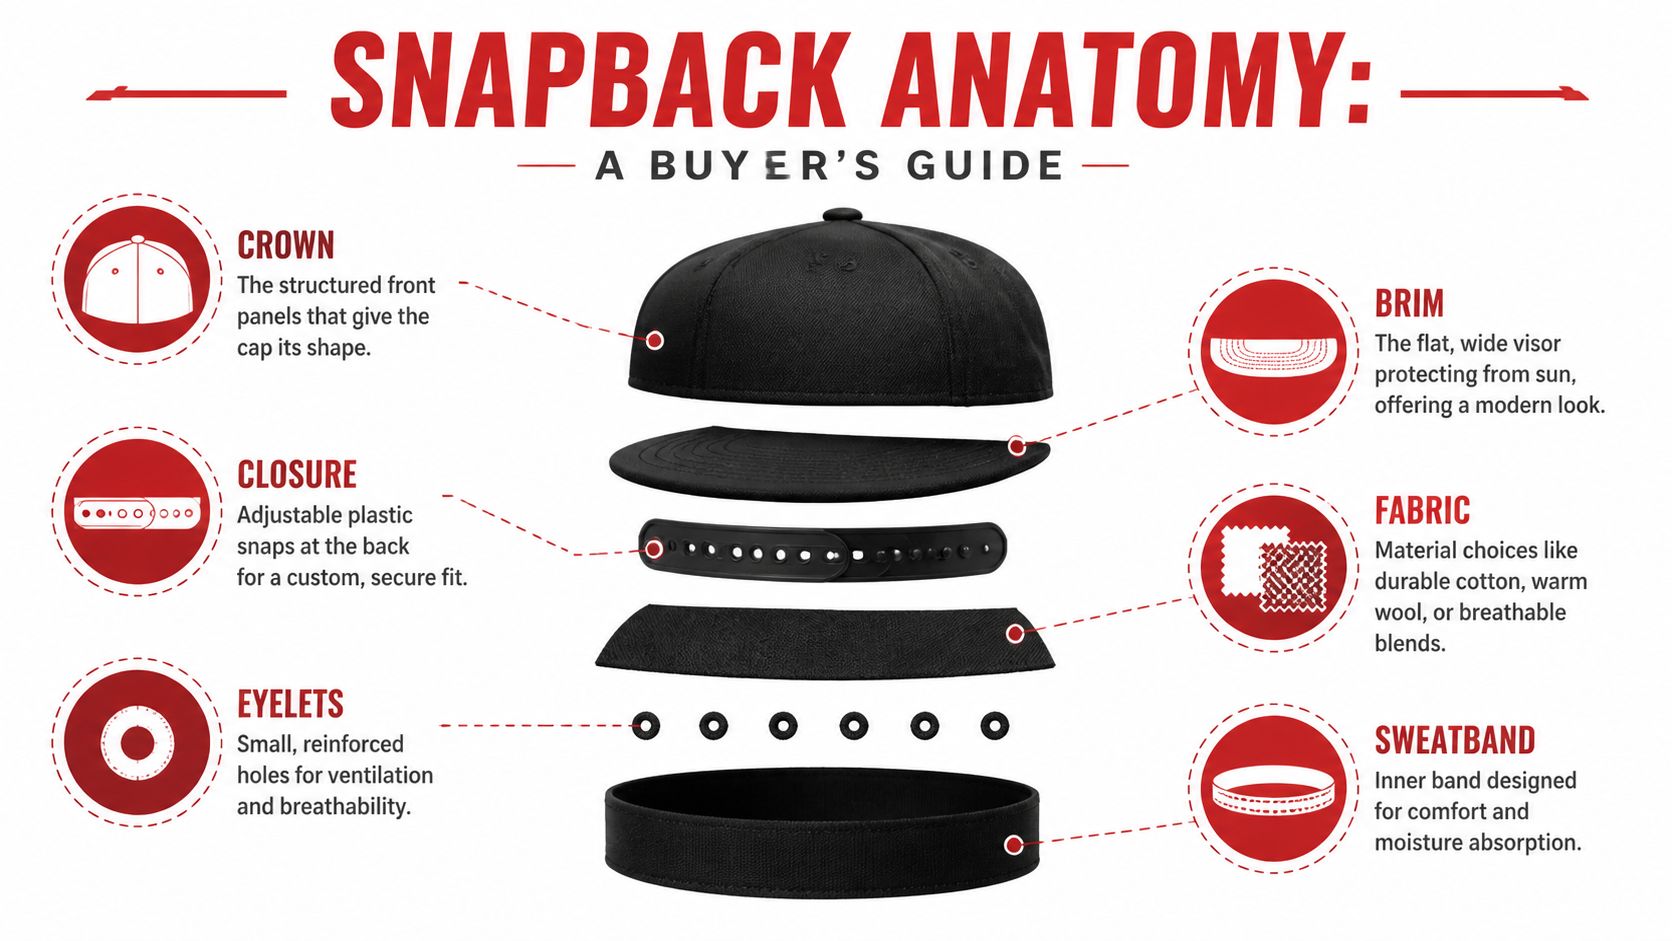
Deconstructing the Blank Snapback A Buyer's Guide
If you’ve never ordered custom hats before, it helps to stop thinking about a snapback as “just a hat” and start looking at it like a built object. Every part affects fit, decoration, and final appearance.
Start with the structure
A standard snapback is built with 6 panels and an adjustable snap closure, and the front panels use stiff, firm material that holds shape well for embroidery, according to this snapback construction guide. That front structure is one of the biggest reasons decorators like working with this style.
Think of it this way. A structured snapback is like a hardcover book. It keeps its form, presents the artwork cleanly, and gives the front logo a crisp face. A softer cap behaves more like a paperback. It has its place, but it doesn’t display embroidery with the same firmness.
That structure affects more than appearance. It affects whether your logo lands cleanly or starts to look uneven after stitching.
Why the front panel matters so much
On a plain snapback, the front panel is your billboard. If your logo is text-heavy, the setup has to respect the limits of the space.
For embroidery, that same source recommends:
- Keep front designs to 3 lines of text
- Stay within 20 characters
- Use a minimum text height of 0.35 inches
- Maintain a thickness of at least 0.07 inches
Those aren’t arbitrary shop rules. They protect readability and help the stitch-out hold up on the finished cap.
If a design only looks good when it’s tiny and packed with detail, it usually needs to be simplified before it ever hits a snapback.
The brim and closure aren’t cosmetic details
Snapbacks are known for the flatter, wider rim compared with a traditional baseball cap. That silhouette is part of what gives the style its visual punch. For brand work, it can make even a simple logo feel more current because the hat itself already has presence.
The closure matters too. Adjustable metal or plastic snaps make the style practical for group orders because you don’t have to split your buy across multiple fitted sizes. That alone makes planning easier for schools, events, and merch runs.
Fabric changes how the cap behaves
Material choice is where beginners often guess instead of deciding. That usually leads to a mismatch between the cap and the use case.
Here’s the fast read:
| Component | What to check | Why it matters |
|---|---|---|
| Crown | Structured front profile | Helps embroidery hold shape |
| Brim | Flat and stable | Supports the snapback look |
| Closure | Clean snap action | Affects fit and perceived quality |
| Fabric | Polyester or cotton blend | Changes durability and comfort |
| Sweatband | Comfort against skin | Matters for regular wear |
| Eyelets | Clean stitching and ventilation | Small quality cue buyers notice |
A cotton-blend snapback tends to feel easier for all-day wear. A polyester snapback usually makes more sense if you care most about keeping color looking consistent over time and across storage.
Small-batch buyers should inspect blanks differently
If you’re ordering a small run, every blank matters more because each hat carries more of the total project value. You don’t have room for a weak shape, a loose closure, or sloppy stitching.
When reviewing options such as the blanks on this bulk snapback hats wholesale collection, look closely at:
- Panel consistency: front panels should match from hat to hat
- Brim firmness: too soft and the cap can feel flimsy
- Snap quality: the closure should feel secure, not brittle
- Interior finish: rough seams can cheapen the whole wearing experience
Those details don’t show up in the product name, but they absolutely show up in the finished result.
How to Select the Best Blank Snapback Cap
The best blank snapback isn’t the most expensive one. It’s the one that fits the job.
That sounds obvious, but buyers still get tripped up because they shop by appearance first and use case second. A hat for a brewery staff team, a skate brand, a booster club, and a corporate promo order might all be snapbacks, but they shouldn’t automatically be the same blank.
Match fabric to the real-world use
A plain snapback generally comes down to two broad fabric paths. 100% polyester leans toward color retention and durability, while cotton blends lean toward breathability and comfort, as explained in this plain snapback material overview.
That trade-off is practical, not theoretical.
If you’re ordering for:
- Retail merch or stored promotional inventory, polyester usually makes more sense
- Outdoor teams or active use, cotton blends often feel better on the head
- A fashion-focused drop, the decision depends on the hand feel you want your customer to notice first
A lot of first-time buyers chase the color and forget the touch. The person wearing the hat notices the touch first.
Compare blanks by audience, not by hype
Different brands have different reputations, but what matters most is who will wear the hat.
Here’s a useful way to think about the common categories carried by wholesale suppliers:
| Brand family | Typical fit impression | Often chosen for |
|---|---|---|
| Richardson | Sport and trucker-leaning look | Teams, outdoor groups, athletic branding |
| YP Classics / Flexfit | Polished shape and familiar retail feel | Apparel brands, creators, general merch |
| Valucap | Budget-conscious workhorse blank | Events, staff use, entry-level promos |
That’s not about declaring a winner. It’s about avoiding mismatch.
If your audience expects a fashion-forward merch item, a purely budget-driven blank can undercut your logo. If your goal is practical group headwear for an event, chasing premium details you don’t need can waste budget that would be better spent on cleaner decoration.
Quality cues worth checking before you order
Buyers new to custom headwear often focus only on the front. Experienced buyers check the whole cap.
Look for:
- Stitching consistency. Uneven seams make even a good logo feel cheaper.
- Sweatband feel. If the inside feels scratchy or flimsy, wearers notice fast.
- Closure strength. A weak snap ruins confidence in the product.
- Profile shape. Some blanks stand taller and sharper, others sit lower and more relaxed.
A blank cap can look fine online and still disappoint in person if the closure feels cheap or the crown collapses too easily.
What works and what usually doesn’t
For small-batch runs, simple choices usually outperform complicated ones.
What tends to work:
- Clean front logo
- Strong contrast between thread and cap color
- A blank that fits the audience’s style habits
- Fabric selected for use, not guesswork
What tends to disappoint:
- Overbuilt artwork on a small front area
- Picking the cheapest blank without handling quality in mind
- Choosing hot-wear event hats in a fabric that feels stuffy
- Trying to force one cap style to satisfy totally different audiences
The best buying decision usually comes from asking one question early. Is this hat supposed to feel like merch, uniform, team gear, or retail product? Once that’s clear, the blank gets easier to choose.
From Blank Canvas to Branded Masterpiece Customization Options
A plain snapback only stays plain until decoration starts. This is the point where a basic blank turns into something people identify with, repost, gift, and reorder.
The good news is that snapbacks are friendly to decoration. Their six-panel construction, flat brim, and structured crown provide a stable surface for embroidery and help reduce puckering and distortion during production, as described in this structured snapback embroidery reference.
That stability is a big deal on smaller runs. When you’re not ordering massive volume, you still want the first hat and the last hat to look like they belong together.
Embroidery is still the default for a reason
If you ask most buyers what they picture on a custom snapback, they’re thinking of embroidery. It’s durable, familiar, and visually right for the silhouette.
Here’s how the main options usually play out.
| Method | Best For | Look & Feel | Cost Factor |
|---|---|---|---|
| Flat embroidery | Clean logos, text, small brand marks | Classic stitched finish, crisp and professional | Often a practical starting point |
| 3D puff embroidery | Bold logos with larger filled areas | Raised effect that pops off the cap | Often higher because setup is more specialized |
| Fine-detail stitching | Intricate linework and cleaner small elements | Sharp, refined, more technical appearance | Depends on design complexity |
| Custom patches | Vintage, textured, badge-style branding | Added dimension and mixed-material feel | Varies by patch type and attachment |
| Printing | Graphic-heavy artwork | Smoother surface appearance | Depends on art and placement |
Match the method to the artwork
A lot of decoration problems aren’t production problems. They’re design-choice problems.
Flat embroidery works well when the logo is already clean. If the design is mostly bold lettering or a compact icon, this is often the safest place to start.
3D puff is a different animal. It shines on larger shapes and bold outlines. It doesn’t love tiny details, delicate script, or artwork with too many small transitions.
Fine-detail embroidery helps when you want a more technical or premium feel, but the design still has to be realistic about the surface. A hat isn’t a business card. Tiny details don’t magically become clearer because you want them to.
Patches open up a different aesthetic
Patches are useful when you want branding to feel less stitched directly into the hat and more like a designed object. That can be a strong move for heritage-style branding, workwear-inspired merch, or logo systems that look better inside a badge shape.
Some buyers also choose patches when they want texture to be part of the identity. Embroidered patches feel traditional. Leather-style patches lean rustic or premium depending on the brand. PVC patches feel bolder and more modern.
If you’re comparing methods or preparing art for custom stitching on hats, it helps to decide what you want the hat to communicate before you choose the decoration itself.
The best decoration method is the one that fits the logo’s shape and the brand’s personality at the same time.
What I’d recommend for first orders
For a first small-batch order, I’d keep the decision tree simple:
- Choose flat embroidery if your logo is straightforward and you want the least risky path.
- Use 3D puff if the design is bold and you want the front hit to carry more visual weight.
- Pick a patch if your brand style already leans vintage, outdoors, utility, or badge-based.
- Consider printing only if the artwork depends on graphic effects stitching can’t translate cleanly.
A plain snapback doesn’t need a complicated concept to look finished. In most small runs, a restrained design beats an overloaded one.
Understanding Custom Snapback Pricing and Timelines
Custom hat pricing feels confusing when you’re new because buyers often try to reduce it to one number. That’s not how it works. The total depends on the blank, the decoration method, the design complexity, the number of decorated locations, and the quantity.
For small-batch orders, the more useful question is usually not “What’s the cheapest hat?” It’s “What’s the smartest first run?”
Why small batches make sense
There’s a real gap in the market around small-batch production economics, especially for groups ordering 6 to 50 units. That range gives micro-communities, event planners, and emerging brands room to test demand without taking on the risk of a large inventory commitment, as noted in this snapback small-order discussion.
That changes how you should think about the project.
A small run can help you:
- Test a logo treatment before you standardize it
- Check actual buyer response instead of guessing online
- Avoid dead stock tied to an unproven colorway
- Create a limited feel that can suit niche brands and local drops
That doesn’t mean every small run is automatically cheap. It means the risk is easier to control.
What usually drives the price up
Three things tend to move the number the most.
First is the blank itself. Better materials, stronger construction, or more brand-recognizable blanks usually cost more than basic workhorse options.
Second is decoration complexity. Dense embroidery, extra locations, and techniques like puff or patches often require more setup attention than a simple front logo.
Third is quantity. Small runs are useful, but they spread setup costs across fewer hats. Larger runs often lower the per-piece impact of that setup work. The right decision depends on whether your priority is market testing or scale efficiency.
Here’s a practical way to frame it:
| Factor | Lower-cost direction | Higher-cost direction |
|---|---|---|
| Blank choice | Basic promotional blank | Premium-feel retail blank |
| Decoration | Simple front logo | Multi-location or specialty decoration |
| Quantity | Small test run | Larger commitment with more inventory exposure |
| Timeline | Standard production window | Rush-sensitive order planning |
Timelines need two separate conversations
A lot of ordering mistakes happen because buyers lump production and shipping into one mental bucket. They’re different.
Production covers proofing, setup, decoration, and finishing. Shipping starts after the hats leave the shop. If you’re ordering for a launch date, event, or team handout, you need both pieces mapped out early.
If you need a straightforward breakdown of what affects that schedule, this guide on hat embroidery turnaround time explained is a useful reference point.
Treat your in-hands date as the real deadline. The order date is just the starting line.
Think like an operator, not just a buyer
For e-commerce brands especially, small-batch headwear is part product strategy and part pricing strategy. If you’re building a margin-conscious merch line, it helps to think through markup, testing, and perceived value the same way you would with any other SKU. This overview of mastering e-commerce profitability is useful for that lens.
The smartest first run usually isn’t the one with the most decoration. It’s the one that tells you something valuable. If the design sells, you reorder with confidence. If it doesn’t, you learned without burying cash in slow-moving inventory.
How to Style and Care for Your Snapback Caps
Once the hats are made, the next job is making sure people wear them and keep them looking good. That part gets overlooked, but it matters. A hat that fits naturally into daily use gives your branding a longer life.

How they fit into real outfits
A plain snapback has range, which is why it works for so many different buyers.
For a streetwear look, it pairs easily with a graphic tee, overshirt, cargos, and clean sneakers. For a casual coffee-shop uniform, it works with a blank tee, chore jacket, and jeans. For a more athletic setup, it fits naturally with a hoodie, shorts, and trainers.
The nice part for brands is that the same hat can move across those situations without looking out of place. That gives your logo more chances to be seen in normal life, not just at the original event or purchase moment.
Care matters if you want the hat to keep its shape
Most damage to snapbacks comes from bad cleaning habits, not heavy wear.
Good habits:
- Spot-clean first with a damp cloth for small marks
- Store it in a dry place where the crown won’t get crushed
- Handle the brim gently so the shape stays clean
What usually causes trouble:
- Throwing it in a washing machine
- Soaking it fully without considering shape retention
- Leaving it in high heat, especially where the brim and crown can warp
If you want a snapback to last, clean the stain, not the entire hat, unless the care instructions specifically support more aggressive washing.
A quick visual demo can help if you’re passing care instructions along to customers or staff:
Give customers a reason to keep wearing it
One of the easiest ways to increase the value of a custom snapback is to include simple wear-and-care guidance with the order, especially if it’s for staff, subscribers, or event attendees.
That can be as basic as:
- wear it forward for a clean everyday look
- pair it with neutral layers for easy styling
- spot-clean instead of machine washing
- store it where the crown won’t get flattened
Those small cues help the product live longer, which reflects well on the brand printed or stitched onto it.
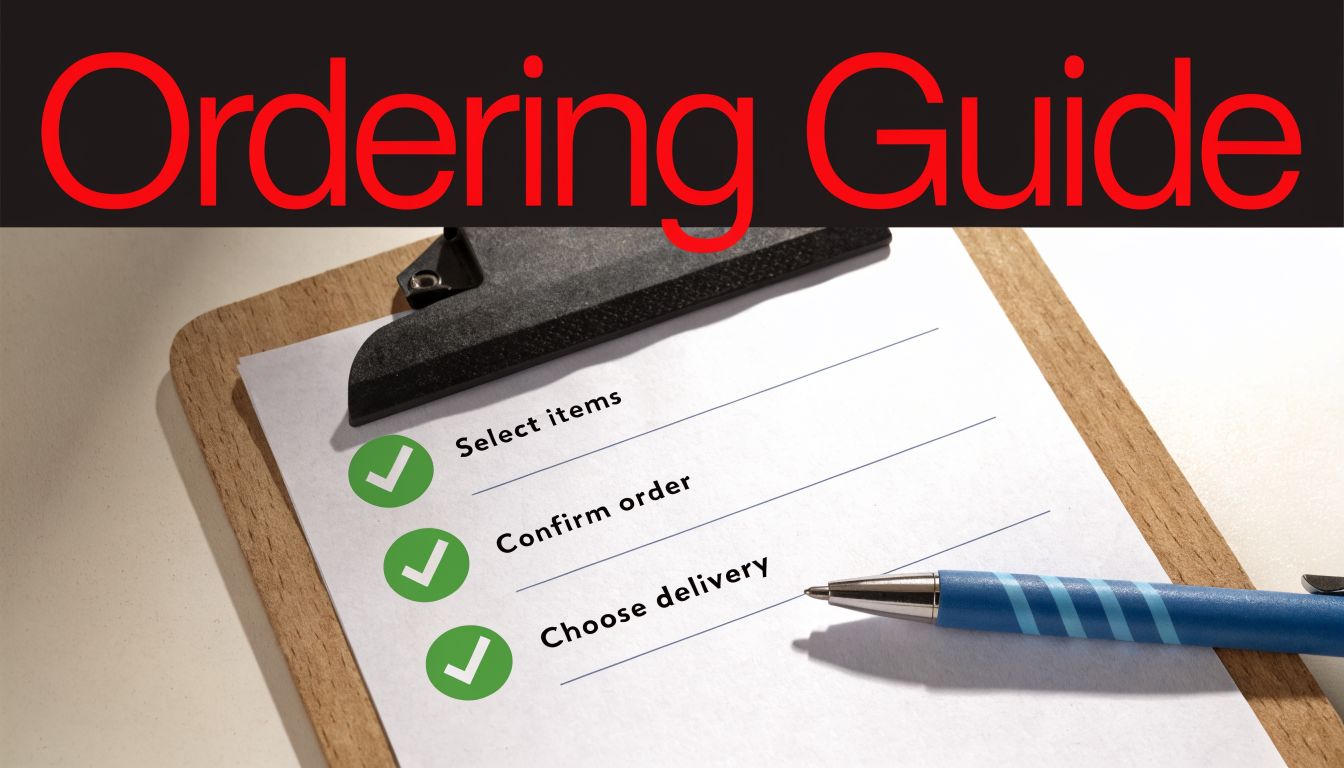
Your Quick Checklist for Ordering Custom Snapbacks
When buyers feel overwhelmed, it’s usually because too many decisions are floating around at once. A checklist fixes that. Get these pieces straight before you submit your order and the whole project goes smoother.
Confirm the product choices first
Don’t start with decoration. Start with the blank.
- Pick the use case: merch, uniforms, team wear, event giveaway, or retail drop
- Choose the fabric intentionally: durability-focused or comfort-focused
- Decide on the look: clean structured profile, trucker feel, or more fashion-leaning presentation
- Set the quantity: enough to test demand without overcommitting
If multiple people are approving the order, get agreement on the blank before you discuss thread colors or patch materials.
Lock the artwork into a production-ready version
A lot of delays happen because the logo file looked acceptable on screen but wasn’t ready for decoration.
Make sure you have:
- A final logo version, not a draft pulled from social media
- Readable text, especially if the front design includes wording
- Color decisions approved by whoever owns the brand
- A realistic placement plan for front, side, or back decoration
Final operational check before you submit
This is the part buyers rush. It’s also the part that prevents avoidable mistakes.
Run through these last:
- Decoration method selected
- Cap color confirmed
- Quantity approved
- Delivery timing discussed
- Contact info checked
- Proof review responsibility assigned
If you’re sourcing for a company or organization and want a broader purchasing workflow for vendors and product requests, tools like Buyer registration can help centralize that process.
A clean order starts with fewer assumptions. If anything is still “to be decided,” it usually delays the hats.
The best first order is rarely the most ambitious one. It’s the one you can approve confidently, produce cleanly, and reorder without changing everything.
If you’re ready to turn a plain blank into a clean, wearable custom piece, Dirt Cheap Headwear offers wholesale hats and in-house decoration for small test runs and larger orders alike. Start with a straightforward design, choose a blank that fits the job, and build from there.
Pingback: Hat Closure Types A Complete Guide for 2026 | Dirt Cheap Headwear
Pingback: Snapback Hat Embroidery: A Complete Buyer's Guide for 2026 | Dirt Cheap Headwear
Pingback: Youth Hats Bulk for Teams That Fit the Job | Dirt Cheap Headwear