
How to Put a Patch on a Hat: A Pro’s Guide for 2026
You've got a clean hat on the table, a patch you like, and that dangerous little thought that says, “This should only take a minute.”
Sometimes it does. Sometimes it turns into a crooked patch, a shiny scorch mark, or corners that start peeling the first time you wear the hat outside. The difference usually isn't effort. It's choosing the right attachment method for the hat you have, the patch you bought, and the finish you want.
That's the part most quick tutorials skip. They show one method as if every hat is basically flat and every patch behaves the same. Real hats don't work that way. A soft beanie, a structured trucker, a dad hat with a curved crown, and a leather-front cap all ask for different handling. Even the same patch can perform well on one style and fail on another.
From Blank Canvas to Custom Cap
A clean hat and a loose patch can turn into a sharp custom piece fast, or into a patch that peels, puckers, or sits crooked after one wear. The outcome usually comes down to method choice.
Different hats ask for different treatment. A flat-front cap gives you room to press or stitch cleanly. A soft unstructured dad hat flexes more and can distort while you work. A tall trucker crown looks simple, but that front panel curve is where iron-on jobs often fail if the heat and pressure are not even. Dutch Label Shop's analysis of hat patch application notes uneven heat pressing as a common reason iron-on patches fail on curved caps, especially near the crown's highest point.
That is why the first decision is not just how to attach the patch. It is why you are choosing one method over another.
Sewing makes sense when you want long-term hold, you are working with thick embroidered patches, or the hat will see regular wear, sweat, and washing. Iron-on is faster and cleaner for a one-off project, but only if the patch adhesive matches the hat material and you can control heat on a curved surface. Some jobs look simple on paper and fight you the whole way once the patch has to sit across a seam, buckram, mesh, leather, or a steep crown shape.
Good results come from matching the patch, the hat, and the method.
Placement matters just as much as attachment. A patch that is centered on a table can still look off once the hat is on a head, especially on curved front panels. If you want a better sense of what looks balanced on different cap styles, this guide to hat embroidery placement options helps you judge position before you commit.
If you're personalizing more than just hats and want ideas for image-based customization too, this guide on how to put a photo on clothes is useful for understanding how decoration methods affect final look and feel across different fabric items.
For a single hat, DIY can be the right call. For team orders, retail merch, or patches going onto tricky materials, professional application usually saves time and waste. A good finished cap should look like the patch belonged there from the start.
Prep Work Tools and Perfect Placement
The patch application starts before any heat or stitching. Good prep fixes most of the problems people blame on the patch itself.
Gather the right tools first
You don't need a workshop full of gear, but you do need the basics within arm's reach. Stopping halfway through to find chalk, thread, or a cloth is how patches shift and alignment gets sloppy.
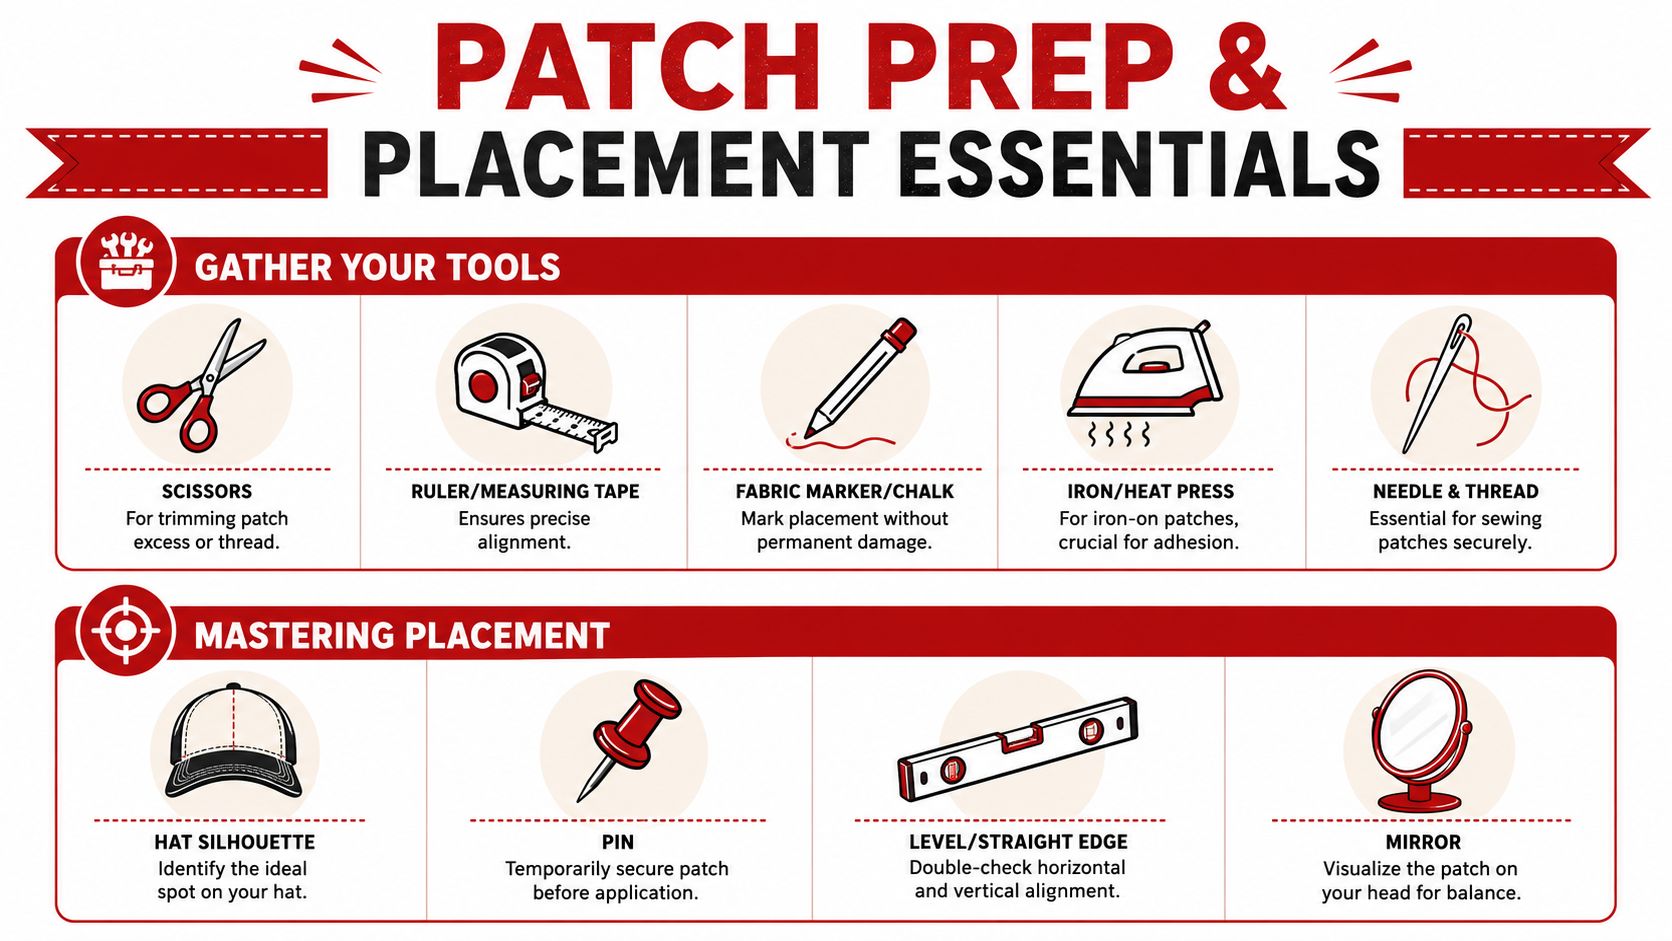
A practical setup looks like this:
- Measuring tool: A ruler or measuring tape helps you center the patch instead of eyeballing it.
- Marking tool: Tailor's chalk or a washable marker lets you mark the spot cleanly.
- Pressing cloth: A thin cotton cloth protects the patch and hat from direct heat.
- Needle and thread: Keep them ready even if you plan to iron first. A few edge stitches can save a patch later.
- Iron or heat tool: For iron-on jobs, use dry heat. On curved sections, a hair straightener can help apply more focused pressure.
- Stuffing material: Towels or fabric scraps are useful for filling a curved hat so the patch area becomes more stable and flat.
If you sew regularly and want a broader materials checklist, The Fabric Company has a handy complete guide for sewists addressing the small notions people forget until they need them.
Mark placement before you commit
Patch placement is where a hat either looks custom or homemade in the wrong way.
For symmetry, mark the location first with chalk or a washable marker. That matters most on baseball caps and beanies, where even a slight lean is obvious once the hat is on your head. A mirror helps too. What looks centered on a table can look off once the crown curves around a face.
Practical rule: Don't trust the seam alone. Use the seam as a reference, then confirm the patch visually and by measurement.
Here's a simple placement guide by hat type:
| Hat style | Placement that usually works best | What to watch for |
|---|---|---|
| Trucker cap | Front center panel | Curved crown can cause edge lift |
| Dad hat | Slightly above front midpoint or subtle side placement | Soft curve can make large patches wrinkle |
| Beanie | Front cuff or slightly off-center | Stretch changes how the patch reads when worn |
| Snapback | Center front for bold logo look | Structured front panel resists some hand-sewing angles |
| Bucket hat | Front panel or side panel | Seams can interrupt the patch edge |
For a deeper look at visual balance on the front of a cap, this article on hat embroidery placement is useful because the same spacing logic applies to patches too.
Match the prep to the method
Not every patch wants the same prep.
If it's an iron-on patch, make sure the backing is heat-activated. If it's sew-on, a temporary dab of glue can keep it from sliding while you stitch. If the hat is curved, stuff it firmly before you do anything so the area under the patch feels solid.
The cleaner and flatter the working surface, the better the result. That's especially true on caps with structured fronts, where the outer shape hides small placement mistakes until the patch is already attached.
The Classic Method Sewing for Maximum Durability
Sewing is the method I recommend when the hat will see real use. Daily wear, sweat, repeated flexing, and curved crown pressure all work against adhesive. Stitching holds because the patch is mechanically attached to the hat, not just bonded to the surface.
Why sewing works so well on hats
Hats move more than flat garments. The front panel bends when you put the cap on. Side panels shift. Sweatbands pull the shell inward. A sewn patch can move with that structure better than glue alone, which is why it is usually the right call for trucker caps, dad hats, and any patch going onto a curved area.
It also gives better control over the final look. On a hat, that matters. A patch that sits flat at the center but kicks up at one edge will read sloppy from across the room.
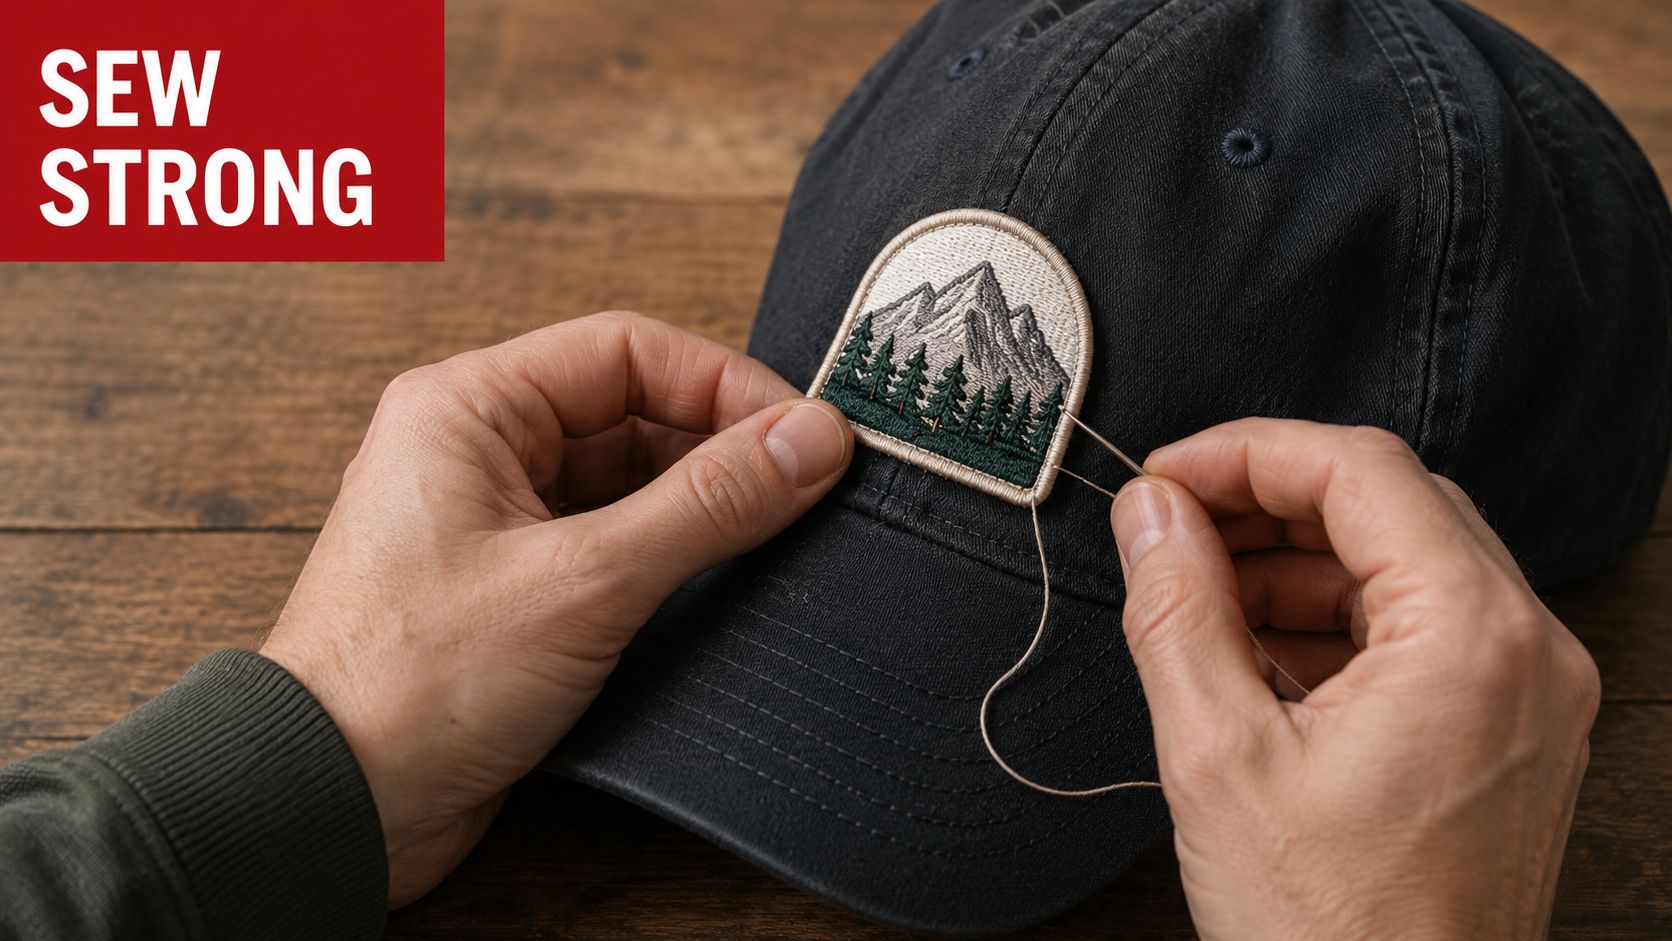
For a hand-sewn patch, I like to tack it in place first with a tiny amount of temporary fabric glue. That keeps the border from drifting while you work around the curve. Then use thread that disappears into the patch edge and bring the needle up from inside the hat so the stitch entry points stay harder to see from the outside.
Best hand-sewing approach
Hand sewing is slower than pressing on a patch, but it solves one of the biggest hat-specific problems. Curved surfaces do not give you much room to correct alignment once you start. Hand stitching lets you adjust stitch by stitch if the patch starts walking to one side.
A clean approach looks like this:
- Anchor the patch first: Use a light dab of temporary glue or double-sided fabric tape.
- Start from inside the crown: Bring the needle up close to the patch border.
- Follow the edge with short stitches: Small, even stitches blend into the border and hold better on curves.
- Check the face of the hat every few stitches: Catching a wrinkle early is easier than fixing one after you finish the circle.
- Tie off inside the hat: Keep the knot tucked away where it will not show or rub.
Short stitches matter for a reason. They spread tension around the border, which helps prevent edge lift on rounded crowns.
If you are sewing a decorative shape with a visible border, it helps to study a few iron-on butterfly patch styles on hats and accessories before you start. The useful takeaway is not the iron-on part. It is seeing how patch scale and edge shape affect placement and visibility on smaller curved surfaces.
Machine sewing and where DIY hits a wall
Machine sewing sounds faster until the hat is under the needle. A home machine is built for flatter pieces. Hats are not flat, and the crown shape can fight you the whole time.
That is why cap shops use specialty equipment built to handle the shape. American Patch notes that a post-bed sewing machine used for hat work can cost around $3,400. The point is not that home sewing cannot work. The point is that clean, repeatable machine results usually depend on equipment made for caps.
For one hat, hand sewing is often the smarter DIY choice. For a run of branded hats, thick patch borders, or tricky placements near seams, professional sewing usually saves time and wasted blanks.
Leather patches need a different approach
Leather changes the job. It is stiffer, less forgiving on a curve, and more likely to show puckering if the stitch spacing is uneven.
Pre-punching the stitch holes with an awl helps because it gives the leather a controlled path instead of forcing the needle through wherever it lands. Even spacing also keeps the border from looking wavy once the patch wraps over the crown. A curved needle or leather needle is usually easier to manage on a hat than a standard straight needle because you are sewing around a dome, not across a flat panel.
The trade-off is simple. Leather can look better than embroidered twill on the right hat, especially on structured caps and premium retail styles, but it asks for more precision. If the patch is thick, the crown is heavily curved, or the order is large, this is one of the jobs that makes sense to hand off to a shop that does cap patch application every day.
The Quickest Fix Applying an Iron-On Patch
Iron-on is the fastest method when the patch has the right backing and the hat can handle heat. It's the best option for people who want a clean look without sewing, but it only works when heat, pressure, and cooling are treated like part of the process, not an afterthought.
Why iron-on patches fail
Most failures happen at the edges or on the highest curve of the crown. The patch sticks in the middle, then starts lifting where pressure was weakest.
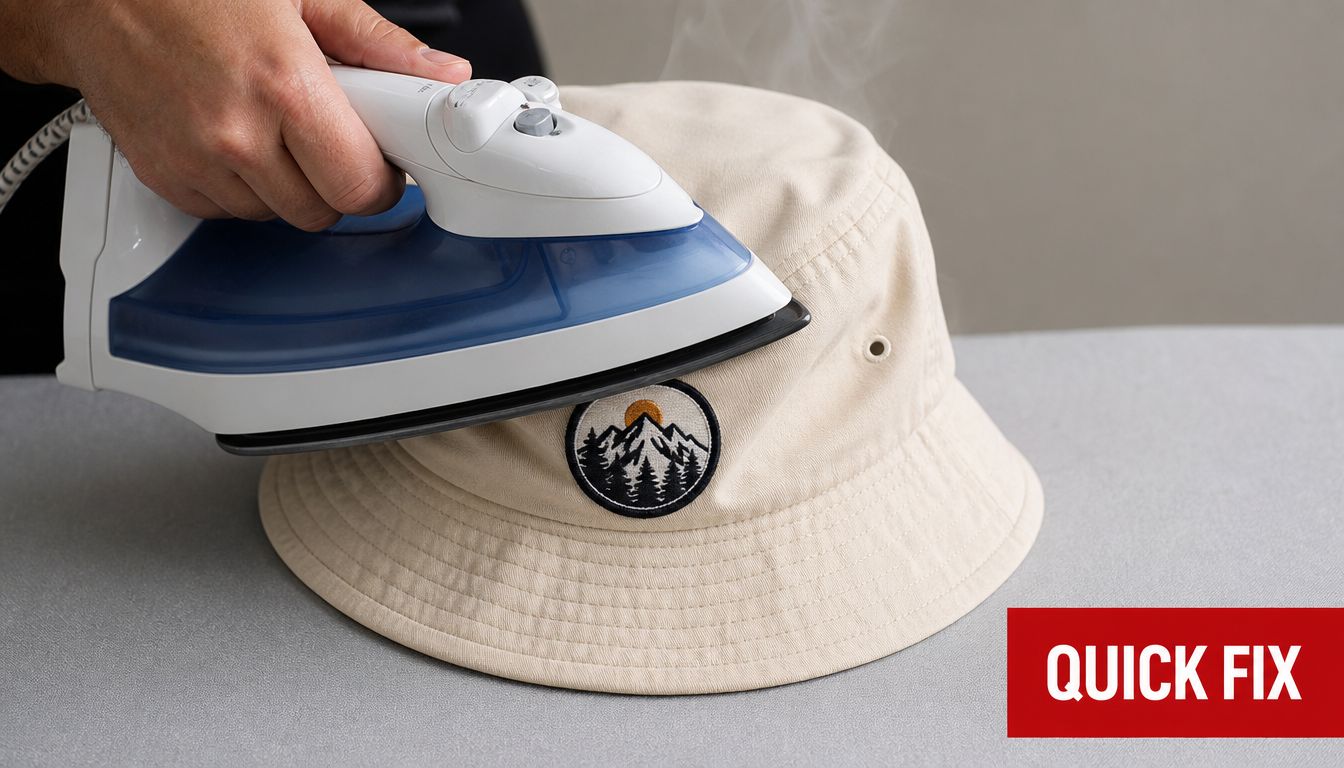
For standard iron-on application, set the iron to its highest dry heat setting without steam when the patch and hat material allow it. Cover the patch fully with a thin cotton pressing cloth, then apply firm, even pressure. On curved hats, stuff the crown firmly with towels or fabric scraps first so you're not pressing into an empty shell.
Some guides also suggest small circular motions for 15–20 seconds to 30 seconds and checking the edges after cooling. If the patch still feels loose, press again for a few more seconds. Don't touch it immediately. The glue stays hot and can pull away in the first 1–2 minutes.
The curved-hat method that works better
Curved hats need a different move than flat garments. Pressing straight down on a rounded panel often leaves parts of the adhesive under-activated.
For curved hat surfaces, the better method is a 20–23 second press at medium heat, about 300°F/150°C, with firm pressure in a rocking motion, according to American Hat Makers. That rocking motion helps the heat reach the entire patch across the curve instead of only the center.
The cooling phase matters just as much. The patch should remain undisturbed for 1–2 minutes so the thermoplastic adhesive can re-solidify. If you test the edge while it's still hot, you can pull the patch loose before it ever has a chance to set.
If you want to know how to put a patch on a hat that actually stays on, don't judge adhesion while it's hot.
A hair straightener can also be useful on curved areas because it applies focused pressure where a broad iron face can't sit evenly. That's especially handy on dad hats and trucker fronts.
A quick visual helps if you want to see pressing technique in action:
Iron-on steps that make sense in practice
Here's the version I'd recommend for most fabric hats:
- Start with placement: Mark the spot first. Once heat hits adhesive, repositioning gets messy fast.
- Build a firm base: Stuff curved crowns with towels or fabric scraps so the patch area feels supported.
- Use a barrier cloth: A thin cotton cloth protects both patch and hat from scorch marks.
- Press with intent: Use firm pressure. On curves, rock the iron slightly across the patch instead of only stamping the center.
- Leave it alone after pressing: Cooling isn't dead time. It's when the bond sets.
- Air dry before wearing: Let the hat sit for 1–2 hours after ironing. Skip the dryer because intense heat can loosen the patch.
- Add stitches if needed: A few edge stitches after the glue dries add security on hats that get heavy wear.
If you like decorative iron-on styles and want examples of how different patch shapes sit on caps, these iron-on butterfly patches show how size and edge detail can affect placement choices.
When not to use iron-on
Iron-on isn't a good default for every hat.
Avoid it on leather hats, because standard iron-on adhesives don't bond well there. Use fabric glue or contact cement made for leather instead, and clean the surface first so pressure stays even. Also be cautious with hats that have heat-sensitive mesh or materials that can deform under direct heat.
Iron-on is quick. It isn't universal.
Beyond DIY When to Order Custom Headwear
A one-off hat for yourself gives you room to experiment. A set of hats for staff, a brand launch, or an event usually does not. Once the goal shifts from "good enough on one cap" to "every cap needs to match," the right method changes.

The main question is not whether a patch can go on a hat. It is whether your hat shape, patch material, and finish standard make DIY a smart choice.
Compare the options honestly
For single hats, several methods can work. The better choice depends on what you want the finished hat to look like and how much wear it will see.
| Method | Best for | Upside | Downside |
|---|---|---|---|
| Sewing | Long-term wear, curved hats, leather patches | Strong hold, clean edge control, better on hard-to-glue materials | Takes more skill and more time |
| Iron-on | Fast DIY on fabric hats | Quick application, tidy look on the right crown shape | Adhesive can struggle on curves, thick patch borders, or heat-sensitive hats |
| Fabric glue | Temporary hold or extra support | Useful for positioning, no machine needed | Easy to overapply, less clean-looking, weaker over time |
| Velcro | Swappable patches | Easy to change out patches | Adds bulk and rarely looks built-in |
In the shop, glue is usually a support tool, not the finish line. It helps hold a patch in place before stitching, especially on a curved front panel where patches like to drift. Velcro solves a different problem. It is for hats that need interchangeable patches, not for brands that want a polished, permanent look.
Why custom headwear makes sense for some jobs
Curved surfaces are where home projects usually start to fall apart. A patch that looked centered on the table can sit high on one side once the hat is worn. Thick merrowed borders can lift at the edges. Structured crowns can also fight your needle or press, which is why the "best" method on paper sometimes gives a disappointing result in practice.
That matters more in batches. Small inconsistencies barely show on one personal cap. Put the same hats on a restaurant staff, trade show team, or company crew, and crooked placement becomes part of the brand presentation.
Professional shops solve that with repeatable placement, stable stitching, and methods matched to the hat itself. A woven patch on an unstructured dad hat calls for a different approach than a leather patch on a structured trucker or a PVC patch on a tactical cap. That is the part many DIY guides skip. The attachment method should follow the materials and the shape of the crown.
If you are ordering in quantity, this guide on buying custom hat patches wholesale helps explain what to ask before you commit.
For bulk orders or hats with tricky materials, custom headwear usually saves time, waste, and rework. It also gives you a more consistent result, which is the whole point once the hats represent a business, team, or event.
Frequently Asked Questions About Hat Patches
What's the easiest method for a beginner
For a first project, iron-on is usually the easiest if the hat is fabric and the patch has proper heat-activated backing. It's fast, doesn't require stitching skill, and gives a tidy result when you prep the hat correctly.
If the hat is sharply curved or the patch is thick, beginner-friendly often shifts to a hybrid approach. Glue for temporary hold, then a few hand stitches around the edge.
Can you wash a hat with a patch on it
Yes, but gentler care is always better.
A sewn patch handles wear best. An iron-on patch should be allowed to fully set before regular use, and heat-heavy drying is a bad idea because it can loosen the bond. In general, air drying is the safer choice for patched hats.
How do you remove a patch without ruining the hat
It depends on how it was attached.
A sewn patch takes patience. Clip the stitches from the inside and lift the patch gradually instead of tearing at one side. An iron-on patch can be harder because the adhesive may leave residue or pull fibers when softened. The cleaner option is often to cover the old placement with a new patch if the hat fabric is delicate.
What's the best method overall
If durability is the top priority, sewing is still the best answer. If speed matters most and the hat is a good candidate for heat, iron-on works well. If the patch is leather, sew it properly with the right needle and prep.
For businesses, teams, and brands, the best method is often the one you don't have to test five times at home. Hats are awkward to decorate consistently, and the equipment gap is real. Once you move beyond a personal one-off, having a shop handle patch placement and production usually saves time, avoids waste, and gives you a cleaner final product.
If you'd rather skip the trial and error, Dirt Cheap Headwear is a solid option for blank and custom headwear, whether you need a small branded run, team hats, or bulk decorated caps with patches and embroidery done cleanly from the start.
Pingback: Blank Leather Patches for Hats Wholesale: A Buyer's Guide | Dirt Cheap Headwear
Pingback: How to Make Embroidered Patches for Hats: A Complete DIY | Dirt Cheap Headwear