
Hat Embroidery by Hand: A Beginner’s Real-World Guide
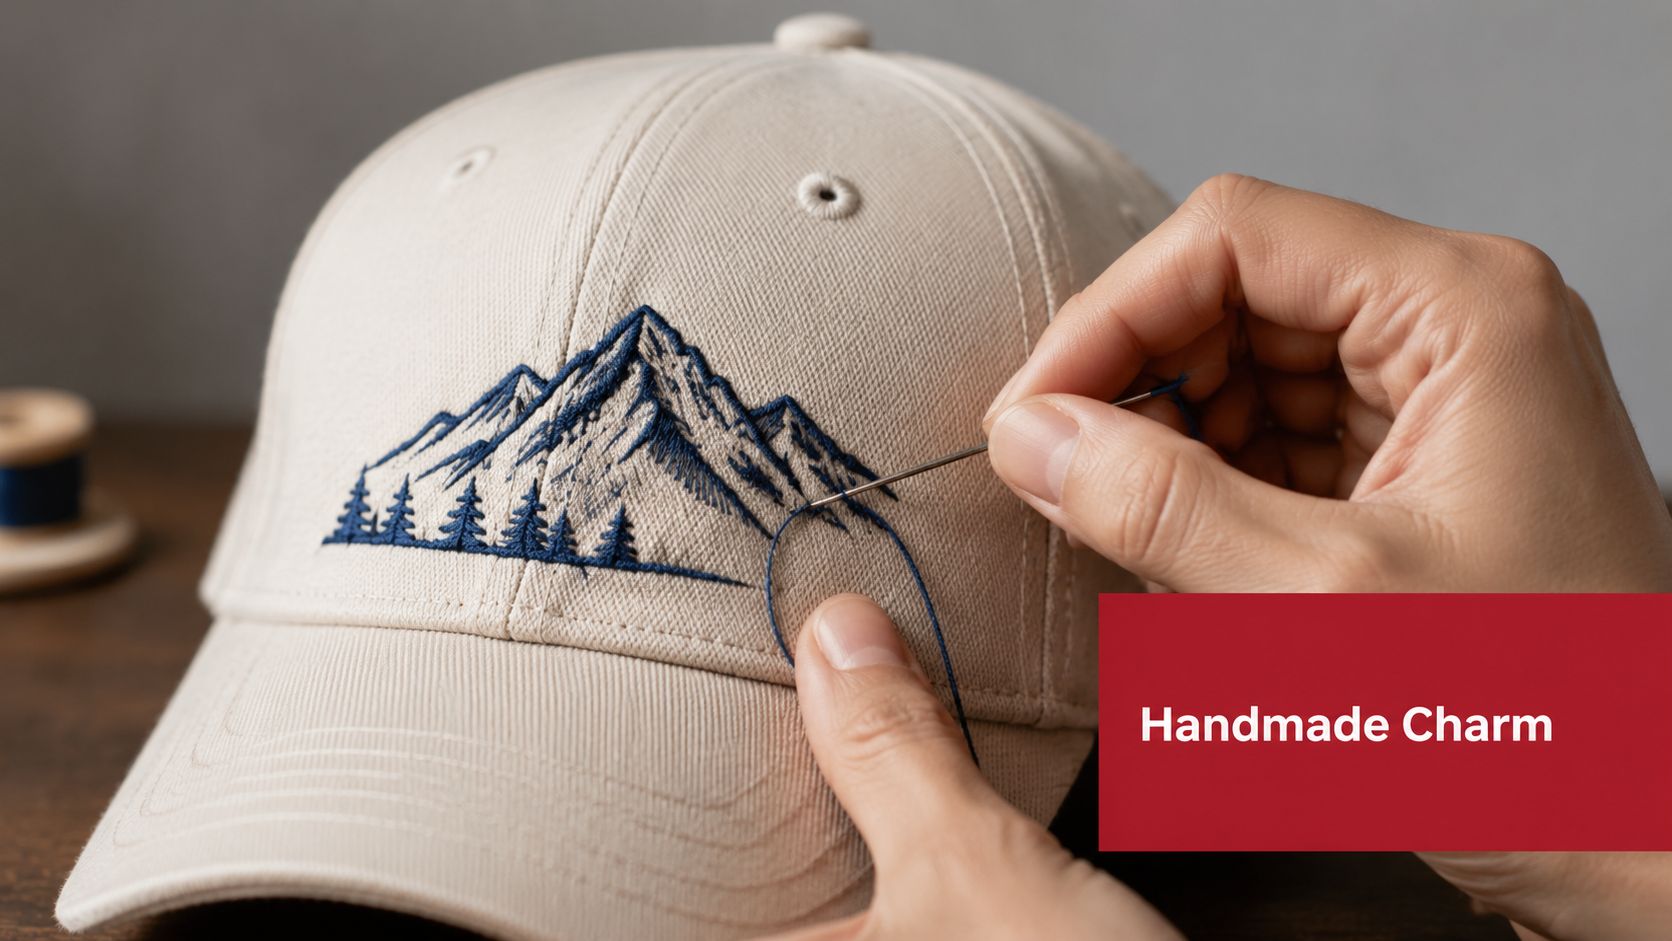
Stitching a design onto a cap by hand isn't just possible—it's surprisingly satisfying. There's something about the texture and dimension you get that no machine can replicate, especially when you're making just one custom piece without dealing with setup fees.
Why Hand Embroidery Still Beats The Machine On Caps
Hand stitching brings personality and adaptability to the table, while machines take the crown on pure speed. That said, plenty of makers still reach for a needle when the job calls for it. Here's why.
- No minimums, no digitizing fees — small runs make financial sense from the start.
- You control the texture — varied thread angles and tension create depth that's impossible to fake.
- Mid-design changes are easy — swap colors, adjust placement, or tweak knotting on the fly without stopping a production line.
Hand-stitched logos naturally read as handcrafted merchandise, which means you can justify premium pricing for limited drops and one-off pieces.
Hand vs Machine Hat Embroidery Comparison
Before committing to either approach, it helps to see how they stack up in practice. Here's a straightforward breakdown.
| Feature | Hand Embroidery | Machine Embroidery |
|---|---|---|
| Cost per piece for single hat | $5–$25 in materials plus labor | Higher one-off cost due to digitizing fees |
| Time per piece | 30 minutes to 3 hours depending on detail | 5–20 minutes run time after setup |
| Minimum order | 1 | Often 6–24 pieces for cost-efficiency |
| Customization flexibility | High — tweak mid-stitch | Low — changes require re-digitizing |
Hand embroidery clearly wins on flexibility and low-volume economics, while machine embroidery pulls ahead once you're scaling past a few dozen pieces.
A Real-World Scenario
Picture this: an influencer wants to drop 12 limited-edition hats featuring a hand-embroidered crest. With handwork, they can test two colorways on the first three hats, adjust stitch density to account for brim curvature, and finish the entire batch without paying a dime for digitizing or machine setup. Try doing that with a production run.
When Hand Embroidery Makes More Sense
Some projects just beg for a needle and thread rather than a machine.
- Raised textures — French knots or split satin stitches on a structured crown look incredible by hand.
- Fast sampling — testing a new logo? Hand-stitch a prototype in an afternoon.
- Tricky fabrics — delicate materials or mesh trucker panels often need the selective tension control only hands provide.
Small-Run Production Tips
If you're selling hand-embroidered hats, pricing transparency keeps customers happy. Estimate your stitch count, add 20–40% for setup and finishing time, and offer upgrades like contrast underlay or 3D foam layers for premium-tier pieces. That way your margins stay healthy while buyers understand what they're paying for.
Picking Needles, Threads, and Stabilizers That Actually Work
Most of us have been there—grabbing a random needle only to watch the crown fabric bend or thread snap halfway through a design. It’s frustrating, but totally avoidable. For structured caps, a sharp embroidery needle or a milliner 10–12 is your best bet. They slide through dense twill without bending, which keeps your stitches even. If you’re working on a knit beanie, switch to a smaller, slightly ballpoint needle so you don’t ladder the knit.
Thread weight can make or break your final look. 40 wt rayon or polyester gives a smooth sheen and reads cleanly for small logos. Need something bolder? Go with 30 wt for raised lettering that pops. For delicate details that won’t overwhelm a stitched patch, 60 wt is perfect. Before buying in bulk, stitch a 1-inch square on scrap fabric and wash it once—this shows you exactly how it’ll hold up.
Stabilizer is even more critical on hats than flat work. Curved panels need support to avoid puckering, so never skip it on a crown. For low-tension, single-pass logos, tear-away works fine. But if you’re dealing with high-tension, dense fills or a hat that’ll see repeated wear, cut-away is the safer choice. Working with trucker mesh? Place a lightweight cut-away stabilizer under the front panel to stop the mesh from distorting under stitch tension.
- Real-world comparison
- Mesh trucker: Use a sharp milliner needle, 40 wt polyester, and a thin cut-away stabilizer. Clamp the front panel slightly tighter than usual.
- Knit beanie: Use a 60 wt thread, ballpoint needle, and a lightweight tear-away or water-soluble stabilizer to preserve stretch.
Test on a scrap panel before touching the good hat—it saves headaches and costs.
Keep your thread length short, around 18–22 inches. Longer threads tangle easily and develop weak spots. For knotting, a small waste-knot inside the cap’s interior, trimmed close, prevents show-through on light fabrics.
Needles, Threads, and Stabilizer Checklist
- Pick needle type by fabric—milliner/sharp for twill, ballpoint for knits.
- Choose thread weight by desired look—40 wt for sheen, 30 wt for bold.
- Stabilizer selection—tear-away for light designs, cut-away for heavy tension.
If you’re looking for a deeper dive into tools, the guide for Chikankari lovers is a helpful resource for kit components and alternatives.
A practical tip from experience: label your test scraps with the needle, thread, and stabilizer you used. This lets you replicate the exact setup later—a habit that speeds up small-run production where consistency across 6–24 hats matters.
You might also find this useful: How to Match Thread Color to Your Hat for quick visual tricks that keep logos crisp.
Finally, invest in a quality thimble and a pair of curved embroidery scissors. They’re small purchases that cut rework time and keep edges clean when trimming stabilizer on curved panels.
Hooping and Transferring Your Design Without Wrecking the Hat
Hooping a cap badly is the fastest way to end up with puckers, stretched crowns, and ruined logos. Start by thinking about the brim—if it needs protection, slide a small piece of cardboard underneath before you clamp down. This keeps the overall structure intact and stops the brim from getting crushed while you pull the front panel taut.
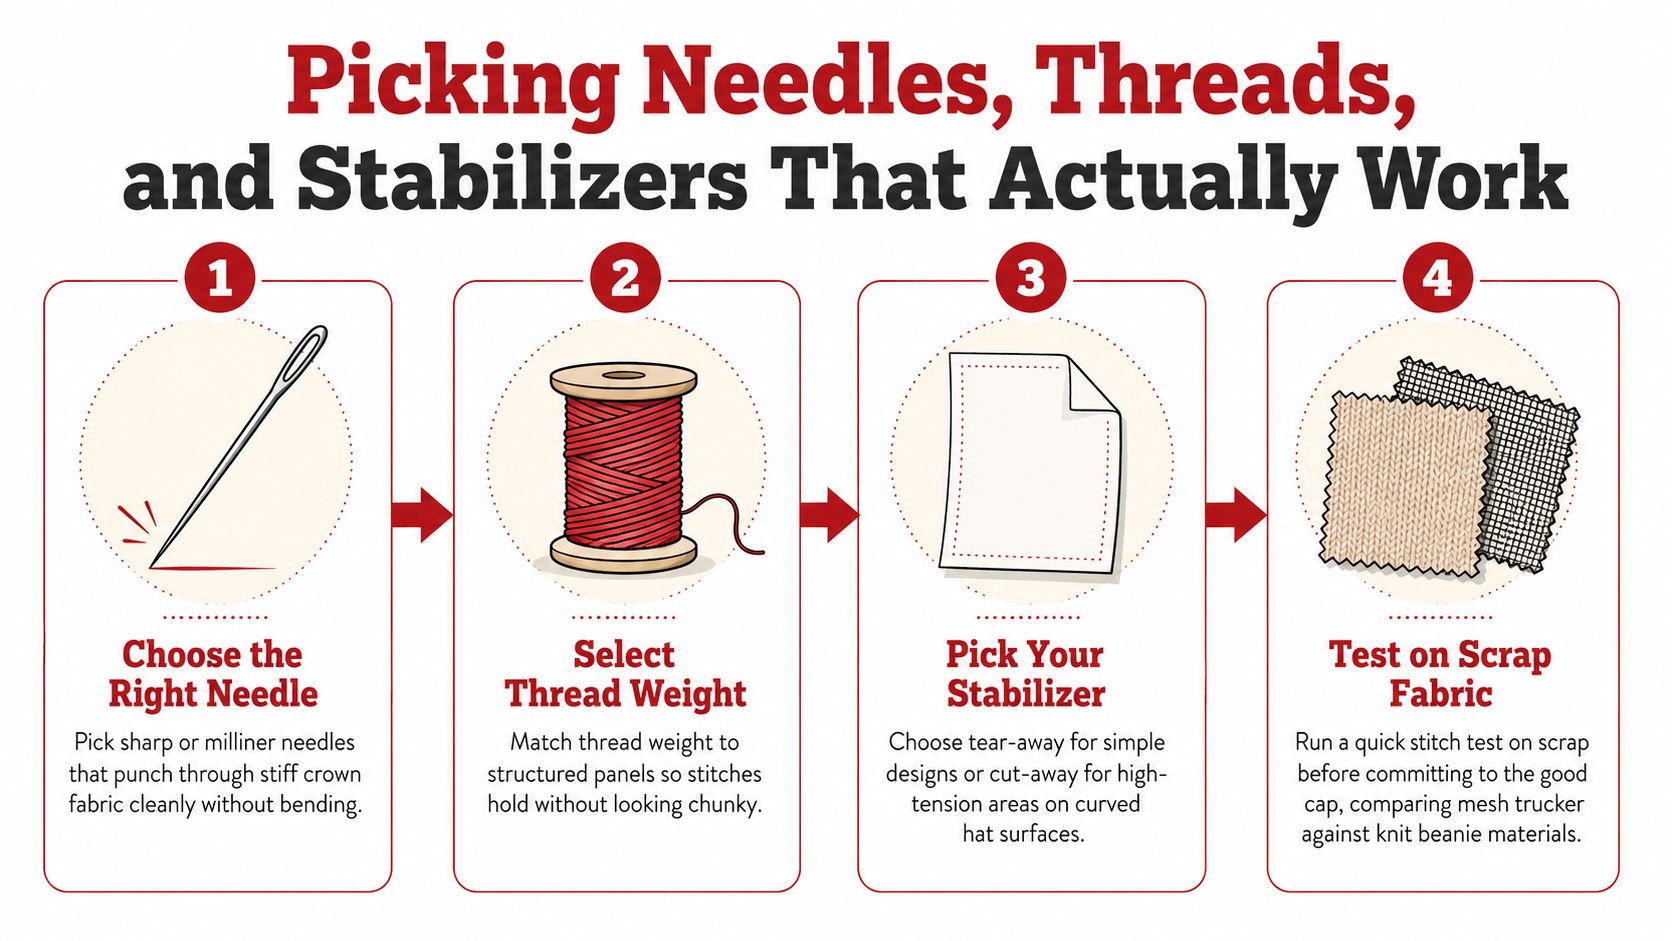
This visual breaks down a basic equipment checklist so you can grab needles, threads, and stabilizers that actually work for different cap fabrics. The whole point here is that predictable results come down to having the right tools and doing a quick test stitch. It saves a ton of time and keeps you from damaging your stock.
Grab a curved cap hoop or a spring clamp hoop for structured 5-panel and 6-panel hats. Sandwich the stabilizer between the hoop pieces and the inner crown; if you're working with trucker mesh, toss a lightweight cut-away underneath to stop the fabric from warping. Tighten everything gradually—you want the fabric taut but not stretched—so the panel stays flat without pulling the crown seams out of alignment.
Ergonomic Positioning for Long Stitches
Try to keep your forearms supported and the hat right around chest level so you don't wreck your neck. When you need both hands free for dense fills, stick a small clamp or a tabletop vise on the brim to hold things steady. It cuts down on hand cramping and keeps your stitches consistent, which honestly means way fewer restarts.
- Working with dark fabric? Try the light transfer method. Lay a water-soluble stabilizer overlay on top and stitch right through it. Once you're done, just rinse it away for crisp lines.
- Chalk tracing on a window works great as a cheap lightbox alternative. Just tape the pattern to the glass, set the hat over it, and trace with tailor's chalk directly onto the stabilizer. This trick is perfect for thick twill.
Keep transfers minimal on the visible side so cleaning the hat later is easier and marks don't show through.
Hooping Tricks for Stubborn Caps
Some caps just refuse to sit flat. When that happens, throw some binder clips around the brim and use small clamps at the crown seams. Slip a temporary backing—like a thin foam pad—inside the hat to spread out the pressure and protect the liner. Before you make a single stitch, eyeball the centerline against the seam to double-check your alignment.
Let's say you're stitching a one-off influencer drop. Hoop up and test one prototype hat first, then write down the exact needle, thread, and stabilizer combo you used. This makes scaling to a small run of 6–24 hats predictable and repeatable without any guesswork.
Stepping back in history for a second connects us to the craft—hand embroidery on hats dates back roughly 30,000 BC, with decorated headwear found at Sungir, Russia, showing off decorative techniques used long before modern tools existed. Learn more about historic embroidery findings.
For follow-up tips on positioning and visual balance, check out our guide on proper logo placement: Learn more about placement in our article.
Here's the rewritten section with a natural, human-expert tone:
Stitches That Look Clean on Curved Panels
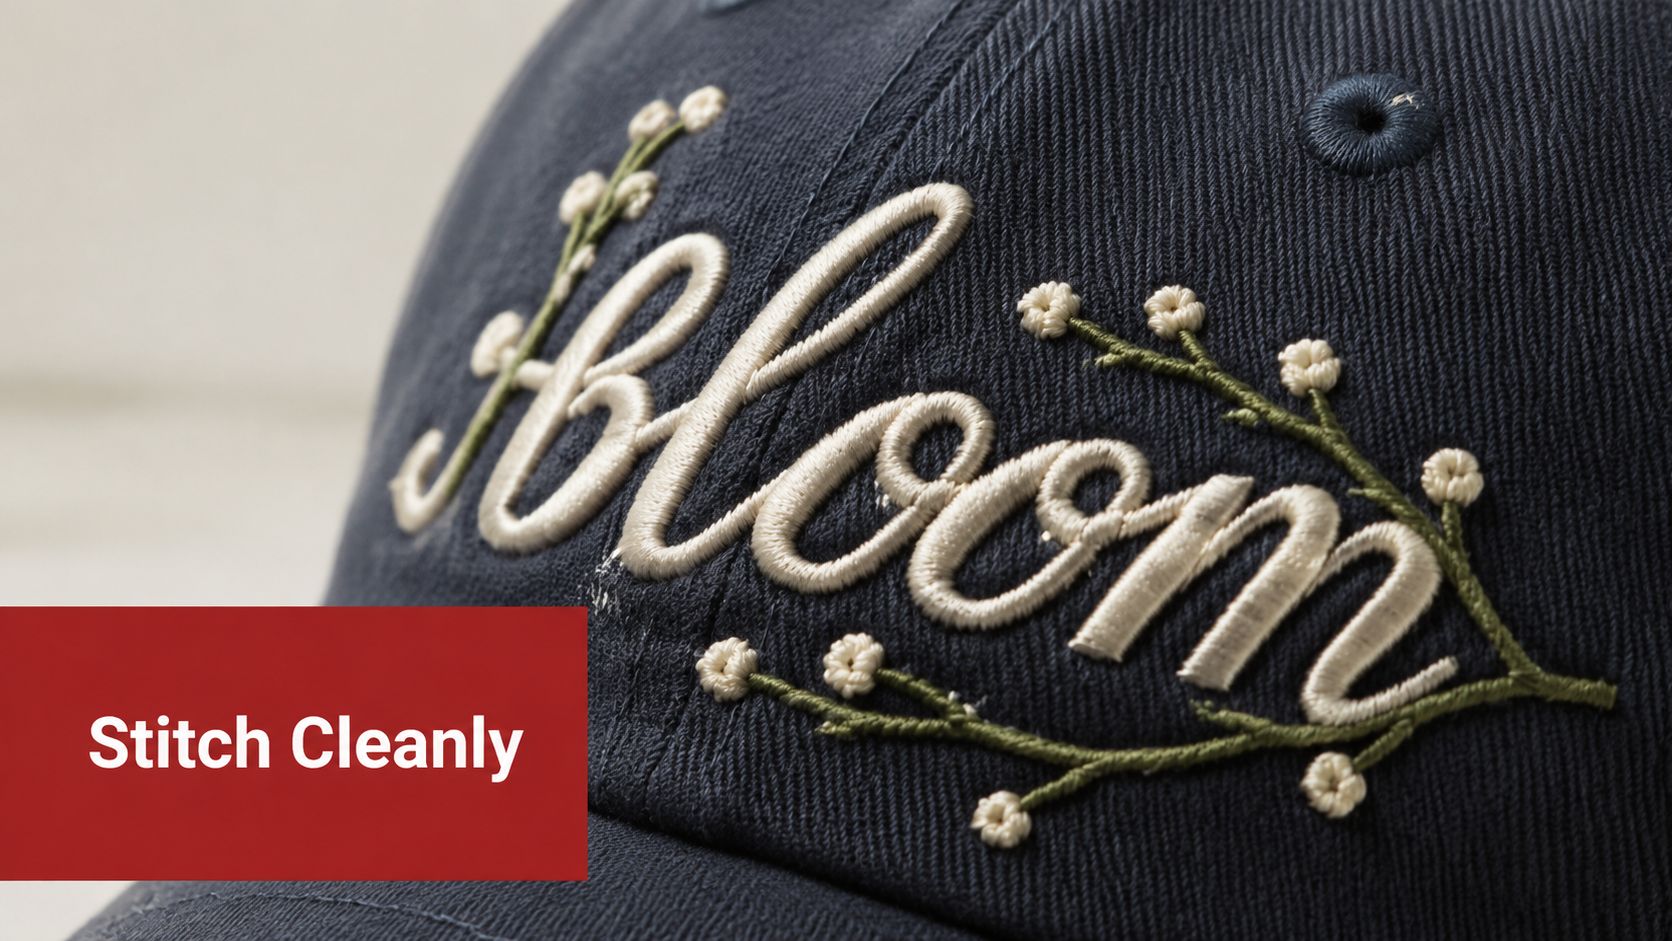
After stitching dozens of hats by hand, I've found a handful of stitches that simply work better on curved panels. They handle the tension, the curve, and the washing machine without falling apart. The trick is matching the stitch to the job—crisp edges, readable text, or that bit of tactile pop.
For logos needing sharp edges, satin stitch is your friend. Keep those parallel passes short—under 3–5 mm on structured panels. This prevents sagging and gives a clean bite on twill, which means you're not constantly re-hooping the next hat.
When lettering has to survive the wash, stem stitch is the move. The overlap locks everything in place so letters don't stretch out after a few runs through the machine. For tighter curves, shorten your stitch length and follow the flow of the letter. It makes the whole path more forgiving under tension.
French knots and bullion knots add texture without messing up your fills. Use them sparingly for highlights—think dotting an "i" or adding floral centers. Keep the tension light when tying them down, or you'll end up with a puckered crown.
For designs mixing fill and text, alternate your stitching direction between fills and outlines. This stops thread shadowing and keeps edges looking crisp.
Practical Tips for Tension and Direction
- Anchor the hat at chest level for long passes. It keeps your hand tension steady.
- Pull thread just enough to sit flush. Over-tightening warps curved panels.
- When stitching across a seam, make tiny backstitches on the underside to stabilize the path.
When to Use Each Stitch
Satin stitch
- Best for block logos and solid shapes.
- Use 30–40 wt thread for visibility and structure.
- Short passes on curves prevent lumpy edges.
Stem stitch
- Ideal for script and narrow lettering.
- Stagger stitches slightly to mimic machine density.
- Works well with 40–60 wt thread depending on letter size.
French knots
- Use for texture and tiny focal points.
- Test knot size on scrap to avoid piercing the crown.
Quick Real-World Example
Picture a small run of six hats for a local team—one design mixing text and an emblem. Do a prototype with a satin-filled emblem and stem-stitched name. Jot down the needle size, thread weight, and stitch lengths on a card. Then repeat those exact settings for the remaining hats to keep everything consistent across the run.
You might be interested in: Read our practical tutorial on transferring names and placement at How to Embroider a Name on a Hat.
Finishing, Pressing, and Fixing the Stuff That Goes Wrong
A good finish is what separates a hat that looks homemade from one that looks like it came off a real production line. Start by peeling back your tear-away stabilizer carefully—bend the trimmed edge in the direction the stitches run, not perpendicular to them. Pulling across the thread is the fastest way to snap stitches and ruin clean satin edges.
When you're pressing a curved panel, don't just lay a dry iron straight onto the brim. The curve fights back and you'll end up with flattened, shiny spots that never fully disappear. Slide a pressing ham underneath, or roll up a couple of small towels to fill the crown shape. That way the iron glides over the fabric without crushing the fibers flat.
For dark twill that picks up shine marks, grab a cotton press cloth and work on low heat with quick lifts rather than long presses. You're trying to set the stitches, not iron a dress shirt.
Quick rule: if thread breaks more than twice in a row, check needle size and thread length before blaming tension.
Common Quick Fixes for Mid-Design Issues
Stuff goes wrong mid-stitch more often than anyone admits. Here's what actually helps:
- Uneven tension — ease off the top hand tension just a touch and switch to shorter thread lengths, around 18–22 inches. Re-anchor with a couple of small backstitches on the underside to lock things in.
- Fabric slippage inside the hoop — slip a thin cut-away underneath, or use a light mist of temporary spray adhesive under the stabilizer. Re-hoop with gradual, even tightening rather than cranking it all at once.
- Shadow marks from hooping — rotate your stitching direction between fills and outlines so the pressure marks don't all line up. On dark fabrics, a light wash-away overlay hides transfer marks that would otherwise show through.
Practical Example and Checklist
Say you're stitching a six-hat small run for a meetup. Prototype one hat first and write down everything—needle size, thread weight, stitch length, stabilizer type. Then use the same clamp pressure and press method for every single hat in the batch. Consistency comes from repeating the exact same process, not from hoping each one turns out similar.
- Trim stabilizer close with curved scissors
- Use a stiletto for tiny foam bits or Puffy Foam cleanup
- Steam lightly from the inside for final shaping
Professional-looking finishes are mostly habit and a few right tools—curved scissors, pressing ham, and a reliable clamp. Keep notes per run and you'll cut rework time dramatically.
Common Questions From First-Time Cap Stitchers
How Long Does a Simple Logo Take by Hand?
A small, single-color block logo usually takes 30–90 minutes for someone who's done a few already. More complex fills or lettering can stretch to 2–3 hours per hat. Plan your time per piece when you're pricing out small runs—it adds up faster than you'd think.
Can You Wash a Hand-Embroidered Hat Safely?
Absolutely, as long as prep right. Use cut-away stabilizer for heavy fills, secure your ends with tiny interior backstitches, and hand-wash cold or run it on a gentle cycle inside a mesh bag. Air dry on a form so the crown keeps its shape.
Is There Money in Selling Hand-Stitched Hats?
Small runs definitely sell—local teams and creators often pay premiums for one-offs. Just expect margins to be slim at first. Charge for labor at an hourly rate and add material markup on top. Real profit shows up once you standardize a repeatable process for batches of 6–24 hats.
What If My Stitches Puckered or Threads Kept Breaking?
Check your needle size first—too large and it'll fight the fabric. Shorten your thread length to 18–22 inches so it doesn't tangle or weaken. Swap to cut-away stabilizer, re-hoop gradually, and always test on a scrap before committing to the real thing.
Where to Get Professional Help for Larger Jobs?
For those exploring outside options or dedicated embroidery work, see this helpful resource on personalized embroidery services.
If you want a pricing worksheet or a production checklist to scale your first six hats, Dirt Cheap Headwear can help streamline supplies and blanks.