You're probably trying to answer a simple question that gets complicated fast. You need branded hats or merch, the order isn't huge, the artwork looks straightforward on your screen, and then the printer starts asking about vector files, color separations, setup, seam placement, and whether screen printing is even the right method for a hat.
That confusion is normal. Custom screen printing is easy to recognize when you see the finished product, but the buying decisions behind it matter a lot more on small-to-medium orders than most guides admit. That's especially true with headwear, where the surface is smaller, seams get in the way, and the wrong decoration method can turn a clean logo into a compromise.
Screen printing is still a major part of apparel decoration. Globally, the screen printing segment generated USD 20,743.3 million in 2024 and is projected to grow at a 10.3% CAGR from 2025 to 2030, and it held a 40.45% share of the custom T-shirt printing market in 2025 according to Grand View Research's screen printing market data. That matters because it shows this isn't an outdated process hanging on by habit. Shops and buyers still use it because, in the right situation, it works.
What Exactly Is Custom Screen Printing?
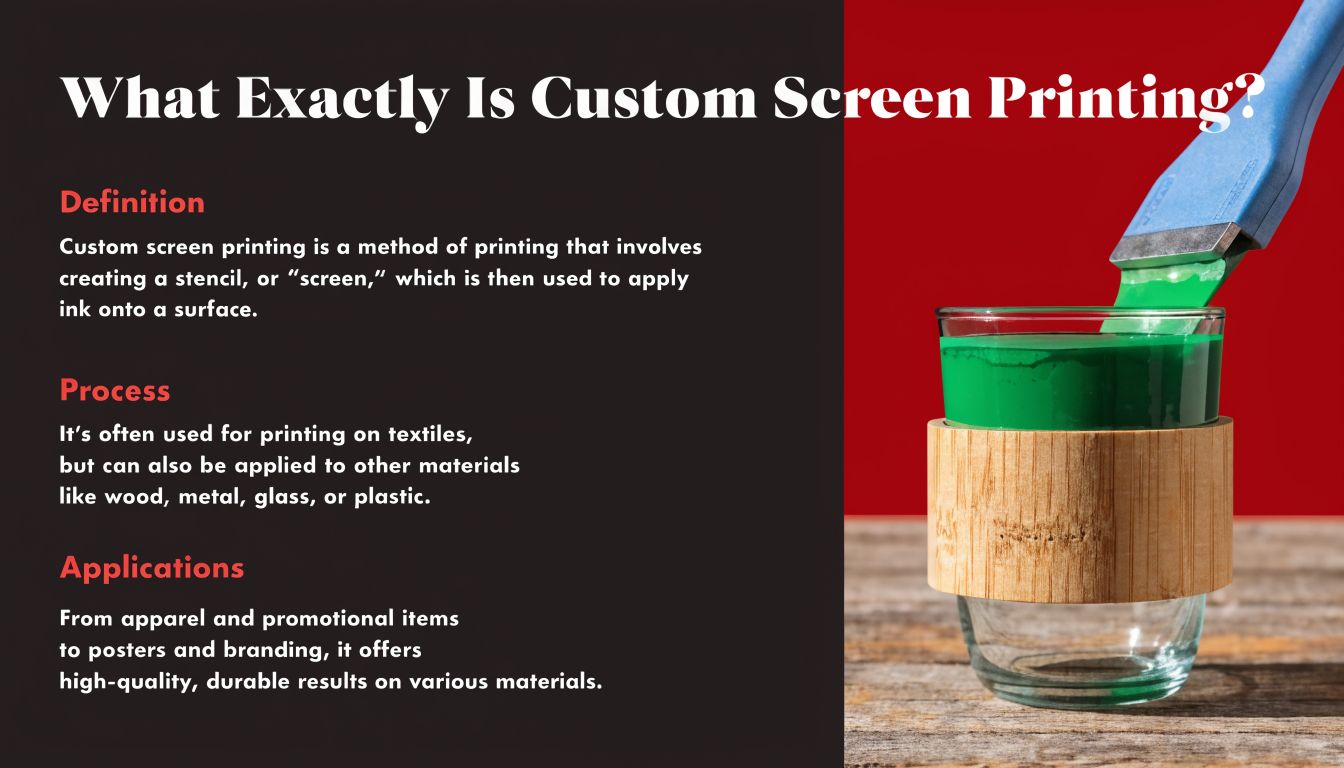
Think of screen printing as a reusable stencil process for ink.
A design is blocked out on a screen so ink can only pass through the open areas. Then the printer pulls ink across that screen and presses it onto the garment or item underneath. If your logo has one color, that's one stencil. If it has multiple colors, each one gets its own pass.
That simple idea is why screen printing has stayed relevant for so long. It produces solid, bold graphics that hold up well and look consistent across a batch. For uniforms, event shirts, promo merch, and straightforward logo work, that reliability matters more than flashy technology.
What the buyer needs to understand
Most customers don't need to memorize shop terminology. They need a clear mental picture of what they're paying for.
Here's the short version:
- Ink goes through a prepared screen: The screen acts like a controlled gate for the artwork.
- The design prints one color at a time: More colors mean more prep, more alignment, and more time.
- The result is built for repeatability: Once the setup is right, shops can reproduce the same design consistently across the order.
That last point is the big reason businesses keep choosing it. If you need a stack of matching promo tees, work shirts, or a secondary decoration on soft headwear, screen printing gives a dependable look that doesn't feel improvised.
Practical rule: Screen printing makes the most sense when your design is bold, your colors are controlled, and consistency matters more than photographic detail.
Why it works well for merch
For branded merchandise, the appeal is straightforward. Screen printing handles logos, simple graphics, and event art with a clean finish that reads well from a distance. It also tends to look intentional on products that don't need a luxury texture or a stitched effect.
For hats, the conversation gets more specific. Not every hat is a great candidate. A flat, smooth area is much easier to print cleanly than a structured front panel with a center seam. That's why smart buyers don't ask only, “Can this be screen printed?” They ask, “Will screen printing look right on this specific hat style?”
That question saves time, money, and disappointment.
The Screen Printing Process from Start to Finish
A buyer ordering 48 trucker hats and 72 tees usually expects one logo and one price. In the shop, that order splits into a series of production decisions that affect setup time, print quality, and whether the art will even work on the product you picked.
On shirts, the process is fairly forgiving. On headwear, especially structured hats with seams, buckram, or curved print areas, the same artwork can become a different job entirely.
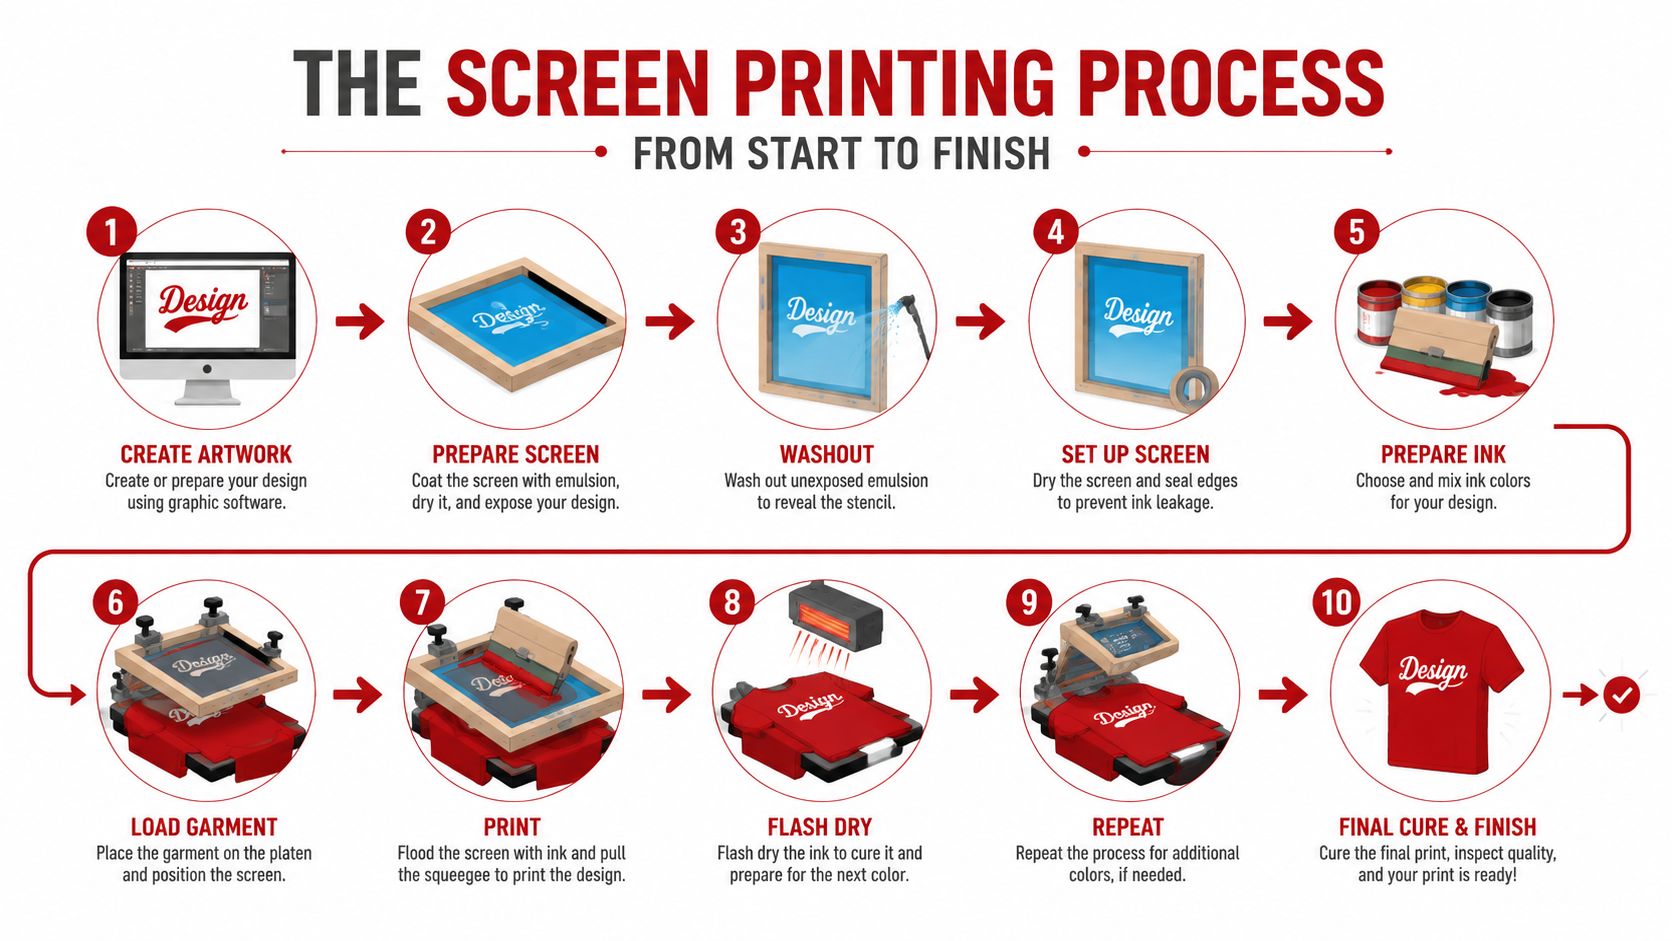
The artwork sets the job up for success or rework
The process starts with your file. Clean vector art in AI, EPS, or SVG gives the shop clear edges and separations. Raster files can still work, but low-resolution JPEGs often create soft edges, extra cleanup time, and approval delays.
For screen printing, each ink color needs its own screen. A one-color left chest logo is simple to prep. A three-color front-on-hat design takes more separation work, more registration, and more chances for small alignment problems to show.
That matters more on smaller orders. If you are printing a few dozen hats instead of a few thousand tees, the setup labor does not disappear. It just gets spread across fewer pieces.
Screen prep determines how the ink behaves
Once the art is approved, the shop coats screens with emulsion and exposes them so only the printable areas stay open. Screen mesh is chosen based on the artwork and the ink deposit the job needs. Finer detail usually calls for a higher mesh. Bolder prints that need more ink coverage often need a lower mesh. Exile Tech walks through that relationship in its overview of equipment needed for screen printing businesses.
Customers do not need to memorize mesh counts, but they should understand the trade-off. The setup for a crisp small logo on a cap front is different from the setup for a bold print on a soft cotton tee. One screen choice cannot optimize both.
Registration gets harder as the product gets less flat
After the screens are made, the shop aligns each color on press. That step is registration. If the colors do not land in the right place, outlines look uneven, fills peek out past edges, and the print loses its sharpness.
Multi-color work on flat garments is usually straightforward once the setup is dialed in. Hats are less forgiving. Curved panels, center seams, and inconsistent crown structure can all interfere with clean contact between the screen and the print area. That is one reason many hat graphics are kept simpler than shirt graphics.
If you want a plain-language overview of the method, this guide to the silk screen printing technique for custom headwear gives the buyer-side version.
Printing and curing are the visible step, not the whole job
Once registration is locked, ink is pushed through the screen with a squeegee, one color at a time. Then the print is cured so it holds up in use and washing.
This is the part customers picture, but it is rarely the part that drives the quote by itself. Setup, alignment, test prints, and product handling often decide the actual labor in the job.
For small-to-medium orders, especially on headwear, that is the practical takeaway. A simple one-color print may be economical. A multi-color design on structured hats can be done, but the art, placement, and product choice have to justify the extra setup if you want clean results.
Strengths and Limitations of Screen Printing
Screen printing is excellent at some jobs and a poor fit for others. Most bad orders happen when the method and the product don't match.
If you're buying for a business, team, or merch drop, it helps to judge screen printing by trade-offs instead of hype.
Where screen printing shines
The biggest strength is clarity with bold artwork. Solid logos, simple spot colors, and repeat designs usually look crisp and deliberate.
It's also a strong choice when consistency across a run matters. If you're outfitting staff or printing event merch, you want the first item and the last item to look like they belong together.
Screen printing rewards restraint. Clean shapes, controlled color counts, and good placement almost always outperform overcomplicated art.
Another practical advantage is that once setup is done, the economics improve as quantity rises. That's why it stays popular for group orders instead of one-offs.
Where it starts to fight you
The same setup that makes screen printing efficient at volume can make it awkward for short runs, especially with several colors. Small quantities absorb the same prep work without giving you many units to spread that labor across.
Detail is another issue. Fine gradients, photographic images, and art with lots of subtle transitions usually push buyers toward another method. A strong logo prints beautifully. A poster-style illustration with soft fades often doesn't.
Then there's headwear.
A hat is not a flat T-shirt panel. Structured fronts, curved surfaces, and center seams all complicate print quality. A design that looks perfect centered on a mockup can break apart visually once it hits a seam or wraps onto a curved crown.
The hat-specific reality
For many hats, the main limitation is placement. Large front graphics that cross the center seam can be difficult to print evenly, and even when a shop can do it, the result may not look as smooth as the same design on a flat garment.
| Situation | Screen printing fit |
|---|---|
| Bold one-color event graphic on apparel | Strong |
| Medium run of simple merch with repeat artwork | Strong |
| Small run with many colors | Mixed |
| Photo-style artwork | Weak |
| Structured 6-panel hat with art over center seam | Risky |
That doesn't mean screen printing is bad. It means it works best when the artwork respects the surface.
Understanding Screen Printing Costs and Order Sizes
Most buyers ask, “How much per hat?” The better question is, “What am I paying for before the first hat is even printed?”
That's the key to understanding custom screen printing. The price isn't only about ink on fabric. It's also about setup time, file prep, screen creation, press registration, and whether the product itself makes printing easy or difficult.
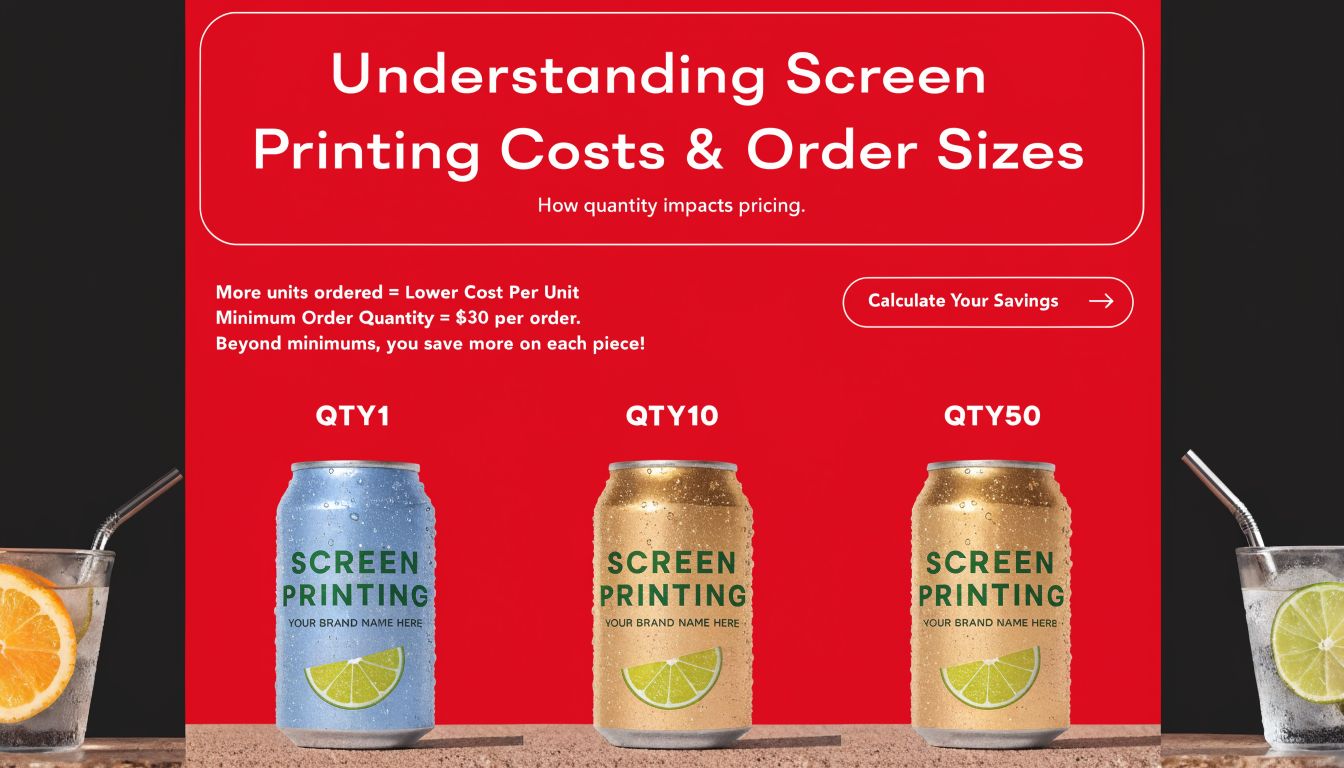
Why small orders feel expensive
A two-color logo requires two screen setups whether you print a dozen hats or a much larger batch. That means the front-loaded labor is similar, but the number of items carrying that cost changes.
Here's the practical version:
- Color count affects setup: More colors usually mean more screens and more registration work.
- Quantity affects unit price: The more units in the run, the more that setup gets spread out.
- Product difficulty affects labor: Easy print areas cost less to run than surfaces that need extra handling or careful positioning.
This is why a small order can have a surprisingly high per-item price even with simple art. The shop still has to build the job correctly.
A simple buyer example
Take a hypothetical 2-color logo on hats.
If you order 12, the setup work is still there, but there aren't many pieces to absorb it. If you order 144 of the same design on the same hat style, that same setup gets spread across a much bigger run, so the cost per unit usually drops.
No honest shop should promise a universal break point without seeing the art and product. Hat construction, print size, and placement all matter. But the pattern is consistent. Quantity improves the math.
Buying advice: If your design is stable, combine departments, event dates, or staff needs into one run instead of placing several tiny orders.
Why the market stays competitive
This isn't a tiny corner of the decoration business. IBISWorld projects 15,427 custom screen printing businesses in the U.S. in 2025, reflecting a 4.6% CAGR since 2020, according to its data on the number of U.S. custom screen printing businesses. For buyers, that means there's broad production capacity and a lot of variation in shop specialty.
Some shops are built around apparel volume. Some are better with local small business orders. Some understand hats and some really don't.
If you want a hat-focused breakdown of typical pricing variables, this guide to screen printing cost is a useful buyer reference. It helps frame the conversation before you request a quote.
What usually lowers your quote
A few decisions tend to make pricing more favorable:
- Keep the art simple: Fewer colors and cleaner shapes reduce prep.
- Choose placement carefully: Printing in an easy area costs less than forcing a graphic over seams or awkward curves.
- Standardize the blank: Mixing too many products in one run can complicate setup and production flow.
If your order sits in that small-to-medium range, these choices matter more than people expect.
Preparing Your Design Files for Perfect Prints
A customer sends over a hat logo pulled from a website screenshot, wants it across the front of a structured cap, and needs a quote the same day. That job usually slows down fast. We either spend time rebuilding the art, or we quote with a lot of caveats because the file does not tell us enough.
Good files save time, but they also protect print quality. On small-to-medium orders, especially with headwear, that matters more than many buyers realize. If setup time climbs because the art is messy, the cost per hat climbs with it.
Send vector art if you have it. AI, EPS, and SVG files give the printer clean edges, editable text, and clear color separations. That matters in screen printing because each print color has to be prepared intentionally. If you only have raster art, send the highest-quality version at actual print size and expect the shop to review it closely before approving production.
What to send the shop
A file is only part of the job. The smoother orders include the artwork plus the production details that affect whether the design will work on a hat.
Send these items together:
- Preferred file types: AI, EPS, or SVG
- Good backup option: PDF, if the art is built cleanly
- Raster files: High-resolution PNG or JPEG at final print size
- Print dimensions: Approximate width and height of the design
- Placement request: Front panel, side, back, or another location
- Hat style: Structured, unstructured, 5-panel, 6-panel, foam trucker, visor, and so on
- Brand color targets: Pantone callouts if color match matters
- Notes on must-keep elements: Specific line weight, spacing, or text treatment
That last part prevents a common problem. A buyer may care most about a thin outline or a small tagline, but if the shop does not know that, those details may be the first things adjusted to make the art printable.
Design for the actual hat
Headwear separates itself from basic shirt printing because a design that looks centered and readable on a flat mockup can fail on a curved front panel.
Hats give you less room and less forgiveness. Front seams interrupt artwork. Structured crowns resist flat contact. Small text that looks fine on a laptop screen can close up once ink hits fabric. For many small business orders, the smartest move is not making the design bigger. It is simplifying the design so it reads clearly at the size the hat can support.
A few practical rules help:
- Keep fine detail under control: Thin lines, distressed texture, and tiny type often print inconsistently on hats
- Build around the seam: On 6-panel caps, front artwork that crosses the center seam can distort or break
- Use stronger shapes: Bold icons and simple lettering survive the curve of the crown better
- Match the art to the print area: Wide horizontal layouts often fit a 5-panel better than a structured 6-panel
- Ask early if the art is borderline: A quick prepress review is cheaper than a rerun
If you want a broader buyer-level overview of screen printing methods for different products and layouts, review that before locking in art that may fight the construction of the hat.
Common file problems that raise cost
Some problems are easy to fix. Others turn a simple order into art cleanup, proof revisions, and production delays.
The usual trouble spots are familiar in any shop:
- Low-resolution logos copied from social media or a website
- Text that has not been outlined and is missing the original font
- Colors merged together in one flattened image
- Mockups with effects that cannot be reproduced in standard spot-color screen printing
- Artwork sized for a shirt front, then reused for a hat without adjustment
For t-shirts, a shop can sometimes work around weak art more easily because the print area is larger and flatter. Hats are less forgiving. Small-to-medium headwear orders have less room for wasted setup time and less room on the product itself for design mistakes.
If the logo only looks good at oversized scale on a mockup, it probably needs to be redrawn for the hat instead of forced onto it.
What a printer needs before approving the job
The best approvals happen when the file, the product, and the expectation all line up. Buyers get better results when they tell the printer what matters most. That could be keeping the logo readable from a distance, matching a brand red as closely as possible, or fitting the art onto a specific cap style without crossing a seam.
A clean file gives the shop a real starting point. Clear production notes turn that file into a print plan that fits your budget and the hat you ordered.
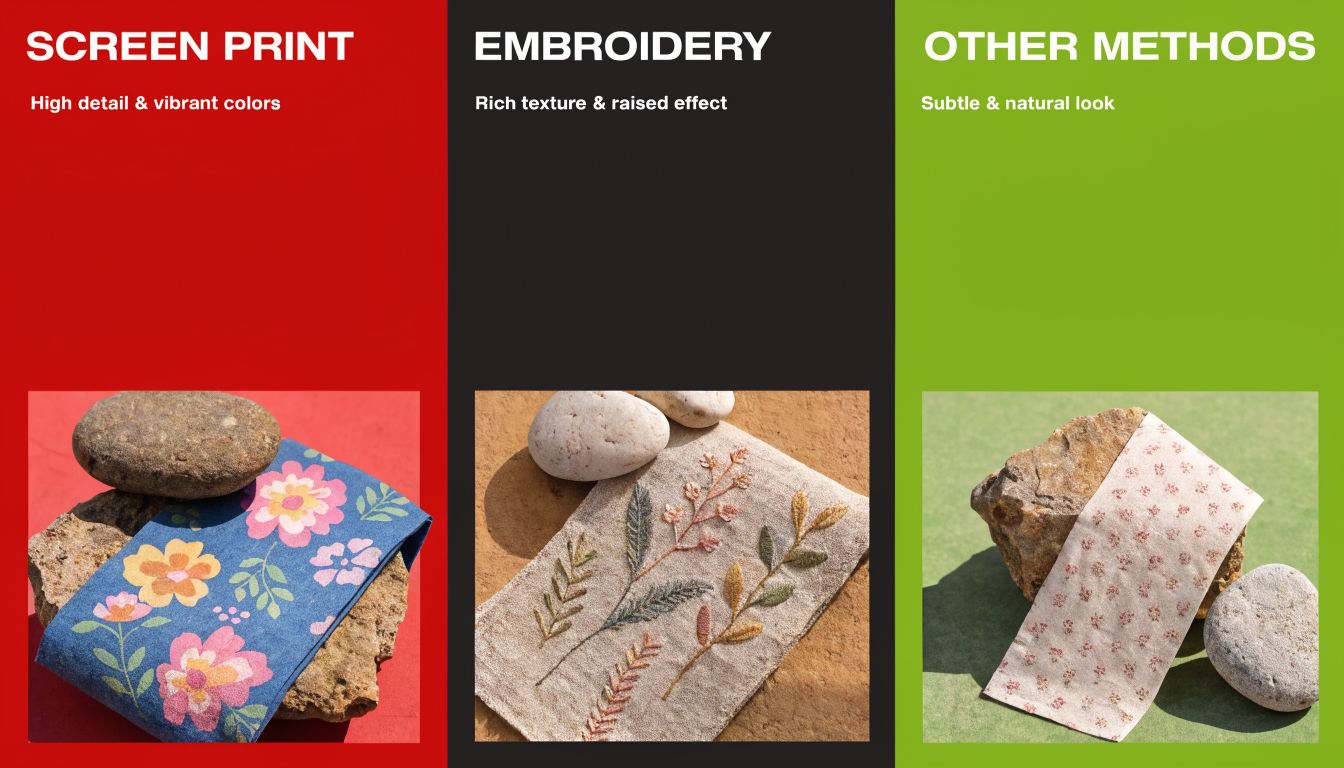
Screen Print vs Embroidery vs Other Methods
For hats, this comes down to the actual buying decision. Most customers aren't deciding between screen printing and nothing. They're choosing between screen printing, embroidery, patches, and transfer-style decoration, and each one solves a different problem.
The right choice depends on what you want the finished hat to feel like, where the design sits, and how many units you need.
When to choose screen printing
Choose screen printing when your art is bold, fairly simple, and meant to read clearly without texture. It's often a practical fit for promotional apparel and for some headwear applications where the print area is suitable and the design doesn't fight the construction.
It's less forgiving on structured hats with difficult front seams. Real Thread highlights that printing over seams can cause ink deposit inconsistencies and print distortion, which is especially relevant on 6-panel hats when the artwork crosses the center seam in its article on printing over seams.
If you're comparing methods more broadly, this overview of screen printing methods is useful for understanding where print-based decoration fits among other options.
When embroidery usually wins
Embroidery is often the safer choice for hats because the product already supports a stitched, dimensional look. Logos, initials, team marks, and simple brand icons often feel more natural in thread than in ink on structured caps.
It also handles seams differently. A center seam can still influence the outcome, but embroidery is commonly chosen for that exact environment because the finished aesthetic suits the hat.
Good use cases for embroidery:
- Front logo on a structured cap
- Small chest-style mark adapted for headwear
- Branding that should feel premium or textured
- Low-to-moderate quantities where a stitched finish is the goal
When patches or transfers make more sense
Patches are strong when you want a badge-like look, a vintage feel, or a design that wouldn't stitch cleanly as direct embroidery. They also help when you want material contrast, such as woven, leather-look, or printed patch styles.
Transfers can make sense for certain short runs or complex graphics, especially when screen setup would be inefficient. They're often the practical answer when the order is small and the artwork doesn't justify traditional screen prep.
| Method | Best fit on hats | Watch out for |
|---|---|---|
| Screen printing | Bold, simple graphics on suitable surfaces | Seams, curves, and small detailed art |
| Embroidery | Logos, team marks, premium brand looks | Very tiny detail or large filled areas |
| Patches | Badge-style branding, layered look | Added application step and edge shape limits |
| Transfers | Small runs, more complex graphics | Finish may not match the look buyers expect on premium caps |
For hats, the method should follow the construction. Don't force a flat-garment decoration choice onto a cap just because the artwork started on a T-shirt.
One practical note for buyers comparing vendors: Dirt Cheap Headwear offers in-house embroidery, custom patches, and printing for blank and decorated headwear, which makes it one option when you need to compare decoration methods on the same product category instead of guessing from a generic apparel quote.
Caring for Your Screen Printed Gear
Screen printing is durable, but it still benefits from basic care. Most print failures customers complain about come from heat, abrasion, or rough washing habits, not from normal wear alone.
Use these simple rules:
- Wash inside out: This reduces rubbing directly on the print surface.
- Use cold water when possible: Lower heat is easier on both ink and fabric.
- Skip harsh wash settings: Heavy agitation can wear any decoration faster.
- Tumble dry low or hang dry: High dryer heat is rough on printed areas.
- Don't iron directly on the print: If ironing is necessary, avoid direct contact with the decorated area.
For hats, care also depends on the style and structure. A soft printed cap should be handled differently from a structured embroidered cap. If the item has a shaped crown or specialty fabric, ask for care guidance when you place the order.
The payoff is simple. A well-produced screen print can stay sharp for a long time when the artwork suits the product and the care is reasonable. That's why custom screen printing still earns its place for merch, uniforms, and selected headwear projects. If your design is bold, your order size is sensible, and your product choice matches the method, it's still one of the most practical decoration options you can buy.
If you're comparing decoration options for branded hats, Dirt Cheap Headwear lets you source blank styles and request custom orders for embroidery, patches, and printing through one shop, which can make it easier to evaluate the right method before you commit.