You’re the coach or team manager, the season is getting close, and someone finally asks, “Can you handle the hat order?” Now you’re comparing crown shapes, fabric types, logo files, minimums, and delivery dates while trying to avoid a mistake that shows up on 40 heads at once.
That pressure is normal. Custom baseball hats for teams look straightforward until the small production details start stacking up. A structured cap can look sharp in a proof but feel too rigid for younger players. A budget snapback can simplify sizing but miss the on-field look your team wants. Raised embroidery can make a simple mark stand out, but it can also make a detailed logo look crowded or drive up the cost faster than expected.
Good team hats come from matching the build to the job. A hot-weather tournament team usually needs different fabric and ventilation than a school fundraiser, and a coach ordering player caps should judge options differently than a booster club buying a mixed run for parents, staff, and fans. That is where many first orders drift off course. People spend most of their time on the logo before they’ve settled the hat itself.
Baseball caps also carry more weight than a basic add-on. They finish the uniform, hold up to repeated wear, and often become the item players keep using after the season. That staying power is part of why cap design has remained tied to the sport for generations, starting with the early Brooklyn Excelsiors style that helped set the template for the modern baseball cap.
A good order comes down to a few practical choices made in the right sequence. Start with who will wear the hats, where they’ll wear them, and how hard they’ll be on them. Then match the logo and decoration method to the limitations of the cap, not the other way around. Clean artwork, realistic expectations, and enough time for proofs usually save more money than chasing the cheapest blank on page one.
From Dugout Idea to Finished Hat
The first decision isn’t logo placement. It’s figuring out what kind of hat the team really needs.
A spring travel team playing doubleheaders in heat needs something different from a school booster club ordering hats for staff, parents, and players. One group may need performance fabric and a more athletic profile. Another may care more about easy sizing, lower cost, and a design that looks good on a wider mix of people.
That’s why custom baseball hats for teams work best when you treat the order like uniform gear, not like novelty merch. The hat has to survive sweat, car rides, dugout abuse, and repeated wear. It also has to look right with the jersey. A cap that feels great in a product photo can be the wrong choice once real players start wearing it every day.
Practical rule: Start with use case, not decoration. If the blank hat is wrong, no embroidery upgrade will save it.
The easiest way to keep the process under control is to make decisions in this order:
- Choose the base hat style that fits your team’s age group, climate, and look.
- Match the fabric to the conditions your players play in.
- Adapt the logo to what a hat can reproduce cleanly.
- Limit decoration locations unless there’s a strong reason to add more.
- Proof everything slowly, even if the order feels urgent.
Coaches often rush to the artwork because that’s the fun part. The better move is to lock in the blank first. Once the hat style is set, the design choices get much easier and cheaper.
Selecting the Perfect Hat Style and Fabric
A team can approve great artwork and still end up with hats nobody wants to wear. The usual problem is the blank itself. Crown shape feels off, the fabric traps heat, or the front panel does not support the logo well.

Start by deciding whether the hat needs to act like part of the uniform or more like team merch. That one choice clears up a lot. Game and practice caps usually need a stable front, better sweat handling, and a shape that looks consistent across the roster. Parent, coach, and fundraiser hats can be more flexible on structure and fabric if comfort and price matter more than a strict on-field look.
Structured vs unstructured
A structured cap has reinforcement behind the front panels, so the crown keeps its shape. That matters for baseball teams because embroidery sits cleaner on a firm surface, especially with block letters, initials, and standard front logos. Structured caps also look more consistent from player to player, which helps when different head shapes are wearing the same model.
An unstructured cap has a softer front and breaks in faster. It can be comfortable for coaches, staff, and fan wear, but it usually reads casual. If the goal is a clean team look that matches uniforms and batting helmets, structured wins more often.
There is a trade-off. Some younger players or adult rec teams prefer a softer cap because it feels less stiff right away. If comfort on day one matters more than crisp shape, unstructured can still make sense. Just expect more variation in how the front logo sits once the hats are worn.
Five panels, six panels, and profile
For most team orders, a 6-panel cap is the safe choice. It is the standard baseball look, the fit is familiar, and decorators know how to work with it. If you are ordering for a mixed group of players, coaches, and parents, 6-panel styles usually create fewer surprises.
A 5-panel cap gives you one wider front panel, which can help certain badge-style layouts or wider marks. It also changes the look right away. Some programs like that streetwear influence. Others order it online, then realize it does not feel like a traditional baseball cap once samples arrive.
Profile matters just as much:
- Low profile feels closer to the head and often suits adults who dislike a tall crown.
- Mid profile fits the widest range of teams and is the easiest first order.
- High profile gives bold lettering more room, but it can look too tall on younger players or smaller head sizes.
If a coach asks me for the lowest-risk option, I usually point to a structured, mid-profile, 6-panel cap. It solves more problems than it creates.
Fabric choices that actually matter
Fabric is where comfort, durability, and decoration start pulling against each other.
Cotton twill gives you the classic baseball feel. It embroiders cleanly, holds color well, and works for teams that want a traditional appearance. The downside is heat. In warm spring and summer schedules, full cotton can feel heavier once sweat builds up.
Polyester or poly-rich performance blends are better for hot weather, frequent washing, and repeated use. They dry faster and usually hold their shape longer. The trade-off is aesthetic. Some performance fabrics look more technical and slightly less classic, which may or may not match the uniform style your program wants.
Trucker mesh helps with airflow and is popular for off-field team hats, summer camps, and casual staff wear. It is less common for a true game cap look. Mesh also changes how side and rear decoration behaves because the open holes do not support every method equally.
Wool blends still show up in traditional cap lines, but I rarely recommend them for teams playing in heat. They can look sharp, but comfort drops fast in warm conditions.
One detail buyers often miss is how fabric affects decoration. A slick performance polyester may handle sweat better than cotton, but some decoration methods behave differently on that surface. If your artwork might need transfers instead of direct stitching, it helps to understand how heat transfer on hats works before you lock in the blank.
Brand and blank quality
Reliable brands matter because consistency matters. When you reorder next season, you want the crown height, fit, and color to match closely enough that new hats do not look like they came from a different program. Richardson, YP Classics/Flexfit, New Era, and similar team staples stay popular for that reason.
It also saves time to compare actual silhouettes before choosing. Looking through a range of wholesale blank baseball caps makes crown height, closure types, mesh depth, and fabric differences easier to spot than product names alone.
A final practical rule. If the team is split between two styles, order toward the players first and build a separate fan version later if needed. Trying to make one hat serve varsity players, youth siblings, booster parents, and staff usually leads to a compromise nobody loves.
Bringing Your Team Logo to Life with Decoration
You approve the hat style, everyone likes the color, and then the logo proof comes back looking smaller, thicker, or busier than expected. That usually is not a production problem. It is a decoration choice problem.
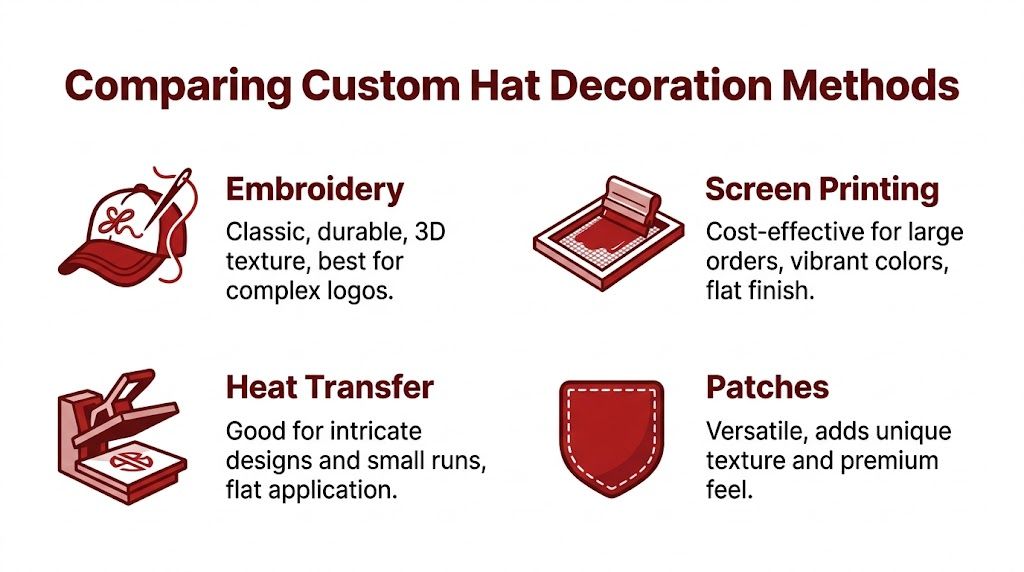
Flat embroidery vs 3D puff vs patches
Start with the logo, then choose the decoration method. Teams often do the reverse and end up forcing artwork into a process that does not suit it.
Flat embroidery is the safest first choice for most team orders. It wears well, holds up through regular use, and reads clearly from the stands when the design has solid shapes, clean outlines, and limited fine detail. If your logo includes script, an outlined mascot, or smaller text, flat embroidery usually gives you a cleaner result than puff.
3D puff embroidery works best with bold, simple artwork. One or two letters. Thick block shapes. Strong spacing. On a structured cap, it can give a varsity look that feels custom without adding extra locations. The trade-off is detail. Small gaps can fill in, thin lines can disappear, and curved script usually looks worse once the foam goes under the top stitching.
Patches help when direct embroidery would simplify the logo too much. They are a strong option for crest-style marks, retro team art, and designs that need a defined edge. The trade-off is style and cost. A patch changes the look of the hat on purpose, and good patch application usually costs more than standard front embroidery.
Here’s the quick comparison:
| Method | Best For | Cost | Durability |
|---|---|---|---|
| Flat embroidery | Most team logos, text, standard front decoration | Moderate | High |
| 3D puff embroidery | Bold initials, block letters, simple shapes | Moderate to higher | High |
| Patch application | Emblems, vintage looks, logos needing defined edge | Moderate to higher | High when applied well |
| Heat transfer | Small runs, intricate graphics, designs hard to stitch | Varies | Good, but depends on material and use |
Where decoration goes wrong
Bad artwork slows orders down faster than almost anything else. The usual problem is simple. A coach sends a screenshot from Instagram, an old JPEG from a booster club flyer, or a logo with fonts that were never converted to outlines.
That file might be good enough for email. It is not always good enough for hats.
Embroidery has physical limits. Thread has width. Needles need space between elements. Hat fronts curve, especially on lower-profile styles. A logo that looks sharp on a flat screen can stitch heavy, close up, or lose small details once it is resized for a cap.
Use AI, EPS, or a clean PDF when you can. Outline the fonts before sending the file. If the only version you have is a raster image, expect some cleanup. Distressed textures, tiny outlines, and fine script usually need a hat-specific edit before approval. Teams that handle this early save proofing time and avoid redraw charges.
A cap is not a flyer. If the logo only works large, build a simplified cap version.
If you need a reference before submitting files, this guide on how to digitize a logo for embroidery shows what production-ready artwork needs to look like.
A visual walkthrough helps too:
Placement and practical trade-offs
Front decoration carries the order. For many teams, a strong front logo is enough.
Extra locations can work, but each one should earn its spot. A side number can look clean on a player cap. A back wordmark can help on coach hats. A sponsor logo, league badge, side mascot, and player number on the same hat usually creates clutter and raises the stitch count at the same time.
Placement also affects comfort and structure. Heavy side embroidery can stiffen part of the cap. Back embroidery over an opening on an adjustable hat has less room to work with. Puff on an unstructured cap often falls flat, both in form and appearance. These are the details that separate a sharp proof from a hat players genuinely want to wear.
For artwork that is too detailed for thread, heat transfer on hats can be a practical option. It preserves more graphic detail than embroidery, but the finish is different and the best results depend on the hat material and panel shape.
Keep the hat readable from a distance
The best team hats stay focused. One strong front mark beats five smaller ideas competing for space.
If you are deciding between adding more information or making the main logo larger, make the main logo larger. The jersey, warmup top, and banner can carry the rest. The hat should identify the team fast and look clean at a distance.
Navigating Sizing Pricing and the Order Process
The order usually gets messy in a predictable spot. A coach has the logo picked, the colors approved, and opening day on the calendar, but nobody has pinned down who needs fitted hats, who can wear snapbacks, and how many extras the program should carry. Fix that first, and the rest of the order gets much easier to control.
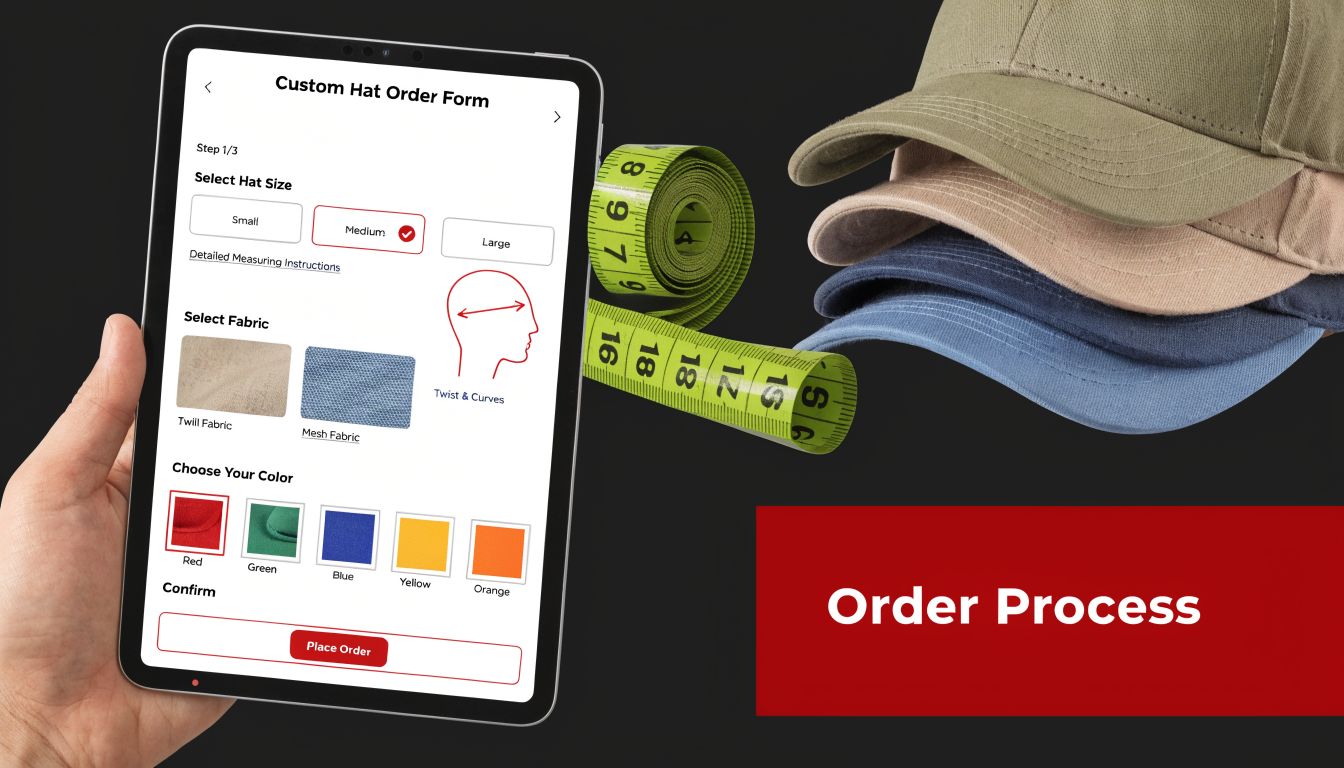
Build the roster list before you count hats
Use a spreadsheet and make it more detailed than a headcount. List players, coaches, staff, and any booster or parent orders separately. Then track size needs by fit type, not just total quantity.
That distinction matters.
Adjustable snapbacks give youth teams more margin for error and make reorders easier if a player joins late. Fitted and stretch-fit hats look sharper to many high school and adult programs, but they only work if your size collection is disciplined. One missing measurement can turn a clean bulk order into a patchwork reorder with different costs and delivery dates.
If you have handled sizing for other team gear, the same lesson applies here. This goalkeeper gloves size guide shows the same basic principle. Group orders get more accurate when you collect measurements early instead of guessing from age or position.
A practical rule I use is simple. If more than a few people are saying "medium probably fits," you do not have sizing yet.
Price starts with the hat, but it rarely ends there
Teams often compare two quotes by blank cap cost alone. That misses the part of the quote that usually changes the most.
Per-hat pricing usually shifts based on four factors:
- Order quantity, because larger runs usually lower the unit cost
- Hat style and brand, since premium models and specialty fabrics start higher
- Logo complexity, because dense embroidery takes more stitching and cleanup
- Decoration count, since each added location adds labor, setup, and approval checks
The trade-off is straightforward. A cleaner hat is often cheaper and better looking at the same time. Front embroidery only is the most efficient setup for many teams. Add a side number, back wordmark, and alternate logo, and the price climbs while the hat has more chances to feel crowded or stiff.
This is also where artwork prep affects cost in a way first-time buyers do not expect. Clean vector art, clear thread color calls, and a logo version built for cap embroidery reduce revision time. Messy art files usually create extra proof rounds, digitizing edits, and small charges that could have been avoided.
Order minimums, extras, and reorders
Small programs should not assume they need one large all-or-nothing purchase. Many suppliers can handle modest runs, which gives teams room to test fit and finish before committing to a bigger repeat order.
That flexibility helps in real life. New teams, travel ball organizations, and school programs with split varsity and JV rosters often do better when they order for confirmed needs first, then add a controlled number of extras. The question is not whether to buy extras. It is how many extras make sense without leaving money on the shelf.
For adjustable hats, a few extras usually carry less risk because more players can wear them. For fitted hats, extras need to be chosen carefully by actual roster size distribution. Too many hats in uncommon sizes become dead inventory fast.
If you want a clearer sense of where production delays and reorder costs usually come from, this explanation of hat embroidery turnaround time is useful because it breaks down the approval and production steps that affect the calendar.
The proof is where expensive mistakes get caught
Treat the proof like a final equipment check, not a formality.
A solid proof should confirm these points:
- The exact hat model and color
- The logo size relative to the front panel
- Thread colors that match the team palette as closely as possible
- The right closure or fit type for the roster
- Any spelling, number, or placement details on side or back embroidery
Look past the logo itself. Check whether a curved seam cuts through letters, whether a low-profile crown makes the mark look taller than expected, and whether small details will fill in with thread. Those are production realities, not design opinions.
Approve the proof like you’re checking a lineup card. Confirm spelling, thread colors, logo size, placement, and hat color against the actual product name, not your memory of it.
Fast approvals help keep the job on schedule. Careful approvals save more money. If a proof needs one extra day of review to catch the wrong navy, the wrong cap profile, or a logo scaled too small, that day is usually worth it.
Managing Timelines and Saving on Your Order
Three weeks before the first tournament is when cap orders get expensive. A coach is still waiting on two player sizes, the booster rep wants to add parent hats, and the logo file turns out to be a low-resolution screenshot. At that point, every choice gets narrower. Style options shrink, proofing gets rushed, and rush fees start looking tempting.
Know the difference between stock and fully custom
The biggest timeline mistake is treating every cap project like the same job.
An in-stock blank with embroidery usually moves much faster than a fully custom build. That is because the blank already exists. Production only has to digitize the art, approve the proof, decorate the hats, and ship them. A fully custom cap adds more steps: sourcing or making the exact shell, confirming panel layout, matching colors, approving construction details, and then producing the finished run.
If opening day is close, stock styles are usually the safer play. If the program wants a very specific crown shape, custom piping, unusual fabric combination, or exact team color blocking, fully custom can be worth it, but only if the calendar supports it.
If you want a clearer view of what slows decorated cap orders down, this explanation of hat embroidery turnaround time does a good job of breaking down approval delays, stock issues, and production scheduling.
Where teams save money without hurting quality
The best savings usually come from cutting avoidable complexity.
A front logo only is often the best value on a team cap. It keeps the look clean, controls stitch count, and avoids extra setup on side or back locations. Side embroidery can look sharp for coaches or sponsor editions, but on a full team order it adds cost fast.
A few other decisions usually keep the budget in line:
- Keep the front art clean: Small text, extra outlines, and fine detail often cost more to stitch and may still render worse on a cap.
- Combine expected extras into the main run: Parent, coach, and staff hats are cheaper in the first order than in a small reorder later.
- Match the hat to the roster: Adjustable or stretch-fit options can save money and hassle if your group has mixed sizing needs.
- Use samples selectively: A pre-production sample helps when the logo is new, the colors are tricky, or multiple decision-makers need to approve the look.
Cheap choices and smart choices are not always the same. A lower-cost hat that collapses, fits poorly, or distorts the logo often ends up costing more because it sits in a box or gets replaced mid-season.
The expensive mistake is not always the higher unit price. It is the reorder caused by rushed artwork, the wrong hat style, or a deadline that left no room to correct anything.
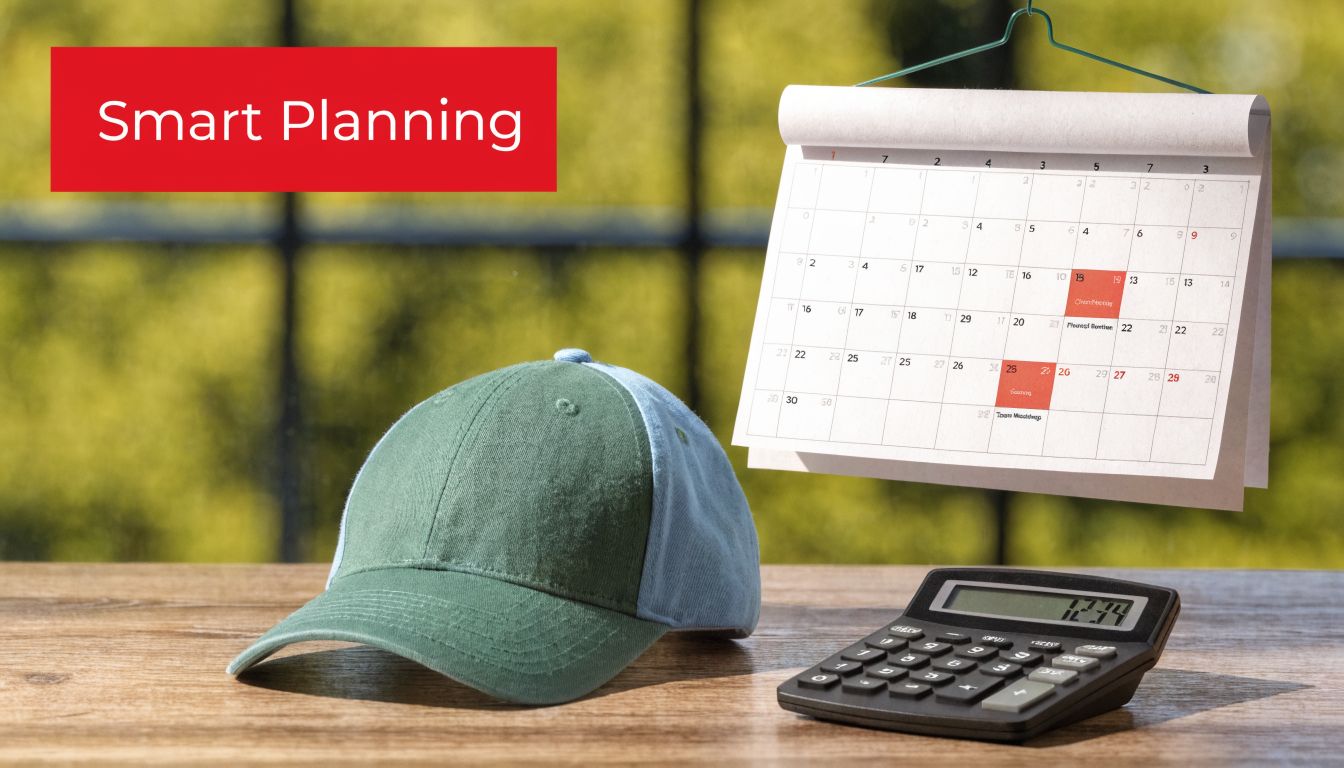
Plan backward from first use
Start with the date the hats must be handed out. Then work backward through artwork cleanup, quote approval, roster confirmation, proof review, production, and shipping.
Build in cushion where teams usually lose time. Coaches need a few days to chase missing sizes. School buyers may need purchase-order approval. Booster clubs often want one more round of signoff after they see the mockup. Those delays are normal, and good ordering plans account for them.
The teams that save the most are usually the teams that decide early. Early orders give you better style availability, more time to fix art before digitizing, and more freedom to choose the right cap instead of the only cap that can still arrive in time.
Your Pre-Order Checklist and Sample Timeline
Before you submit anything, run through a short checklist. Most avoidable problems show up here.
Pre-order checklist
- Hat style is locked in: You’ve chosen the profile, structure, panel count, fabric, and closure.
- Color choice is final: Team colors are confirmed against the physical hat option, not just a screen image.
- Logo file is ready: Best case is AI or EPS with outlined fonts.
- Artwork is simplified for hats: Fine lines, tiny text, and distressed details have been adjusted if needed.
- Decoration method is chosen: Flat embroidery, 3D puff, or patch, based on how the logo renders on a cap.
- Quantities are confirmed: Players, coaches, extras, and replacement needs are all counted.
- Sizing plan is complete: You know who needs adjustable, fitted, or Flexfit sizes.
- Budget is approved: Everyone signing off on cost has already done it.
- Proof reviewer is assigned: One person has final say so approval doesn’t stall.
- Need-by date is realistic: You’ve allowed enough time for proofing, production, and shipping.
Sample timeline
Week 1
Pick the hat style, choose colors, and clean up the logo file.Week 2
Collect roster quantities and sizes, submit artwork, and review the first proof carefully.Week 3
Approve the final proof and confirm the full order details.Week 4 and beyond
Production runs, the order ships, and you sort hats for players before the first game or event.
A calm order nearly always beats a rushed one. If the hat fits well, the logo is scaled correctly, and the decoration matches the design, the rest tends to fall into place.
If you want a supplier that makes the process easier, Dirt Cheap Headwear is worth a look for blank hats, low-minimum custom embroidery, and team orders that need solid communication and fast turnaround.