You’ve got the hat. Maybe it’s a clean Richardson snapback for a birthday, a stack of dad hats for a fundraiser, or embroidered trucker caps headed to a team event. Then you put it on the table with wrapping paper, tape, and ribbon, and the problem shows up fast. Hats don’t behave like books, shirts, or mugs.
The brim fights the paper. The crown collapses if you press too hard. Embroidery catches on cheap tissue. If you’re shipping instead of gifting, one bad fold can turn a good-looking cap into a return.
Knowing how to wrap a hat isn’t a cute extra skill. It’s part presentation, part protection, and part workflow. A single gift needs to open cleanly and still hold its shape. A business order needs repeatable packing that keeps the first hat and the hundredth hat looking the same.
That Awkward Moment Before The Gift Is Opened
A hat is one of those gifts that looks simple until you try to wrap it. Set a snapback on a sheet of flat paper and it suddenly feels like you’re wrapping a salad bowl with a visor attached. Pull the paper too tight, and the crown dents. Leave it too loose, and the whole thing slides around and looks sloppy.
That awkward moment matters more than people think. The hat is visible before it’s opened. If the package looks crushed, wrinkled, or lumpy, the gift already feels less considered. For a business, that same moment shows up when a customer opens a shipment and sees a bent brim or flattened front panel.
The scale of the category is a big reason this matters. The global headwear market reached $28.5 billion in 2023 and is projected to grow, driven by promotional merchandise, according to this headwear market overview. The same source notes that wrapping goes back to 19th-century millinery practices, and by 1920, U.S. department stores wrapped over 1.2 million hats annually as gifts. It also notes that 42% of promotional hats are given as gifts, while 31% of consumers find them difficult to wrap.
That tracks with real-world experience. Hats are awkward because they combine soft fabric, a shaped crown, and a rigid brim. You’re not just hiding the item. You’re protecting the shape people paid for.
What makes hats harder than most gifts
- Structured hats need support. A 6-panel snapback or trucker can lose its front profile if you crush the crown.
- Unstructured hats need shape control. Dad hats, beanies, and bucket hats are forgiving, but they can still look messy if they’re wrapped loose.
- Decoration changes the job. Raised embroidery, side hits, patches, and rope details all need a gentler touch than a plain blank cap.
A wrapped hat should do two things at once. It should look intentional from the outside and untouched on the inside.
There’s also a big difference between wrapping for a person and wrapping for a system. A birthday gift can be a little fussy if the result looks good. A retail order or event drop needs a method that someone else can repeat without guesswork.
That’s where most frustration comes from. People try to use one method for every hat. That rarely works. The best results come from matching the wrap style to the hat style, the destination, and the volume.
Gathering Your Hat Wrapping Arsenal
The difference between a clean wrap and a frustrating one usually comes down to supplies. Not fancy supplies. The right ones. If your paper is too stiff, your folds bunch. If your tape is too aggressive, it can mark tissue or catch fabric. If you skip internal support, the outside may look fine while the crown caves in underneath.

The first thing to decide is whether you’re wrapping for presentation, shipping, or both. A gift wrap setup leans on tissue, ribbon, and finish. A shipping setup leans on support, structure, and moisture protection. If you handle both, keep both sets of materials ready so you’re not forcing one approach into the wrong job.
The core kit worth keeping on hand
Here’s the kit that covers most hat jobs well:
- Acid-free tissue paper for stuffing crowns and outer presentation. It’s the safest all-around choice for fabric contact.
- Kraft paper for shipping folds and rigid outer wraps.
- Low-tack tape for paper control without messy residue.
- Poly bags when moisture or dust protection matters.
- Ribbon or branded stickers for gift-ready finishing.
- Rigid boxes for premium presentation or extra structure.
- Clean filler material such as crumpled tissue or paper for crown support.
For structured versus soft profiles, the hat itself tells you what support it needs. If you’re comparing shapes before you wrap, this breakdown of structured and unstructured hats helps clarify why some crowns can take pressure and some can’t.
What each material actually does
A lot of wrapping mistakes happen because people use materials for the wrong purpose.
| Material | Best use | What goes wrong if you misuse it |
|---|---|---|
| Tissue paper | Crown stuffing and gift presentation | Too little support leaves a saggy crown |
| Kraft paper | Protective outer wrapping for shipping | Too stiff for delicate decorative wrapping |
| Poly bag | Dust and moisture barrier | Used alone, it can look cheap for gifts |
| Ribbon | Closing gathered tissue wraps | Too tight can pinch soft crowns |
| Rigid box | Premium gifting and shelf-ready presentation | Oversized boxes let the hat slide |
Practical rule: Support the crown from the inside before you worry about the outside. Shape first. Finish second.
If you’re mailing hats with other fragile items, it’s also worth understanding how cushioning materials behave under pressure. This guide to bubble wrap for moving is useful background on where bubble protection helps and where it can create bulk you don’t want.
Set up your station before you touch the hat
A bad workspace ruins good materials. Keep the surface clean and dry. Pre-cut tissue if you’re doing more than one hat. Put tape, scissors, ribbon, stickers, and support fill within reach.
That last part matters more than people expect. Once you’ve shaped a crown correctly, you don’t want to let go of it to hunt for tape.
Wrapping a Hat for the Perfect Gift
If the hat is being handed to someone in person, the wrap should feel clean, neat, and easy to open. It doesn’t need to survive conveyor belts and sorting hubs. It does need to hold shape long enough to get from your hands to theirs without looking like a last-minute repair job.
There are two gift methods I trust most. One is for soft, flexible hats. The other is for hats that need structural help to look good when opened.
Use the half-moon tissue technique for soft hats
For unstructured hats, the best-looking no-box method is usually the half-moon tissue technique. According to GigiPip’s write-up on gift wrapping a hat, this method produced 95% recipient satisfaction in e-commerce gifting. The same source says the method uses 50g of tissue for shape retention and that tissue prevents 18% of moisture trapping compared to plastic wrap.
This works especially well for dad hats, bucket hats, and beanies because the hat can fold slightly without creating permanent damage.
How to do it cleanly
- Lay out two sheets of tissue paper.
- Lightly clean the hat surface first. A lint-free pass matters more than people think on dark colors.
- Fold the crown into a soft half-moon shape, with the brim outward and the logo facing up.
- Stuff the crown with tissue so the shape stays full, but don’t pack it hard.
- Place the hat crown-down on the tissue.
- Gather the tissue upward around the hat.
- Twist the base firmly.
- Tie it off with ribbon.
- Fan the top tissue for volume and trim if needed.
Common mistake: people gather first and support second. That leaves the wrap pretty but hollow. When the recipient picks it up, the shape drops immediately.
Keep the logo oriented where it will face naturally when the package is held. A gift wrap that reveals the branding line cleanly looks much more deliberate.
A short visual can help if you want to see hand positioning before trying it yourself:
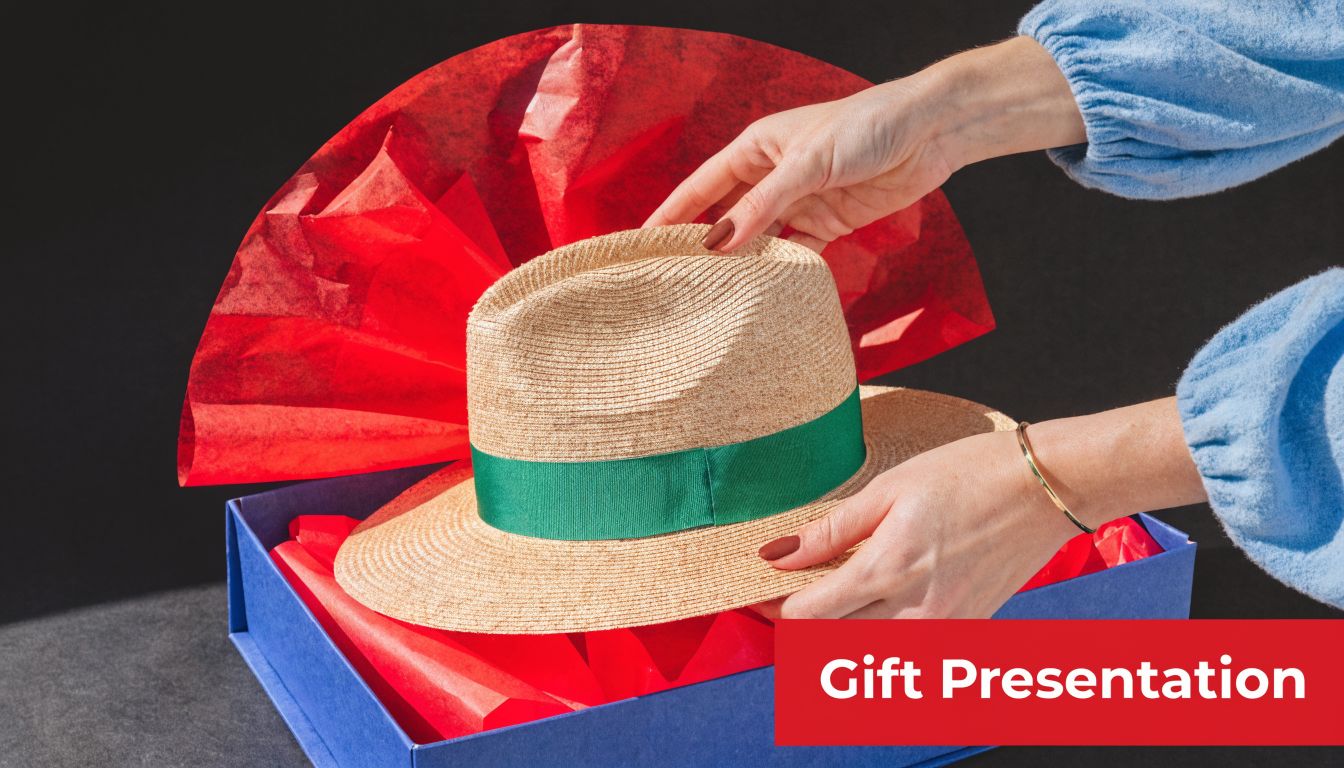
Box structured hats when shape matters most
Structured hats deserve more support. Snapbacks, many trucker caps, rope hats, and firm 5-panel caps can look sharp in tissue alone, but they’re far easier to dent during handling. For gifts, a box gives you both presentation and protection.
Use a box that gives the hat enough room to sit naturally. Not jammed, not floating. Stuff the crown lightly with tissue first. Then add a base layer of tissue in the box, place the hat so the brim doesn’t press into the sidewall, and tuck a little tissue around the sides to stop movement.
What makes a boxed hat look polished
- Crown support first so the front panel stays upright
- Base padding so the hat doesn’t rattle
- Minimal side fill just to stop sliding
- Tight outer paper folds on the box itself, not on the hat
If you’re wrapping the box with gift paper, treat it like a regular rectangular gift after the hat is secured inside. That gives you crisp corners instead of trying to force decorative folds around the brim itself.
Which gift method fits which hat
| Hat type | Best gift wrap method | Why |
|---|---|---|
| Dad hat | Half-moon tissue | Soft crown, easy to shape |
| Beanie | Tissue wrap or soft pouch | No brim to protect |
| Bucket hat | Half-moon tissue | Flexible all around |
| Snapback | Boxed gift wrap | Crown and brim need support |
| Trucker cap | Boxed gift wrap | Front panel dents easily |
If you only remember one thing from gift wrapping, remember this: the hat should come out looking like it was never wrapped at all. The wrap is there to improve the handoff, not leave its marks behind.
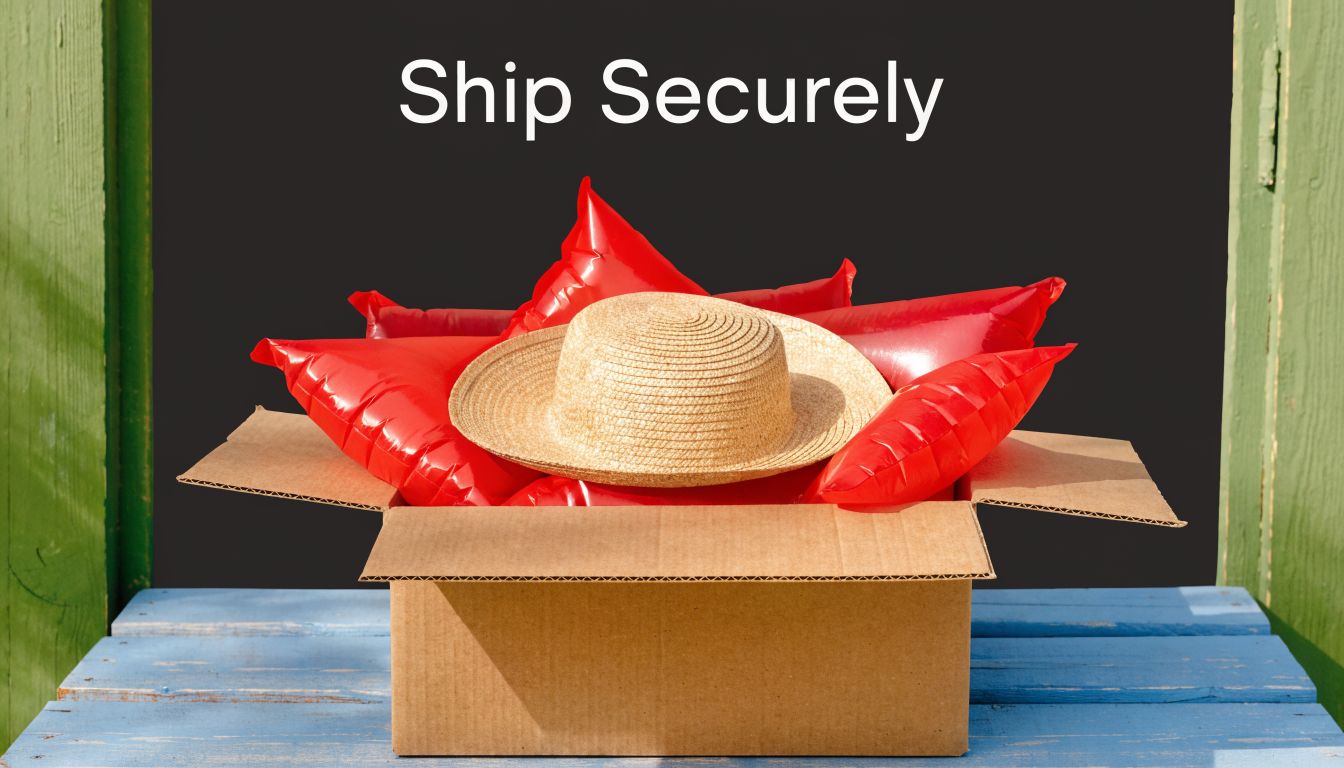
Shipping Hats Without The Heartbreak
Shipping is a different game. A nice ribbon means nothing if the brim shows up bent. Once a hat enters the parcel system, you’re dealing with stacking, drops, compression, and moisture exposure. The right shipping method looks a little less romantic than gift wrap, but it saves headaches.
For single structured hats, the strongest no-nonsense method is the envelope-wrapping method. HTVRont’s hat wrapping guide says this approach prevents crown deformation with a 98% success rate and reduces brim creases by 92% compared to loose boxing.
The envelope-wrap method that holds up in transit
This method works because it creates a firm outer shell around the hat instead of letting the cap roll around inside an oversized carton.
Basic sequence
- Stuff the crown with tissue so it holds form.
- Use 18×24-inch kraft paper as the outer sheet.
- Position the hat crown-down in the center.
- Fold the paper inward with angled seams so the shape tightens around the cap.
- Tape the folds securely.
- Seal the wrapped hat inside a poly bag.
- Place it inside a rigid mailer or appropriately sized box.
The key is the geometry. A tight folded shell spreads pressure better than random void fill. Loose boxing sounds safer, but hats often get tossed around inside empty space, and that’s when brims rub and crowns collapse.
Don’t use a box that gives the hat room to build momentum. Motion inside the package is what does the damage.
Box sizing and filler choices
For shipping, the box should match the hat. Too snug and the crown gets pressed. Too roomy and the hat takes impact from movement. The filler should stabilize, not crush.
Use this quick guide:
- Single structured cap. Envelope wrap plus rigid outer box.
- Soft hat shipment. Tissue support plus snug mailer or small box.
- Multiple hats. Stack carefully with tissue between vulnerable areas, then stabilize the bundle before boxing.
If your shipments go by air or cross borders, packaging rules get stricter and handling gets rougher. This practical air freight packaging guide is a solid reference for thinking through transit stress, outer packaging, and labeling standards.
For customers, shipping expectations also matter. A clear shipping policy helps set the right expectations around transit time and order handling.
Presentation versus protection in shipped orders
You can still make a shipped hat feel premium. Just don’t confuse premium with delicate. A clean tissue wrap inside a protective shell works better than decorative paper alone. If you want a nicer unboxing, put the polished layer inside the protection, not in place of it.
Here’s the trade-off in plain terms:
| Goal | Best choice | Skip this |
|---|---|---|
| Maximum protection | Envelope wrap plus rigid box | Loose oversized box |
| Better unboxing | Inner tissue plus outer protection | Decorative wrap as outer layer |
| Lower damage risk on structured hats | Crown stuffing and controlled fit | Flat packing without support |
The best shipping package is the one the customer never notices because the hat arrives looking right.
Efficient Wrapping for Retail and Bulk Orders
Wrapping one hat is handwork. Wrapping a table full of them is production. If you handle event orders, retail display stock, team drops, or resale shipments, the win isn’t finding a clever wrap. The win is building a repeatable system that different people can follow without changing the result.
Custom embroidered headwear sales hit 320 million units in 2024, according to this custom headwear market reference. The same source notes that using wrapping details like folding brims inward, securing with satin ribbon, and adding branded tags can increase perceived value by as much as 33% in an Etsy seller survey. That’s the part a lot of operators miss. Wrapping isn’t only protection. It can raise how finished the product feels.
Build the workflow before you build the package
The fastest wrapping teams don’t move faster because their hands are quicker. They move faster because the process is fixed.
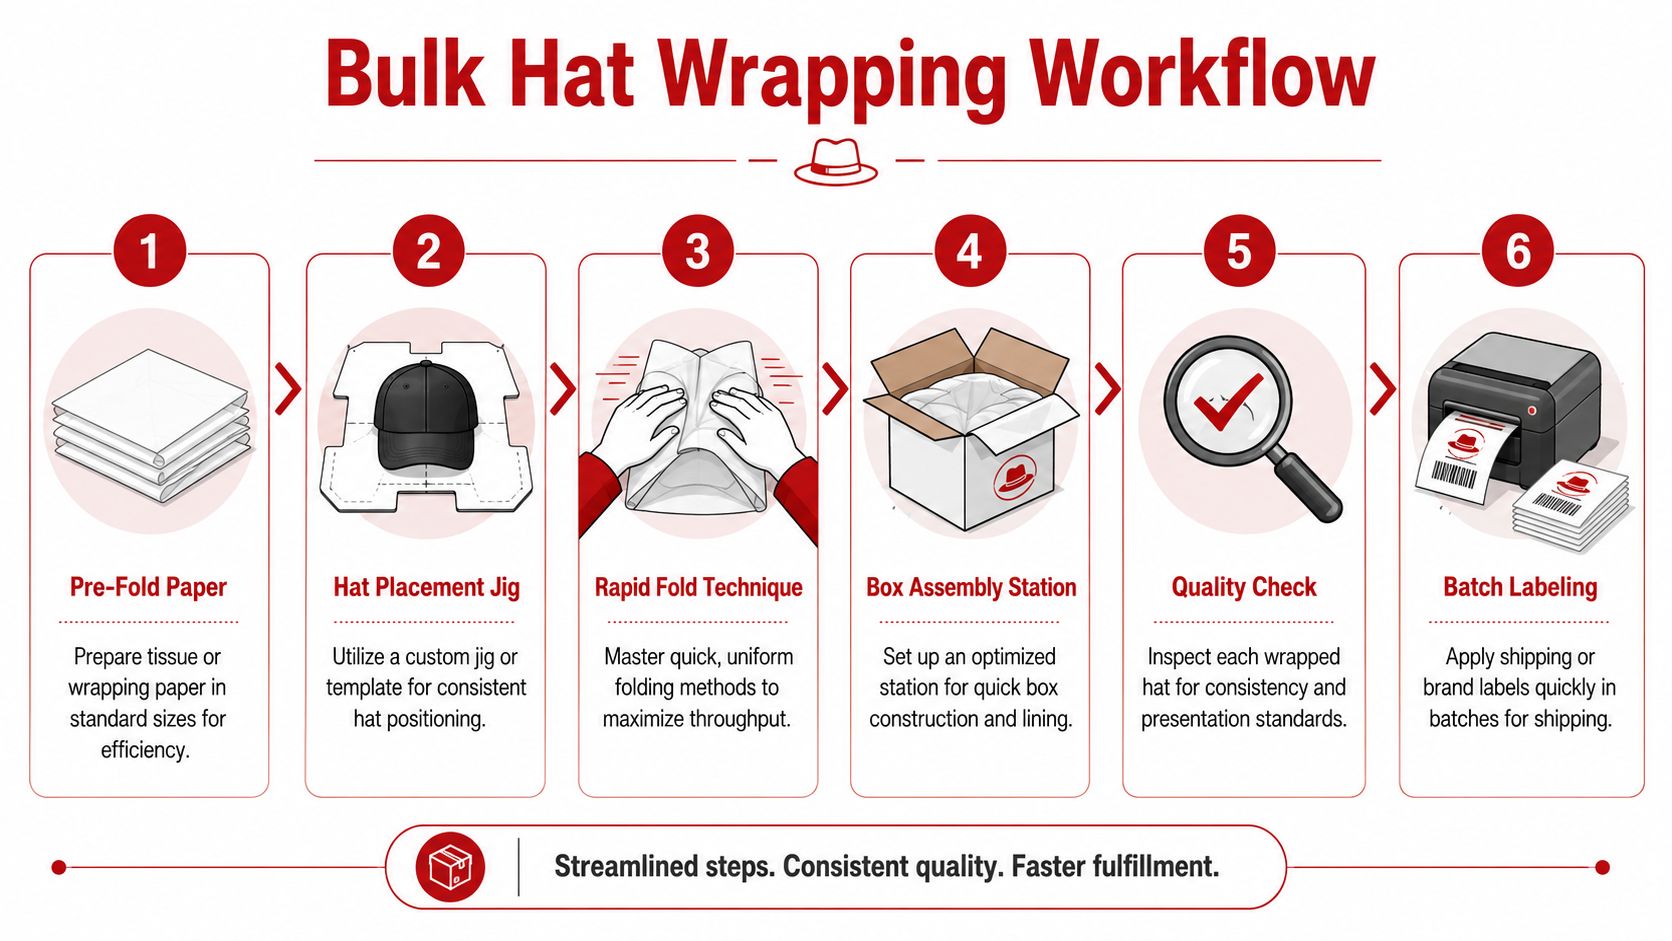
A simple station setup usually works best:
- Zone one for crown stuffing and lint check
- Zone two for wrap or bag application
- Zone three for labels, tags, belly bands, or stickers
- Zone four for boxing and outgoing sort
If you’re ordering inventory for this kind of workflow, buying hats in volume changes the packing logic. Mixed styles need different prep, while consistent styles let you standardize materials. This guide on how to buy blank hats in bulk is useful for planning around that.
Best options for bulk efficiency
Not every order needs full gift wrap. In volume, pick the finish level that matches the job.
For events and team orders
Use a clear poly bag plus branded sticker when speed matters most. It keeps the hat clean, shows the logo, and packs quickly.
For retail shelf presentation
Use a belly band or simple branded wrap around the crown area. That keeps the product visible while still making it feel prepared for sale.
For premium merch drops
Use tissue support, a clean fold, and a small branded tag. This adds labor, so reserve it for orders where presentation is part of the value.
Standardize materials by hat family, not by every individual SKU. One setup for structured caps and one for soft hats is usually enough.
The business case for standardizing
A wrapping process that lives in one person’s head always breaks under pressure. The minute volume jumps, quality gets inconsistent. Brims face different directions. Stickers land crooked. One employee over-stuffs crowns, another under-stuffs them.
Systemizing fixes that. It also helps with training, reorders, and brand consistency. If a customer buys from you twice, the second package should feel like it came from the same business.
Use a short checklist at the station:
- Hat clean and thread-free
- Crown shape correct
- Orientation consistent
- Wrap applied correctly
- Brand element straight
- Pack-out matched to destination
That last step matters. Retail-ready and ship-ready are not the same thing. The best operators separate those decisions early instead of improvising at the end.
Common Hat Wrapping Problems and Quick Fixes
Even solid methods go sideways sometimes. The good news is most hat wrapping problems are fixable without starting over.
The crown looks slightly crushed
If the hat arrived with a mild dent, re-shape it before rewrapping. Stuff the crown with tissue and let it sit. For stubborn soft spots, use gentle steam nearby, not directly blasting the fabric, then reshape by hand and let it dry fully before packing again.
The brim keeps printing through the paper
That usually means the outer wrap is too thin or too tight. Add one more layer of tissue around the brim edge before the final wrap. For structured caps, switch to a box or shipping fold instead of forcing flat gift paper over the visor.
The wrap looks bulky and messy
You’re probably using too much material for the hat size. Cut the tissue or kraft down first. Oversized paper creates lumps, especially around low-profile crowns.
Ribbon slides off the package
That happens on slick tissue and rounded shapes. Twist the gathered tissue tighter before tying, or use a small branded sticker under the ribbon crossing point to hold it in place.
You ran out of tissue paper
Use clean kraft paper for shipping support. For gifts, plain white packing paper can work in a pinch if it’s soft enough not to mark the fabric. Avoid newspaper or printed paper against light-colored hats.
A flat-brim hat has to be wrapped without a box
Use a supported paper wrap, not a decorative loose fold. Stuff the crown, protect the brim edge with tissue, and keep the fold lines away from the front panel. The goal is controlled support, not a tight squeeze.
Most wrapping failures come from one of three things. Not enough internal support, too much outer pressure, or too much empty space during transit.
The fix is usually simple. Support the shape better, match the method to the hat, and stop trying to make one wrap style do every job.
If you need blank hats or decorated headwear that are worth wrapping properly, Dirt Cheap Headwear makes the sourcing side a lot easier. You can shop wholesale styles from brands like Richardson, YP Classics/Flexfit, New Era, Nike, Valucap, and Legacy, then add embroidery with low minimums starting at six pieces per logo. Whether you’re building a merch drop, stocking an event, or scaling a retail program, they help you get the hats right before the wrapping even starts.