
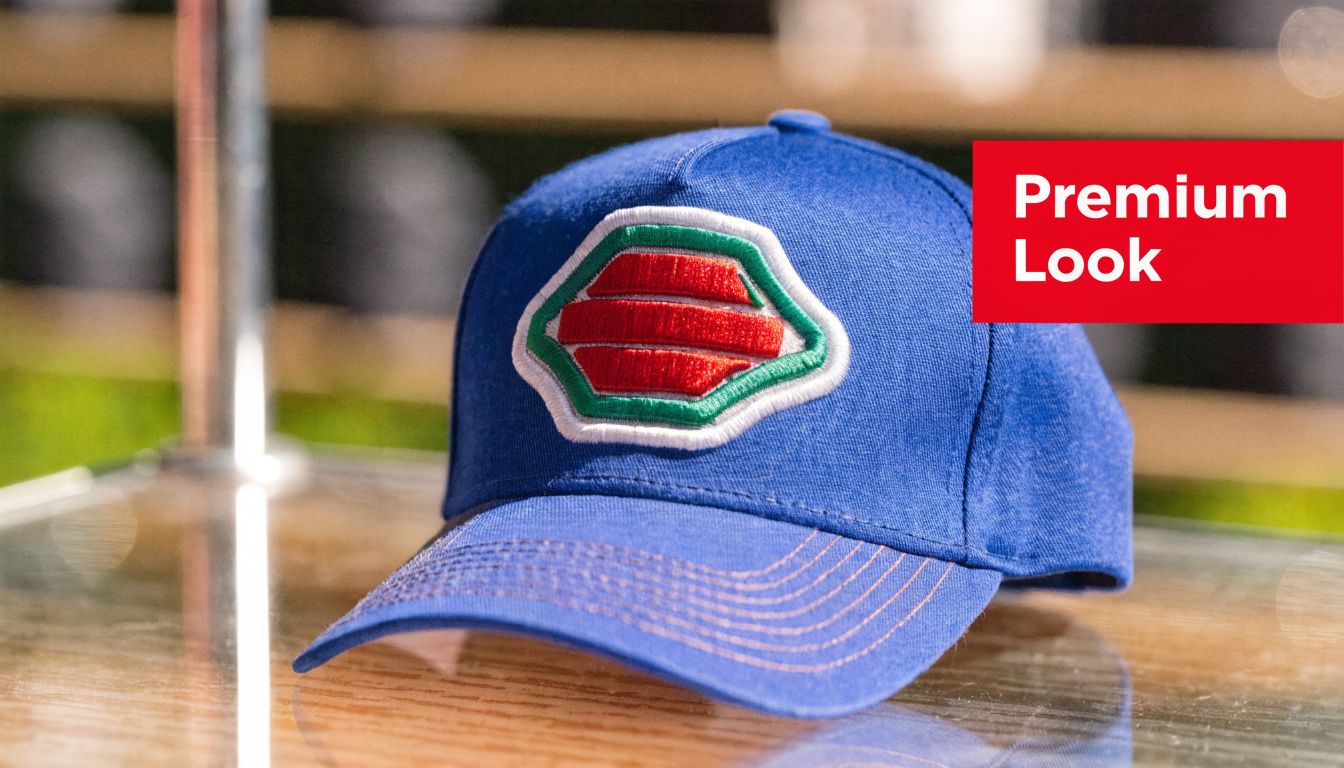
You’ve probably had this moment already. You see a hat with a raised front logo, maybe on a snapback, maybe on a trucker cap, and it just looks better than the flat-stitched hats next to it. The logo has depth. The cap feels more premium. It looks like real merch instead of giveaway merch.
That reaction is why so many small brands, teams, and event organizers start looking into a 3d embroidery machine. They want that same premium look on their own hats. Then the questions start. What machine makes that effect? Is it hard to do? Can you run it on Richardson or YP Classics blanks? Is it smarter to buy equipment or send the job out?
Many guides become vague concerning this. General embroidery guides talk about foam and stitches, but they usually overlook the primary challenge. Hats aren’t flat. A curved front panel changes everything, especially when you’re trying to stack thread over foam cleanly without puckering, thread breaks, or exposed edges.
The Raised Logo Look You Can't Ignore
A raised logo changes how people judge a hat before they even touch it. On a clean structured cap, a good puff design makes the front hit harder. That’s why brands use it for initials, mascots, bold wordmarks, and simple icons that need to stand out from a few feet away.
It works especially well on hats that already carry a strong visual presence. Think structured snapbacks, rope caps, truckers, and even themed collections like patriotic baseball caps, where the front decoration has to do most of the talking.
Why the look feels premium
The appeal isn’t complicated. Raised embroidery adds shadow, height, and edge definition. Flat embroidery can still look great, but puff creates more contrast from the cap surface, so the logo reads faster.
A small business owner usually notices three things right away:
- Better shelf presence: A raised logo catches the eye faster than a flat one.
- Stronger brand feel: Simple logos often look more intentional in puff.
- More perceived value: The hat looks like merch people would buy, not just something they were handed.
A puff logo doesn’t fix a weak design, but it can make a strong one look finished.
That’s the key. Puff isn’t magic. It’s a decoration method with a distinct visual personality. If your logo suits it, the result can be excellent. If your artwork is too thin, too detailed, or too busy, a raised finish can work against you.
What Exactly Is 3D Puff Embroidery
The easiest way to explain 3D puff embroidery is this. Flat embroidery is like painting color onto the surface. Puff embroidery is like adding icing to create height first, then covering that height with thread.
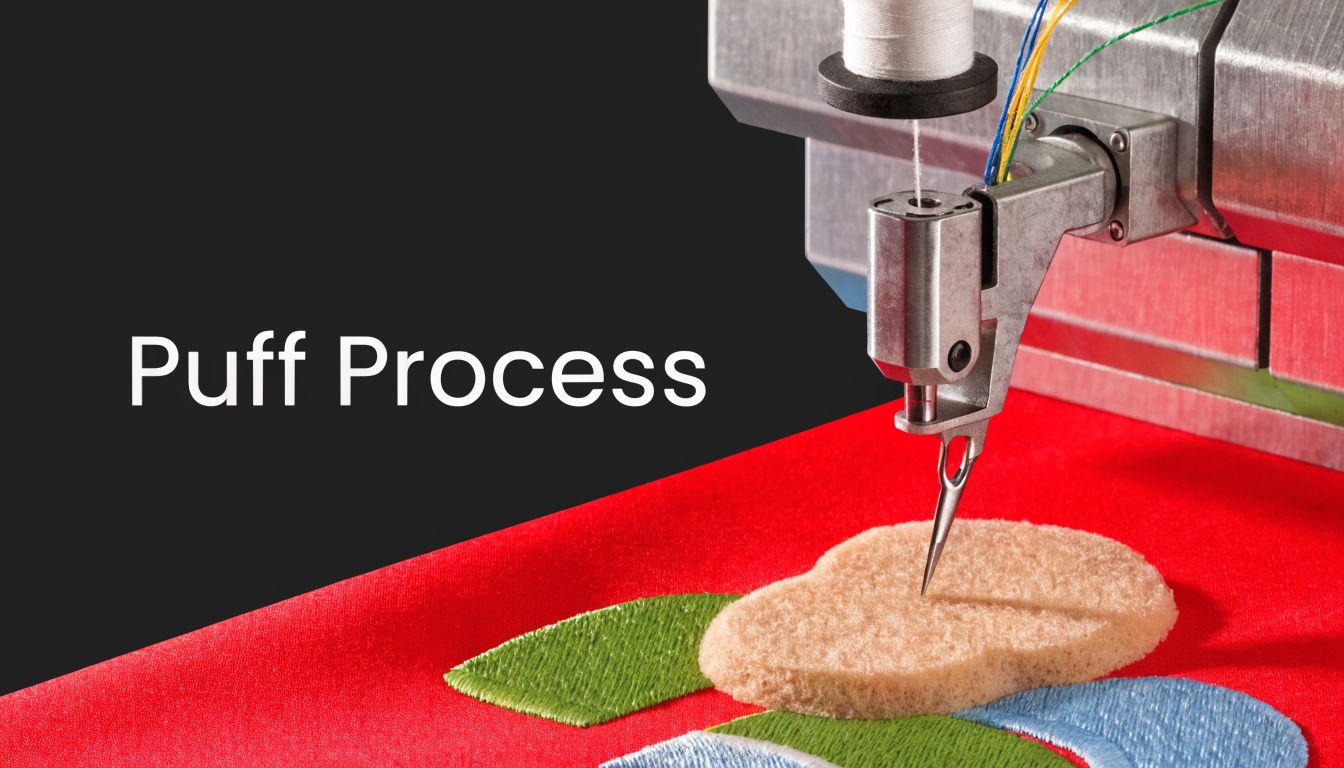
The machine doesn’t magically make thread stand up on its own. It stitches over a foam underlay placed on the hat. That foam pushes the stitches upward and gives the logo its raised profile. After the stitching is done, the extra foam gets removed, leaving the thread sitting proud above the cap surface.
The basic idea in shop terms
For a logo to work in puff, the design has to be built for it. Thick columns, solid satin areas, and bold shapes tend to perform well. Tiny text, thin outlines, and highly detailed gradients usually don’t.
That’s why people get tripped up when they assume any logo file can become puff. It can’t. The art often needs to be simplified or partially converted so the raised parts stay clean and readable.
How we got here
Modern puff embroidery sits on top of a long machine history. In 1846, Josué Heilmann invented the first hand-operated embroidery machine in France, and it could perform the work equivalent to up to four skilled hand embroiderers simultaneously, a milestone that helped move embroidery from hand labor into industrial production, according to this history of machine embroidery.
That matters because puff is not some separate craft floating outside normal embroidery. It’s the result of machines becoming more consistent, more controllable, and better suited to repeatable production.
The raised effect looks flashy, but the real story is control. The machine has to hit the same path cleanly over foam every time.
What puff is good at
Puff shines when the logo has clear shapes and a front-facing purpose. Good fits include:
- Block lettering: Team initials, abbreviated brand names, and short words.
- Bold icons: Crowns, shields, mountains, animal heads, and monograms.
- Statement fronts: Designs meant to own the center panel of a hat.
What it’s not good at is tiny legal text, intricate linework, or art that depends on delicate internal detail. That’s where flat embroidery or patches often make more sense.
How Machines Create the 3D Puff Effect
A 3d embroidery machine doesn’t just run a normal embroidery file over thicker material and hope for the best. Puff requires a different setup, a different digitizing approach, and much tighter control when the job goes onto a curved cap front.
The foam is doing real work
The foam sits under the stitching and creates the height. The industry standard is 2mm or 3mm foam thickness, and trying to use thicker foam can create enough machine stress to cause needle deflection and inconsistent stitches, especially on caps that need precise presser foot height and tension control, as noted in this 3D embroidery troubleshooting guide.
That one detail tells you a lot. Puff isn’t only about appearance. It’s also a machine-load issue. Once foam gets too thick, the machine has to drive harder through the stack, and quality starts slipping.
Digitizing decides whether the job works
This is the part many buyers never see. Puff needs a file built for puff.
A shop usually adjusts for:
- Wider stitch paths: So the thread covers the foam instead of cutting into it.
- Proper entry and exit points: So the logo builds cleanly and doesn’t drag across the front panel.
- Top stitch direction: So the raised areas look even instead of ragged.
- Clean edge coverage: So leftover foam doesn’t peek out around the logo.
If the file is wrong, the machine can be perfect and the hat will still fail. Foam showing through, crushed top surfaces, and uneven height usually trace back to digitizing or setup, not just operator skill.
Curved hats are the real test
Flat fabric is forgiving. Caps aren’t. Structured fronts curve, seams create resistance, and the fabric can shift during hooping. That affects where the foam lands and how the needle penetrates through it.
General guides fall short in this area. They explain puff on a flat panel and stop there. In real cap work, the operator has to think about the crown shape, the front seam, and how the material reacts under stitching pressure.
A good cap setup usually depends on a few essential factors:
- Stable hooping: The front panel can’t float or bounce.
- Balanced tension: Too tight and the cap puckers. Too loose and the thread won’t cover cleanly.
- Presser foot adjustment: The machine has to clear the foam without mashing it.
- Artwork placement: A design too close to a seam can become unpredictable fast.
Here’s a visual look at the process in action:
What actually happens during stitching
The process is more methodical than people expect.
- The cap gets mounted so the front panel stays stable through the run.
- Foam is placed where the raised part of the logo will sit.
- The machine runs the puff sections with stitch paths built to compress and cover the foam correctly.
- Extra foam is removed after stitching, leaving the raised shape behind.
- The operator checks the edges for exposure, stitch coverage, and clean top profile.
Practical rule: If a logo only looks good in puff from one angle, it isn’t production-ready yet.
That’s especially true on headwear. A front logo has to hold up while worn, not just while lying flat on a table.
3D Puff vs Flat Embroidery vs Custom Patches
Most buyers don’t need only one decoration method. They need the right one for the logo, the hat, and the budget. Puff is strong, but it’s not automatically the best choice.

What each method does best
3D puff embroidery creates the most depth. It’s ideal when the front logo needs presence and the artwork is bold enough to support a raised treatment.
Flat embroidery is the most flexible. It handles finer detail better and gives you more freedom with lettering, small elements, and layered shapes.
Custom patches bring a different look entirely. They can feel more retail-driven, and they work well when the brand wants a badge effect instead of stitches built directly into the hat. If you’re comparing decoration options on actual cap programs, this guide to custom stitching on hats is useful because it shows how different finishes suit different logo types.
Decoration Style Comparison
| Attribute | 3D Puff Embroidery | Flat Embroidery | Custom Patches |
|---|---|---|---|
| Visual impact | Bold, raised, high-profile | Classic and clean | Distinct applied look |
| Best for | Simple, thick front logos | Detailed logos and text | Badge-style branding |
| Detail handling | Limited on fine detail | Best of the three | Depends on patch style |
| Feel on hat | Built into cap with height | Built into cap with low profile | Separate piece attached to cap |
| Common use case | Snapbacks, truckers, statement logos | Team caps, uniforms, mixed-detail art | Lifestyle hats, fashion looks, heritage styles |
The curved-cap issue matters here too
One overlooked issue in puff content is hat geometry. A source discussing this gap notes that forum advice often mentions stitch angle control, but rarely gives practical cap-specific benchmarks such as reducing machine speed by 30% to prevent thread breaks on curved seams for low-minimum runs on trucker caps and similar styles, according to this 3D embroidery article focused on depth and dimension.
That matters when choosing a method. Puff is less forgiving on curved fronts. Flat embroidery usually tolerates complexity better. Patches avoid some stitch-density problems altogether because the decorative element is produced separately and then applied.
If your logo has small text under a bold icon, split the decision. Puff the icon if it works, keep the text flat, or move the whole concept to a patch.
Quick decision filter
- Choose puff if the logo is bold, simple, and meant to stand out from across the room.
- Choose flat embroidery if readability and detail matter more than height.
- Choose patches if you want a separate branded element with a different fashion feel.
Your Project Checklist for Perfect Puff Embroidery
A good puff order usually goes right or wrong before the machine starts. The prep work matters more than people think. Hat choice, art style, and file setup all influence whether the front logo comes out crisp or comes out looking overworked.
Start with the hat, not the logo
Some logos look great on paper and struggle on certain cap bodies. Structured fronts usually give puff a better foundation because the panel has enough body to support the raised stitch build. Soft, floppy fronts can work, but they don’t hide mistakes well.
Before production, check these basics:
- Cap structure: Structured fronts tend to support puff better than unstructured ones.
- Front panel shape: Tall crowns and clean front panels usually give the logo more room.
- Seam position: Front seams can interfere with some centered artwork.
- Fabric behavior: Slick or stretchy materials need more care than stable woven fronts.
The file has to be digitized for puff
A regular embroidery file often needs rework before it’s usable for 3D. That’s why the prep stage should include a conversation about stitch type, edge coverage, and whether parts of the logo should stay flat.
If you’re new to this side of production, a guide on how to digitize a logo for embroidery helps clarify why the stitch file matters as much as the artwork itself.
Production quality comes from machine capability
The machine side matters too. Tajima began modern industrial production with its first multi-head automatic embroidery machines in 1964, and later advances like the 1973 6-needle color-change machine plus electronic systems for chenille and sequins helped make high-speed, high-quality embroidery production viable for complex work, as outlined in this machine embroidery overview.
For the buyer, the takeaway is simple. Professional shops aren’t just paying for brand-name equipment. They’re paying for stable, repeatable output across many hats and many runs.
A short troubleshooting list
Most puff problems are recognizable once you know what to look for.
- Foam showing through: Usually caused by weak coverage, poor edge handling, or a design that’s too fine for puff.
- Puckering around the logo: Often tied to hooping issues, tension imbalance, or a cap body that doesn’t support the stitch load well.
- Crushed puff effect: Can happen when the setup compresses the foam too aggressively.
- Messy edges: Usually a digitizing problem, especially where satin coverage should have sealed the foam line.
Clean puff starts with saying no to the wrong artwork. Shops that accept every logo as-is usually create avoidable problems.
What to hand off before ordering
If you want the process to move smoothly, gather the right details upfront:
- Your best logo file, preferably a clean vector or high-resolution art.
- Your intended hat style, including brand, profile, and color.
- The decoration goal, whether you want all puff, partial puff, or flat embroidery only.
- Any placement concerns, especially if the logo must sit high, low, or near a seam.
- Your run size, because small tests and larger reorders can affect how the job is planned.
That checklist doesn’t make you the operator. It makes you the kind of client who gets better results.
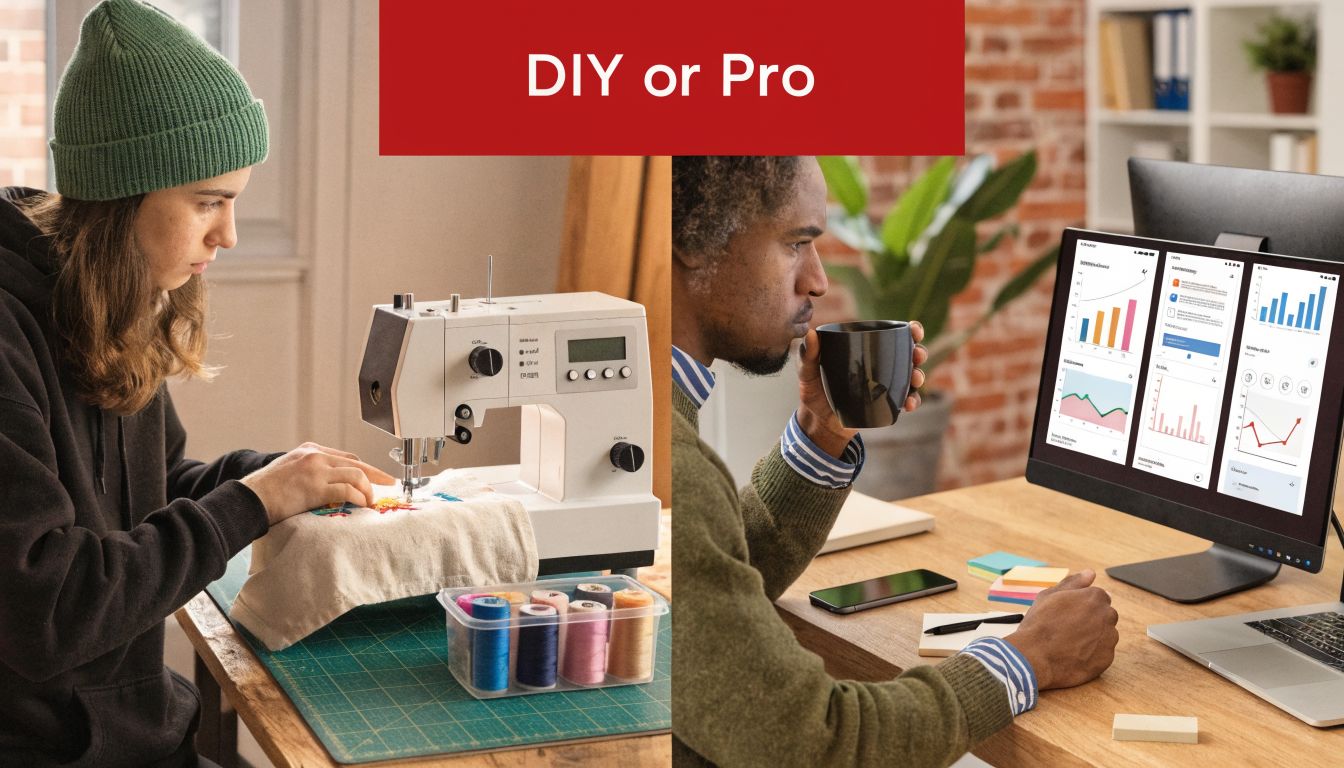
Buying a Machine vs Outsourcing to a Pro
This is a significant business decision. You’re not only deciding how a hat gets decorated. You’re deciding whether embroidery is becoming part of your operation, your overhead, and your daily problem list.
Buying makes sense for a narrow group
If you plan to run embroidery every day, have space for equipment, can learn cap setup, and are prepared to deal with digitizing, maintenance, and rejects, ownership can make sense. But that’s a real operational commitment, not a casual add-on.
People often focus on the machine and ignore everything attached to it:
- Operator learning curve: Puff on hats is not beginner-friendly.
- Digitizing dependency: You still need files built correctly for each design.
- Maintenance reality: Needles, tension, calibration, and wear don’t take days off.
- Production risk: If a short run goes sideways, the cost lands on your bench.
If you’re still weighing equipment ownership as a business move, this article on is it better to lease vs buy is a useful decision framework because it forces you to think beyond the machine price and into cash flow, flexibility, and long-term use.
Outsourcing is usually the smarter play
For most small businesses, outsourcing wins because it removes the hard part. You don’t need to master cap hooping, foam handling, thread coverage, machine tuning, or puff digitizing. You approve the artwork direction, choose the hats, and let a specialist handle the production variables.
That’s especially true if your order pattern is uneven. Maybe you need a short branded run for a launch, then team hats for an event, then a reorder later. That kind of stop-and-start demand rarely justifies bringing the whole process in-house.
Precision matters more than headline speed
A lot of buyers get distracted by machine speed. Faster sounds better until hat quality starts drifting.
Industrial embroidery equipment shows a real trade-off here. Some machines run at 2,500 SPM, while precision-focused systems like Barudan operate around 1,000 to 1,100 SPM with technology that maintains sub-1% positioning error, according to this industrial 3D embroidery machine guide. For mixed-volume cap orders, that tighter control is often more valuable than pure speed.
That point matters if you’re buying your own equipment. A machine that sounds productive on paper may still be the wrong fit if your work includes short custom runs where placement consistency matters.
On hats, accuracy pays for itself faster than speed. A clean six-piece run beats a fast bad run every time.
The practical call
Buy a machine if embroidery is becoming a core production arm of your company. Outsource if hats are a product line, merch stream, staff uniform item, or event piece, but not the center of your business.
Most owners are better off protecting time and cash. They should spend energy on design, sales, and fulfillment, not on diagnosing thread breaks on a curved front panel.
Is 3D Puff Right for Your Brand
3D puff is worth it when your logo is simple, bold, and meant to make an impression on headwear. It adds depth that flat stitching can’t fake, and on the right cap it changes the whole feel of the product.
It’s also more specialized than it looks. The hard part isn’t understanding foam. The hard part is getting consistent results on curved hats with the right file, the right setup, and the right machine control. That’s why many small brands do better by treating puff as a production specialty instead of a DIY experiment.
If you’re also thinking about the bigger brand side of the decision, this piece on strategic brand positioning is helpful because it connects product presentation to how people perceive your business. A raised logo is a decoration choice, but it also sends a brand signal.
If you want custom puff embroidery without buying equipment, troubleshooting cap runs, or learning digitizing from scratch, Dirt Cheap Headwear is a straightforward place to start. You can choose from popular blank hat styles, request custom embroidery, and get help turning your logo into a clean, production-ready headwear design.
Pingback: Embroidery Machine Price: A 2026 Buyer's Cost Guide | Dirt Cheap Headwear
Pingback: Custom Headwear Reorder Guide | Dirt Cheap Headwear